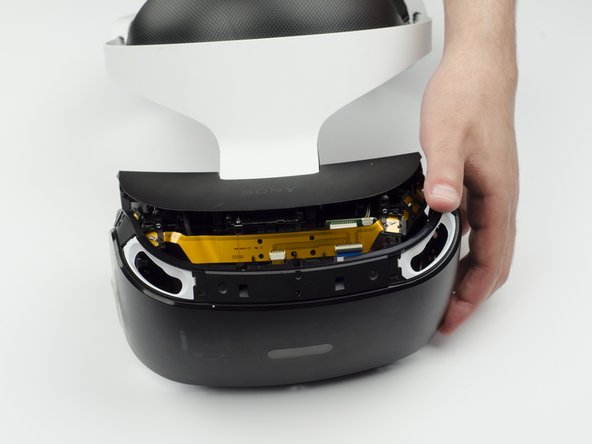
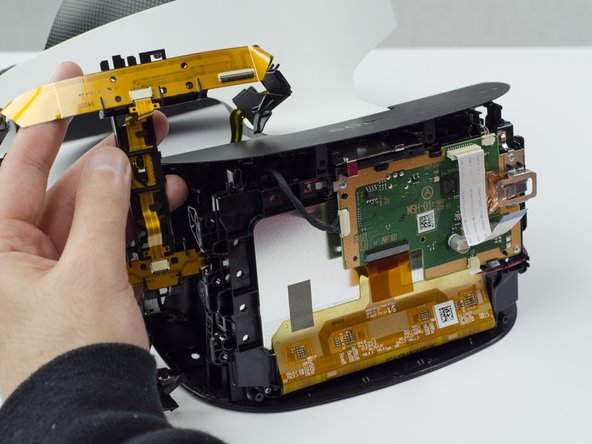
メインコンテンツにスキップ

PlayStation VR LED Light Tracker Replacement

必要な工具と部品

  1. PlayStation VR LED Light Tracker Replacement, LED Light Tracker: 手順 1、 3の画像 1 PlayStation VR LED Light Tracker Replacement, LED Light Tracker: 手順 1、 3の画像 2 PlayStation VR LED Light Tracker Replacement, LED Light Tracker: 手順 1、 3の画像 3
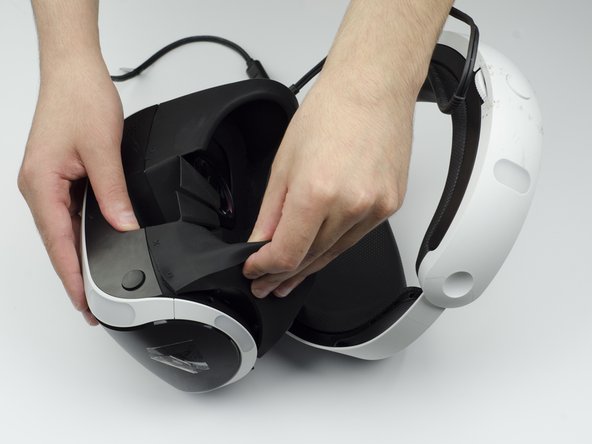
    • Peel back the rubber covering around the lenses to remove the surrounding plastic eyepieces.

  2. PlayStation VR LED Light Tracker Replacement: 手順 2、 2の画像 1 PlayStation VR LED Light Tracker Replacement: 手順 2、 2の画像 2
    • Unscrew four 13 mm screws with a PH #000 screwdriver.

  3. PlayStation VR LED Light Tracker Replacement: 手順 3、 2の画像 1 PlayStation VR LED Light Tracker Replacement: 手順 3、 2の画像 2
    • Using the plastic opening tool, carefully pry the white plastic panel free from the side of the headset. Repeat this action for the opposite side.

  4. PlayStation VR LED Light Tracker Replacement: 手順 4、 3の画像 1 PlayStation VR LED Light Tracker Replacement: 手順 4、 3の画像 2 PlayStation VR LED Light Tracker Replacement: 手順 4、 3の画像 3
    • Use the plastic opening tool to pry the top white plastic panel free from the headset.

    • Do not try to remove the bottom plastic panel. There is a screw attaching it that must be removed first.

    • There may be a small amount of adhesive attaching the top panel to the headset, in which case you may need to use a bit more force to remove the panel.

  5. PlayStation VR LED Light Tracker Replacement: 手順 5、 1の画像 1
    • Flip the headset over.

    • Using a PH #000, unscrew the 7 mm screw found on the bottom of the headset.

    No screw present in headset purchased late 2018. White trim is only held by clips.

    Pontus - 返信

  6. PlayStation VR LED Light Tracker Replacement: 手順 6、 3の画像 1 PlayStation VR LED Light Tracker Replacement: 手順 6、 3の画像 2 PlayStation VR LED Light Tracker Replacement: 手順 6、 3の画像 3
    • Using the plastic opening tool, pry the bottom white plastic panel loose and remove it from the headset.

    • There is adhesive attaching the panel to the headset, in which case it will take more force to remove the panel.

  7. PlayStation VR LED Light Tracker Replacement: 手順 7、 3の画像 1 PlayStation VR LED Light Tracker Replacement: 手順 7、 3の画像 2 PlayStation VR LED Light Tracker Replacement: 手順 7、 3の画像 3
    • Unscrew the two 7 mm screws from the top of the headset.

  8. PlayStation VR LED Light Tracker Replacement: 手順 8、 3の画像 1 PlayStation VR LED Light Tracker Replacement: 手順 8、 3の画像 2 PlayStation VR LED Light Tracker Replacement: 手順 8、 3の画像 3
    • Using your fingers, carefully pry the black front panel free from the headset.

    • We recommend that you start the removal from the sides by pulling them forward.

    • There is adhesive holding the front panel in place, which means you will need a bit of extra force to remove it.

  9. PlayStation VR LED Light Tracker Replacement: 手順 9、 1の画像 1
    • Unscrew the four silver 6 mm screws in each corner using a PH #000 screwdriver.

  10. PlayStation VR LED Light Tracker Replacement: 手順 10、 3の画像 1 PlayStation VR LED Light Tracker Replacement: 手順 10、 3の画像 2 PlayStation VR LED Light Tracker Replacement: 手順 10、 3の画像 3
    • Lift the small silver latch attaching the ZIF (zero insertion force) connector to the circuit board.

    • Carefully pull the end of the white ribbon connector from its slot.

    • Be careful not to damage or dirty the ribbon connector.

  11. PlayStation VR LED Light Tracker Replacement: 手順 11、 2の画像 1 PlayStation VR LED Light Tracker Replacement: 手順 11、 2の画像 2
    • Unhitch the yellow led connector ribbon and move it aside.

    • Be careful not to damage or dirty the ribbon connector.

  12. PlayStation VR LED Light Tracker Replacement: 手順 12、 3の画像 1 PlayStation VR LED Light Tracker Replacement: 手順 12、 3の画像 2 PlayStation VR LED Light Tracker Replacement: 手順 12、 3の画像 3
    • Carefully pry the black plastic piece attaching the yellow ribbon to the headset away from the green circuit board.

    • Remove the yellow LED ribbons and black plastic connecting piece from the headset.

終わりに

To reassemble your device, follow these instructions in reverse order.

ある他の人がこのガイドを完成しました。

作成者

4人の作成者と共同で作成されました。

Sarah Shand

メンバー登録日: 02/20/17

1,885 ポイント

7のガイドは作成済み

チーム

USF Tampa, Team S3-G1, Sullivan Spring 2017 USF Tampa, Team S3-G1, Sullivan Spring 2017人のメンバー

USFT-SULLIVAN-S17S3G1

3 メンバー

13のガイドは作成済み

コメント 1 件

where can I buy the LED lights for it??

Jordi - 返信

コメントを追加

統計データ:

過去 24時間: 1

過去 7 日: 8

過去 30 日: 20

今までの合計 3,799