はじめに
このガイドを参照して、 Playstation 4 Slimのプラスチック製底部カバーを取り外して交換しましょう。
必要な工具と部品
-
-
-
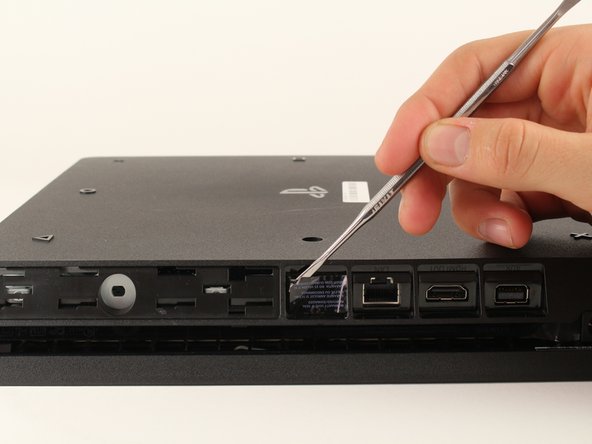
TR8いじり止めトルクスドライバーを使って、見えるようになった長さ5.0mmのネジを反時計回りに回して外します。
T8 fits like a glove for me
Is there anything else you can use
randomweeb - 返信
A small flathead screwdriver will work
There is a small metal rod in the middle of the screw that isn’t allowing my t8 inside. Any insight on this?
Some T8 bits have a hole in the middle that will allow that rod to go through; some do not. If you have a set of multiple bits, check if there are any others labeled T8 or TR8 with that hole in the middle.
Nicholas -
There is a metal thing inside of the screw slot any insite on this?
-
-
-
たった今外したネジの側面が自分を向くようにして、Playstation 4 Slimを裏返しにして置きます。
-
手前側の2つの角を指で持ち上げます。
-
底部カバーを裏面角に向けてスライドさせて、持ち上げて外します。
It says to place it upside down, but didn't you do so in the previous step? I've been trying to unscrew the screw with my screwdriver that I got from here and if I had to had the system right side up, I'm afraid I might've stripped the screw from all the force I tried to use to get the screw out that will NOT budge. It didn't even move the slightest after removing the warranty sticker.
There is a single clip on the left side about 5cms in, and another clip on the right side equidistant to the one on the other side. Jamming a spudger in there first, and lifting those clips helped, and then I had to slide down to lift a total of 4 clips on each side (each about 4cms apart). Then push the cover away from you, if that makes more sense than “sliding it towards the back corners”, since the back corners are technically facing you.
I saw many video and tried it my self, you have to remove the hard disc before removing any cover.
-
デバイスを再度組み立てるには、この説明書の逆の順番で組み立ててください。
デバイスを再度組み立てるには、この説明書の逆の順番で組み立ててください。
36 の人々がこのガイドを完成させました。
以下の翻訳者の皆さんにお礼を申し上げます:
100%
これらの翻訳者の方々は世界を修理する私たちのサポートをしてくれています。 あなたも貢献してみませんか?
翻訳を始める ›


Remove the screw directly to the left of that one in the picture as well. Should be silver.
Elizabeth Johnson - 返信
ihr seid so ein scheiß haufen das stimmt über haubt nix
Toaster 95 - 返信
einfach alles stimmt nicht
Toaster 95 - 返信