はじめに
この修理ガイドを参照して、SonyPlaystation 4のファンの交換をします。
作業を始める前に、PS4の電源を抜いてください。
必要な工具と部品
-
-
トップカバーの隙間に沿って両手でPS4を握ります。
-
トップカバーの光沢がある側を親指で外れるまでスライドさせます。
-
トップカバーの光沢のある側を持ち上げ、PS4から取り外します。
-
-
-
ピンセットを使って、両側のコーナーにあるプラスチックのネジカバーを取り出して、さらに2本のケース用ネジを露出させます。
What If my PS4 doesn't have the two screws on the side
I should imagine that plastic cover will come off?
How did you go?
Cary B -
-
-
-
PS4の背面に留められた、7.2mmトルクス安全ネジを4本外します。
I only have two screws, those in the middle of the console.
Have you removed the plastic covers mentioned in the previous step? That will expose the other two screws.
same, here. there are only the middle screws, no covers or screws on the sides. and it sits pretty tight
turns out 12XX models are different. Look at this for reference: https://www.youtube.com/watch?v=Hpr0z0ve...
This video guide is very useful, thank you. The disc drive itself is different than this ifixit guide too
Yes there is slight variations between the first models, and the second gen and on models. I have an original and only has the two screws in the middle, removal of the cover remains the same.
-
-
-
親指を使って下部ケースを持ち上げて、PS4から外します。
-
-
-
ピンセットを使って、電源ケーブルをまっすぐ抜いて、マザーボードから電源ユニットの接続を外します。
What you need to do here is be patient. Do not pull the wires. Get some fine nosed pliers, wiggle the white connector from left to right in small movements and edge it out slowly. You can also use your nails one finger at each edge of the white connector to do this.
Its really hard but i managed it with both of the tweezers/pincers at the same time
1. Keep in mind to pull not too hard on the wires and make step 2 and 3 simultaneously!2. the straigt and wider tweezer to pull the white connector itself
(top and bottom grip)
3. the small and angled tweezer to pull the wires carefully
(as shown on the picture above)Another option, is to remove the screws holding it down, leave the cable in place and lift it out carefully, revealing the other end of the connection. The hidden side of the connection wire is easier to get a handle on.
-
-
-
PS4から電源ユニットをまっすぐ持ち上げます。
Retirar en vertical, derecho hacia arriba. Sino puedes doblar uno de los tornillos largos
-
-
-
スパッジャーの先端を使って、マザーボードからアンテナケーブルの接続を外します。
dumb question but I’m very new to this. when reconnecting the wifi antenna, does it just click back on? I'm hesitant to try this procedure if I need to solder anything since I have zero experience.
Yup! Hold it in place and press straight down on top of it with your finger or a spudger. If you have any other cable/connector questions see this guide.
-
-
-
-
アンテナに留められた、9.7mmトルクスセキュリティネジを1本外します。
This does not work on the newer 12 series
Thank you! I thought I was insane. I've been trying to figure out where the hell this thing goes and the seat for it is like an inch from the corner. It's driving me mental trying to figure out how to put this back on
-
-
-
Wi-Fiアンテナを取り出します。
When I’m connected to wifi it does good for awhile then it disconnects from the wifi and I can’t use the controller. I have to turn the game off and disconnect power source. Do you think the wifi antenna could be the problem or doin have another situation.
I would check the antenna connection to the motherboard, if it's properly seated I don't think it's the problem.
hazelrat -
-
-
-
指先で光学ドライブ上部にある、リボンケーブルのメタルリリースレバーを押さえます。
-
指先もしくはピンセットを使って、リボンケーブルに付いた黒いタブを引っ張って、ケーブルの接続を外します。
Please note that the younger generations of PS4 have a different setup of connectors to the driver, its sometimes 3 of these as presented but with different sizes and no pad to press down. However, dont be alarmed, just use the pair of tweezers and gently pull them off the connectors of the motherboard. Grab on tight on the blue area of the ribbon cable and pull gently! They tend to sit tight so take some time and patience on this.
Thank you!!!
-
-
-
指先を使って、マザーボードに接続されたリボンケーブル用のメタルリリースレバーを押さえます。
-
指先もしくはピンセットで、黒いタブを引っ張ってリボンケーブルの接続を外します。
-
再組み立てのために、リボンケーブルを置いておきます。
bei mir ist das leider defekt Plastikteil abgebrochen wie kann ich das ersetzen
Is it possible to buy the white port for ps4? My one seems to be damaged so won't hold the ribbon cable.
This may be a difficult fix, as the white port seems to be integrated into the motherboard. You could try simply holding the ribbon cable down with electrical tape, if it's just a fitting issue?
hazelrat -
-
-
-
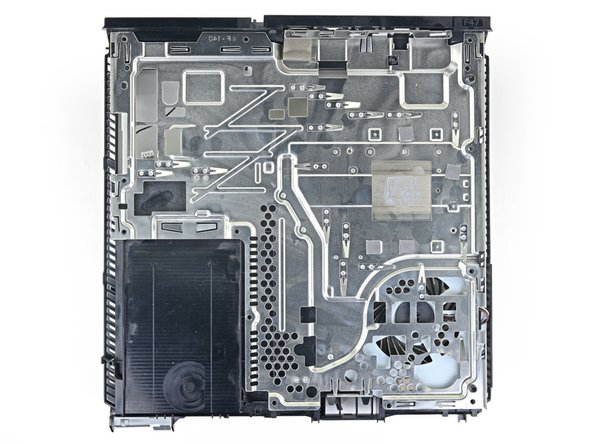
上部ケースを持ち上げて、PS4から取り出します。
“Significant force” is a bit of an understatement. It’s like it’s superglued together..
You absolutely should not need a lot of force for this. In the picture above, press upward using the left thumb from under the outer lip of the cover. You may need to pull it slightly toward you as well. Once that half is lifted, the right-hand side is still firmly attached. Keeping the left-hand side of the top separated, flip the unit over. Along the right-hand side, press the outside lip with your thumb about 2 thumb-widths down from the corner. There is a tab here and once released, the cover comes off easily and off in the back. Otherwise, you’ll be placing stress vertically (and rotationally) on the first tab on the side.
I appreciate this feedback – thank you. This sounds like a safer method. I’ll test it on our guide unit and update the procedure.
THIS SET OF INSTRUCTIONS FROM YOU, IS ABSOLUTELY SENSATIONAL.
I got this cover off quite easily. Still some resistance, but I didn't need this significant force at all.
THANK YOU!!
:)
Cary B -
I found an easier method for myself is to have the console upright and pointed away from myself. From this position, wrap your fingers over the top of the cover, hooking it in its front with the last digits of each finger. This allows you to press with your palm into the top of the console and pry in an upward/outward motion. This feels safer as it took much less force to disengage the problematic clip.
-
-
-
上部EMIシールドを固定している9.7mmトルクスネジを12本外します。
In my PS4, there is a small black Philips screw behind where the power lead connects to the motherboard. That screw connects the EMI shield to the inner metal where the power supply sits.
I had exactly the same thing, and mine is a fairly old model of PS4. Confused me for a moment until I spotted it.
Tom G -
Can confirm this.
This screw was on mine. To anyone reading this, flip the PS4 over and look where the pain in the ass power supply connector is.
Black screw right there.
If you have that screw of course. :)
Cary B -
-
-
-
15.6 mmプラスネジを2本外します。
-
プレッシャープレートのネジを半回転ずつ回して徐々に外していきます。
-
プレッシャープレートの圧力を均等にするために、2つのネジを交互に外していきます。
My PS4 also has 2 metal rings around each screw hole and 4 metal pieces 2 on each side closing in the same shape as the pressure plate as you take the pressure plate off?
Geoff King - 返信
How strong do you tighten the screws when re-applying the plate?
To the max, or stop one to two turns before?
I've tightened mine until the screws became taut and I've not had any stability issues.
hazelrat -
-
-
-
EMIシールドを取り出します。
This is the 2nd PS4 I have disassembled and on both units I have found there is a black Phillips screw securing the upper EMI shield. This should be mentioned in the teardown as the EMI shield cannot be removed completely without first removing this screw and you risk damaging the EMI shield in the process . To locate the screw turn the unit over and you will see a small black Phillips screw located near the power supply prongs. There will be a set of arrows pointing to the screw. Once you remove this screw then you can fully release the upper EMI shield.
Geoff King - 返信
Ditto. This is my first time disassembling a PS4. EMI shield didn’t lift off easily on one corner. Noticed the black Phillips screw holding it in place. I scrolled up in the tutorial to see if I missed it. Easy enough.
throw it way, electromagnetic fields dont exist
-
-
-
ファンケーブルとマザーボードの間にスパッジャーの先端を差し込みます。
-
スパッジャーをひねりながらコネクタをまっすぐ持ち上げて、マザーボードから接続を外します。
-
-
-
PS4からマザーボードを持ち上げて取り出します。
That shiny metal cover box on the opposite side of the hdi port shown in picture 30 at the very front is showing over heating signs I guess very brown around the edges I think is causing my PS4 not to show up on tv any ideas how to fix that hdi port looks fairly good to me but the black plastic port shows burnt signs as well that's on the same side of the HDMI port but the shiny metal cover is on the opposite side
-
-
-
ファンから6.2mmプラスネジを2本外します。
The screw located to the far left in the picture above is in a different place in my PS4. In mine it is located in the hole at the very top right hand corner of the fan right next the the black plastic post that secures it in place. The other screw is located in the same position as shown above.
Geoff King - 返信
Agree. Screw on top left is wrong. That screw is for EMI plate. The right screw is top right.
Hi Munir, thanks for pointing this out, are you doing this repair on a PS4 Pro or PS4 Slim?
Same comment about the location of the screw that shows up on the bottom left. You can see it's in the wrong place because it isn't there when lifting the EMI shield in the second picture of step 33, and the EMI shield has an arrow on it pointing to the actual screw location (barely visible in the photos, but visible).
Model is CUH-1004A
It’s the screw to the top right and the screw pictured on the left comes down through the lower EMI shield
-
-
-
PS4本体kあらファンをまっすぐ持ち上げます。
When installing the new fan, the holes may be slightly out-of-spec. If the fan is not completely seated, I suggest making a minor adjustment to the hole that is off with a Dremel bit. (the ball-like one worked for me). Tried to use a regular drill bit and power drill but couldn’t cut it. Dremel bit had it expanded perfectly in seconds. In my case, the errant hole was the one that fits into a plastic post, closest to the corner and at the bottom of the picture above.
-
-
-
ピンセットを使って、ファンからフォームパッドのストリップをゆっくりと剥がします。
what happen if i don’t get all of them on there correctly?
what happen if i don’t get all of them on there right?
The padding strip was too degraded to remove intact. Instead, I purchased a rectangular felt strip from the hardware store. I inked the existing pad and used it as a “stamp” on the peel-away part of the felt pad and cut with scissors. Placed new curved strip onto new fan and trimmed height with X-acto blade.
-
-
-
ファンからフォームパッドを剥がします。
My original fan did not have any pads to transfer. Used foam weather stripping instead.
-


このデバイスを再組み立てするには、インストラクションを逆の順番に従って作業を進めてください。
e-wasteを処理する場合は、認可済みリサイクルセンターR2を通じて廃棄してください。
修理が上手く進みませんか?トラブルシューティングのヘルプには、私たちのアンサーコミュニティを参照してください。
オリジナルのパーツと交換用パーツをよく見比べてください。交換用パーツに付いていない残りのコンポーネントや接着シールなどは、インストールする前に新パーツに移植する必要があります。
このデバイスを再組み立てするには、インストラクションを逆の順番に従って作業を進めてください。
e-wasteを処理する場合は、認可済みリサイクルセンターR2を通じて廃棄してください。
修理が上手く進みませんか?トラブルシューティングのヘルプには、私たちのアンサーコミュニティを参照してください。
オリジナルのパーツと交換用パーツをよく見比べてください。交換用パーツに付いていない残りのコンポーネントや接着シールなどは、インストールする前に新パーツに移植する必要があります。
274 の人々がこのガイドを完成させました。
以下の翻訳者の皆さんにお礼を申し上げます:
100%

これらの翻訳者の方々は世界を修理する私たちのサポートをしてくれています。 あなたも貢献してみませんか?
翻訳を始める ›

35 件のコメント
Great guide, but where to buy a fan for the ps4?!
Look one ebay, that's where my store gets the majority of out parts from. considering we fix computers.
Will this guide work with the CUH-1200 model?
My PS4 has been overheating so I decided to take it apart and clean it. I cleaned it well but it still over heats the fan will try to start up but cuts back off plz help
Replace the fan ... Yours works intermittently that probably means ut has a bad bearing.
Well, after replacing the fan, triple checking every thing and plugging it back in…. I got nothing. No power at all.
took it all apart three times to make sure all cables, connections and touch sensors were making contact. Still nothing.
With the bad fan in it at least still powered on befor this.
Many help appreciated !
Did you find a solution
Did you find a solution? I’m currently having the same issue!
My power button doesn’t work, but the eject works and the console seems to be running fine when I turn it on with my controller. Any ideas on what I did wrong?
This worked: https://youtu.be/L5Sp39M0O6Q
Megan -
I followed the guide with no issues, but when I hooked my ps4 up again and pressed the power button, the console beeped, I got the blue light, but then it turned off. No fan, no screen, nothing.
The power button works, and there is power - otherwise I wouldn’t get a beep.
So I took it apart and reinstalled the old noisy fan. When I put it back together, same result.
Anyone have any ideas what the problem could be?
Nice man. Very very so good your guide.
Did this repair, fan is better but now my PS4 cuh-1116a won’t read any game discs?! It did beforehand but I did notice there is a bracket on the top of my optical drive? Is it in the wrong way? Could a wire being loose cause this and if so which one? Any help is appreciated thanks.
After I replaced the fan and thermal paste and reassembled my ps4, I have NO POWER at all. I have disassembled and reassembled countless times to make sure I didn’t miss something. All wires are correctly placed. Someone please help!
https://www.easeus.com/resource/how-to-f...
There is also a risk of frying components with static electricity if your were touching all over the motherboard.
Cleaned out the dust and when I put it back together everything worked perfectly, and the stock fan is now silent.
Tom Riddle - 返信
my playstation is now booting in Safe Mode… please help!
My fan circuit was damaged so i try to power the fan by an external 12V 1.5 amp power supply (your typical adapter 230v-12v)
However when i connect brown wire with +12v and the black one with Minus- , it spins for a couple seconds then stops.
Repeatedly does the same .
So my question is, where is the grey wire for and where do i connect it? Is it a speed regulator? Can i add the grey wire with the plus or the minus?
Great guide. Used it to replace the fan on my PS4 launch edition.
My PS4 layout does not look like this in step 1? My model is CUH-1215A
Ps4 turns on but when I load a game the red line appears and it shuts off.
Sam rules!!!
Katie Pena - 返信
I replaced the thermal paste and now it's working great. No more overheating red light. Silent as a fish running full throttle. Thank you so much for making this for us!
Thank you! Worked like a charm. The worst part was that it died right before the weekend so I had to wait longer to get the new fan. It was actually a pretty fun repair.
why so much things just to get to the fan?
It is because the EMI shield has to be removed to access the fan screws, unfortunately.
Thank you. Great guide. I used it to disassemble my PS4 to clean it. Works great!
İnanılmaz güzel bir rehber. PS4’ün sesinden eser kalmadı. Teşekkürler…
An amazing guide. Fan noise completely gone. Thanks…
Onur Gülce - 返信
I have a CUH-1102A version of this PS4.
Would this teardown work for it?
Cary B - 返信