メインコンテンツにスキップ

PlayStation 2 Slimline Optical Drive Replacement

必要な工具と部品

  1. PlayStation 2 Slimline Optical Drive Replacement, Optical Drive: 手順 1、 3の画像 1 PlayStation 2 Slimline Optical Drive Replacement, Optical Drive: 手順 1、 3の画像 2 PlayStation 2 Slimline Optical Drive Replacement, Optical Drive: 手順 1、 3の画像 3
    • Remove the rubber feet on two of the screw covers on the bottom of the console.

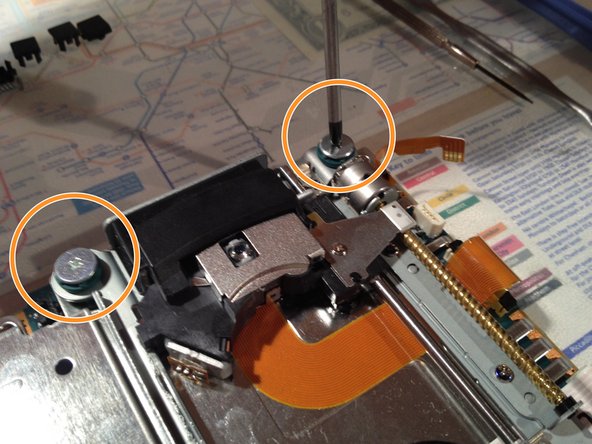
    • Remove the screw covers and the screws themselves.

    • Caution: One of the screws is underneath the "Do not void" seal

  2. PlayStation 2 Slimline Optical Drive Replacement: 手順 2、 2の画像 1 PlayStation 2 Slimline Optical Drive Replacement: 手順 2、 2の画像 2
    • If all screws are removed.

    • Use a metal spunger to open the chassis

  3. PlayStation 2 Slimline Optical Drive Replacement: 手順 3、 3の画像 1 PlayStation 2 Slimline Optical Drive Replacement: 手順 3、 3の画像 2 PlayStation 2 Slimline Optical Drive Replacement: 手順 3、 3の画像 3
    • Slip the three cables out of the sockets.

    • Use a PH01 screwdriver to remove the four screws securing the optical drive

    • Lift up the optical drive and remove the duct tape under the flex cable.

    • Now the optical drive is free and ready for replacement

終わりに

To reassemble your device, follow these instructions in reverse order.

16 の人々がこのガイドを完成させました。

作成者

7人の作成者と共同で作成されました。

tlroesner

メンバー登録日: 05/13/12

1,864 ポイント

4のガイドは作成済み

3 件のコメント

How is it that this guide says difficult and the other PS2 drive replacement on here says easy?

Mark - 返信

it really depends on your level of skill/experience.

Damien Simons -

How many different versions of drive is there for the slim model? When you go to replace it, do you just compare the model number on the laser?

Trevor V - 返信

コメントを追加

統計データ:

過去 24時間: 2

過去 7 日: 27

過去 30 日: 93

今までの合計 22,058