メインコンテンツにスキップ

PlayStation 2 Controller L/R Trigger and Shoulder Buttons Replacement

必要な工具と部品

  1. PlayStation 2 Controller L/R Trigger and Shoulder Buttons Replacement, L/R Trigger and Shoulder Buttons: 手順 1、 3の画像 1 PlayStation 2 Controller L/R Trigger and Shoulder Buttons Replacement, L/R Trigger and Shoulder Buttons: 手順 1、 3の画像 2 PlayStation 2 Controller L/R Trigger and Shoulder Buttons Replacement, L/R Trigger and Shoulder Buttons: 手順 1、 3の画像 3
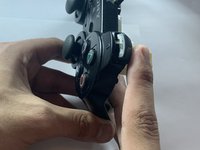
    • Place the controller face-down on a solid surface.

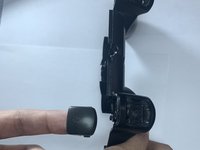
    • Remove the six screws from the back cover using a Phillips #00 screwdriver.

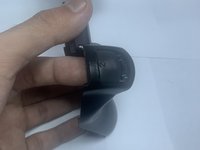
    • Gently remove both covers away from each other and place in a safe area.

  2. PlayStation 2 Controller L/R Trigger and Shoulder Buttons Replacement: 手順 2、 3の画像 1 PlayStation 2 Controller L/R Trigger and Shoulder Buttons Replacement: 手順 2、 3の画像 2 PlayStation 2 Controller L/R Trigger and Shoulder Buttons Replacement: 手順 2、 3の画像 3
    • Grab the back cover of the controller.

    • Gently push the shoulder buttons down and out to remove them from their socket.

  3. PlayStation 2 Controller L/R Trigger and Shoulder Buttons Replacement: 手順 3、 3の画像 1 PlayStation 2 Controller L/R Trigger and Shoulder Buttons Replacement: 手順 3、 3の画像 2 PlayStation 2 Controller L/R Trigger and Shoulder Buttons Replacement: 手順 3、 3の画像 3
    • Grab your replacement shoulder buttons.

    • Slide them under the socket and push them up into the sockets.

    • Be gentle as excessive force can cause damage to them.

    • You'll hear a small click to secure them in place. Test the buttons so they don't fall out of place accidentally.

  4. PlayStation 2 Controller L/R Trigger and Shoulder Buttons Replacement: 手順 4、 2の画像 1 PlayStation 2 Controller L/R Trigger and Shoulder Buttons Replacement: 手順 4、 2の画像 2
    • Grab the front cover.

    • Push the L1 and R1 buttons down and away from the cover.

    • This will remove the buttons in place.

    • Often when you go to put the case back together, the rubber pads for the L1/R1 buttons get scrunched out the place. Instead of putting those buttons in before putting the case together. leave them off. Once you have the case back together, you can snap them in from the outside.

  5. PlayStation 2 Controller L/R Trigger and Shoulder Buttons Replacement: 手順 5、 1の画像 1
    • Connect both covers together and replace the screws using a Phillips #00 screwdriver.

  6. PlayStation 2 Controller L/R Trigger and Shoulder Buttons Replacement: 手順 6、 2の画像 1 PlayStation 2 Controller L/R Trigger and Shoulder Buttons Replacement: 手順 6、 2の画像 2
    • Take your replacement L1 and L2 buttons.

    • Don't excessively press down the buttons as they can get stuck on the side.

    • Gently press them inside the sockets.

    • Press the buttons repeatedly to make sure they are placed correctly so you don't have any issues with them.

終わりに

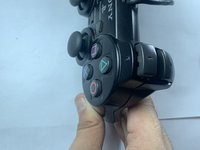
Test your buttons out. If it feels loose or unresponsive you can repeat the process and ensure the buttons are in place.

作成者

1人の作成者と共同作成されました。

Miguel Aguirre

メンバー登録日: 10/25/23

133 ポイント

1ガイドが承認済み

チーム

CSU Los Angeles, Team 4-1, Kershman Fall 2023 CSU Los Angeles, Team 4-1, Kershman Fall 2023人のメンバー

CSULA-KERSHMAN-F23S4G1

1 メンバー

1のガイドは作成済み

0 件のコメント

コメントを追加

統計データ:

過去 24時間: 0

過去 7 日: 14

過去 30 日: 63

今までの合計 268