メインコンテンツにスキップ

このバージョンは誤った内容を含んでいる可能性があります。最新の承認済みスナップショットに切り替えてください。

必要な工具と部品

  1. この手順は未翻訳です。 翻訳を手伝う。

    : 手順 1、 2の画像 1 : 手順 1、 2の画像 2
    • Remove the four screws from the grip with the 5/64" allen wrench. There are two on each side.

  2. この手順は未翻訳です。 翻訳を手伝う。

    : 手順 2、 2の画像 1 : 手順 2、 2の画像 2
    • Pull the grip away from the frame.

  3. この手順は未翻訳です。 翻訳を手伝う。

    : 手順 3、 2の画像 1 : 手順 3、 2の画像 2
    • Pull the grip through the opening.

    • The grip is connected in the middle and is one piece.

  4. この手順は未翻訳です。 翻訳を手伝う。

    : 手順 4、 3の画像 1 : 手順 4、 3の画像 2 : 手順 4、 3の画像 3
    • Remove the macroline from the fitting by pulling the metal ring around the end of the fitting away while pulling out the macroline.

    • It helps to rotate the collar to create room to pull out macroline.

  5. この手順は未翻訳です。 翻訳を手伝う。

    : 手順 5、 3の画像 1 : 手順 5、 3の画像 2 : 手順 5、 3の画像 3
    • While pulling in the metal ring on the fitting, pull the macroline out.

  6. この手順は未翻訳です。 翻訳を手伝う。

    : 手順 6、 3の画像 1 : 手順 6、 3の画像 2 : 手順 6、 3の画像 3
    • Use 1/8" allen wrench to remove screw behind regulator.

  7. この手順は未翻訳です。 翻訳を手伝う。

    : 手順 7、 3の画像 1 : 手順 7、 3の画像 2 : 手順 7、 3の画像 3
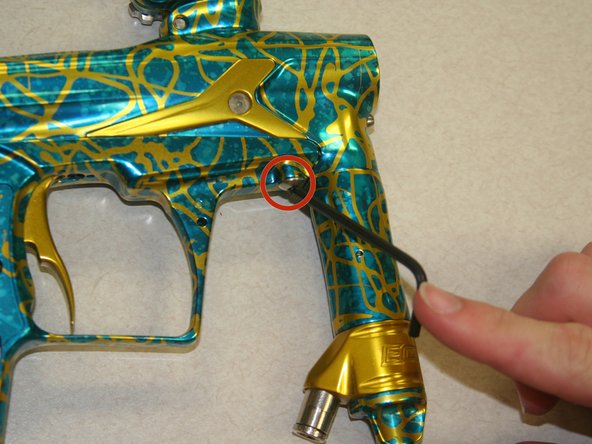
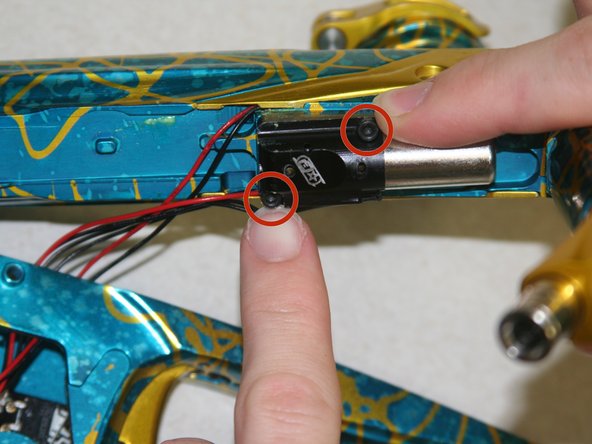
    • Use 1/8" allen wrench to loosen the screw inside the grip on the right side.

    • The screw only needs to be turned a couple of times.

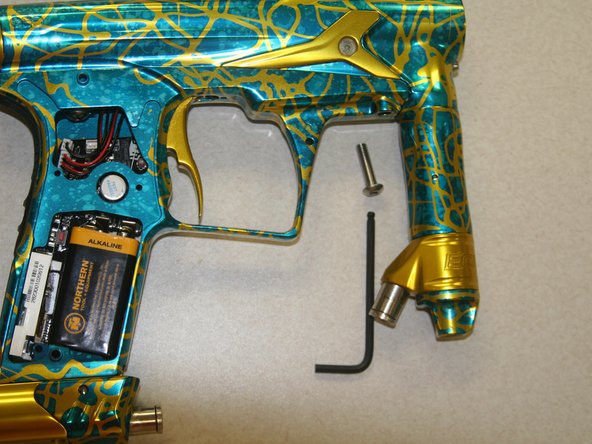
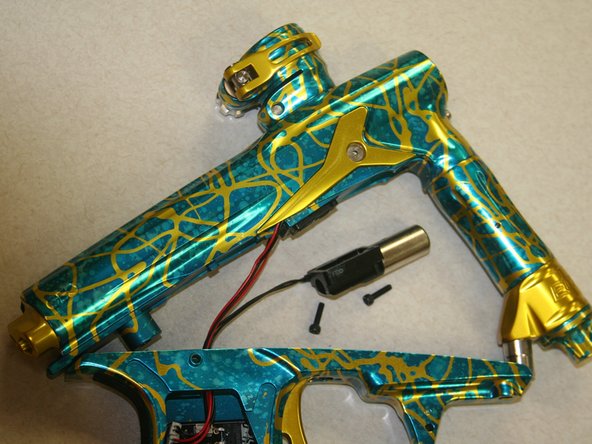
    • Slide the upper frame forward on the rails and remove the screw from the slot to separate the two halves of the body.

    • BE CAREFUL: Do not pull the two frames apart too much or too quickly. This may cause the wires to be damaged.

  8. この手順は未翻訳です。 翻訳を手伝う。

    : 手順 8、 3の画像 1 : 手順 8、 3の画像 2 : 手順 8、 3の画像 3
    • Using the Phillips #0 screwdriver, remove the 2 screws in the solenoid.

    • Remove the solenoid.

  9. この手順は未翻訳です。 翻訳を手伝う。

    : 手順 9、 1の画像 1
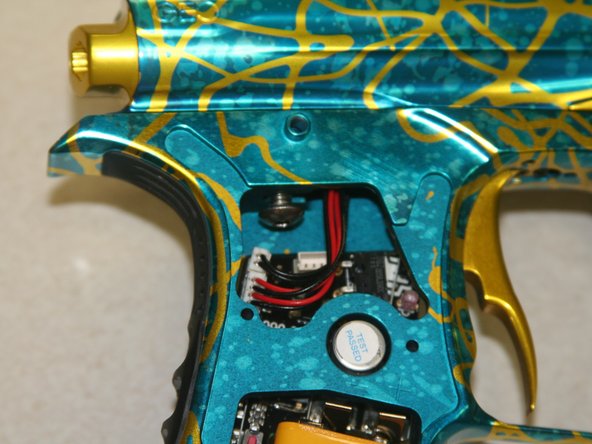
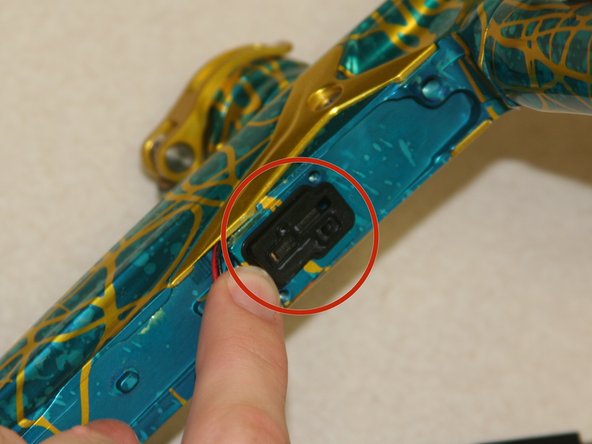
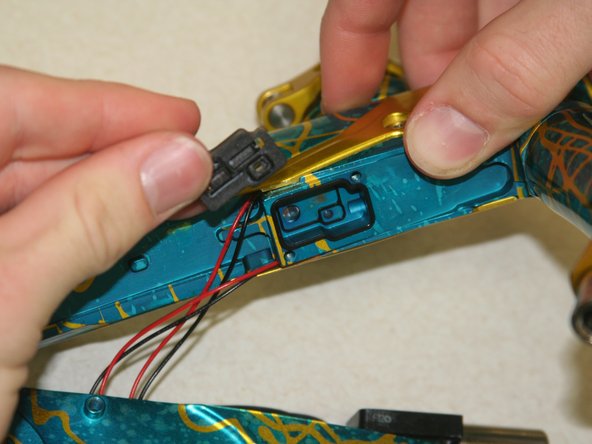
    • Pry the board connection with the 2 black wires from the terminal.

    • BE CAREFUL: Do not pull hard by the wires or you may dislodge them from the connection instead of removing the connection from the board.

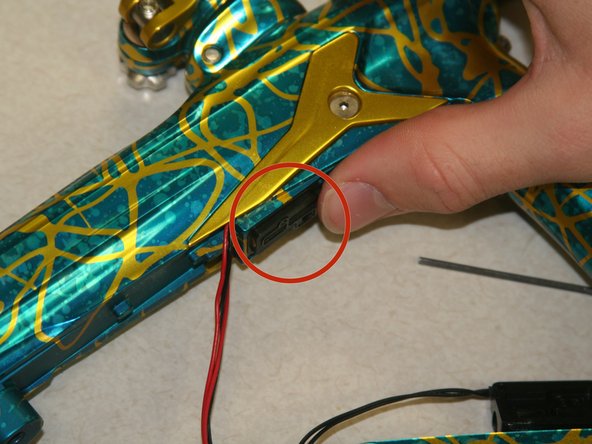
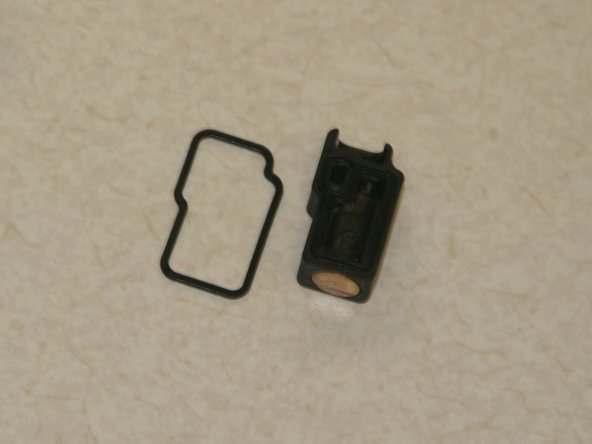
    • Pull out the wires through the opening in the top of the grip and replace the solenoid.

  10. この手順は未翻訳です。 翻訳を手伝う。

    : 手順 10、 3の画像 1 : 手順 10、 3の画像 2 : 手順 10、 3の画像 3
    • Locate the solenoid gasket manifold, underneath the top half of the body.

  11. この手順は未翻訳です。 翻訳を手伝う。

    : 手順 11、 3の画像 1 : 手順 11、 3の画像 2 : 手順 11、 3の画像 3
    • Remove the solenoid gasket manifold by applying pressure with one finger to the part closest to the end of the barrel.

ゴール

作成者

5人の作成者と共同で作成されました。

Rett Triplett

メンバー登録日: 10/18/13

801 ポイント

8のガイドは作成済み

チーム

Clemson, Team 13-6, Benson Fall 2013 Clemson, Team 13-6, Benson Fall 2013人のメンバー

CLEM-BENSON-F13S13G6

3 メンバー

8のガイドは作成済み

0 件のコメント

コメントを追加

統計データ:

過去 24時間: 1

過去 7 日: 5

過去 30 日: 12

今までの合計 603