メインコンテンツにスキップ

Planet Eclipse Etha Eyes Replacement

必要な工具と部品

  1. Planet Eclipse Etha Eyes Replacement, Regulator: 手順 1、 2の画像 1 Planet Eclipse Etha Eyes Replacement, Regulator: 手順 1、 2の画像 2
    • Firmly grasp hold of the ring on the bottom of the 90 degree silver fitting on the front of the gun.

    • Pull hard, but slowly, on the macroline where it comes out of silver piece until it comes out.

    • The macroline is the black hose connecting the regulator to the tank connection.

  2. Planet Eclipse Etha Eyes Replacement: 手順 2、 2の画像 1 Planet Eclipse Etha Eyes Replacement: 手順 2、 2の画像 2
    • Remove the regulator by unscrewing it in a clockwise direction.

  3. Planet Eclipse Etha Eyes Replacement, Battery and Grip Panels: 手順 3、 2の画像 1 Planet Eclipse Etha Eyes Replacement, Battery and Grip Panels: 手順 3、 2の画像 2
    • Use the 5/64" hex key to remove the screw shown.

    • Remove the grip panel by gently holding the bottom of the panel and lifting the panel off.

    • If you are only replacing the battery, skip the next step.

    • The screws in this guide are interchangeable with those shown in the Eyes replacement guide.

  4. Planet Eclipse Etha Eyes Replacement: 手順 4、 1の画像 1
    • Flip the marker over and use the 5/64" hex key to remove the screw shown.

    • Remove the grip panel by gently holding the bottom of the panel and lifting the panel off.

  5. Planet Eclipse Etha Eyes Replacement: 手順 5、 2の画像 1 Planet Eclipse Etha Eyes Replacement: 手順 5、 2の画像 2
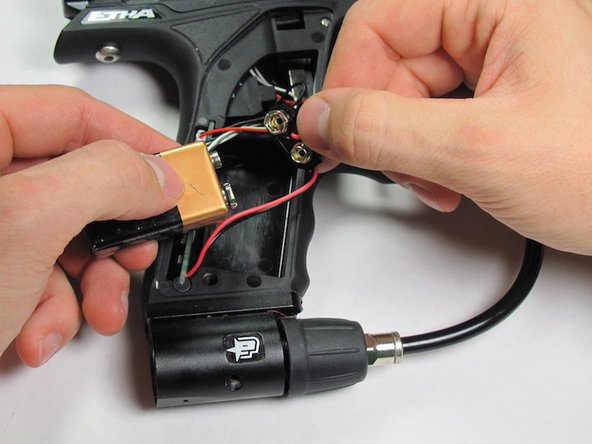
    • Carefully remove the 9V battery and connector.

    • Remove the 9V battery from the connector.

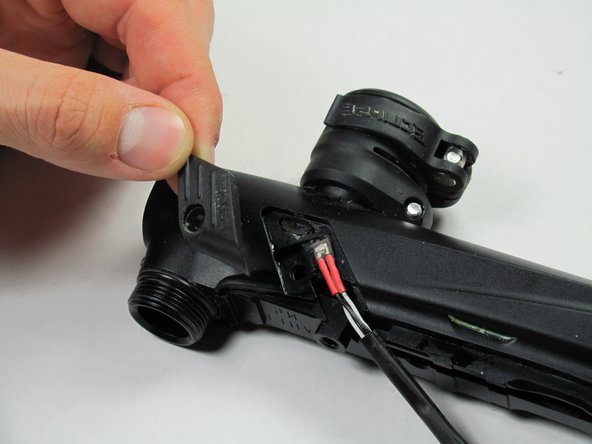
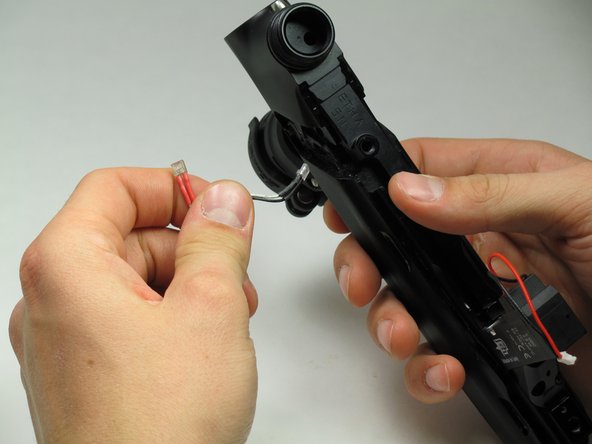
  6. Planet Eclipse Etha Eyes Replacement, Frame: 手順 6、 2の画像 1 Planet Eclipse Etha Eyes Replacement, Frame: 手順 6、 2の画像 2
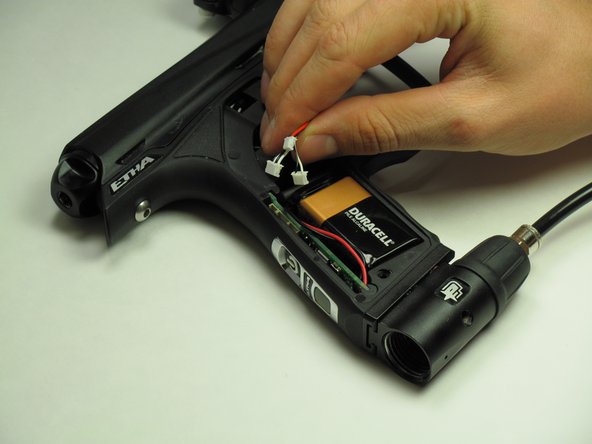
    • Carefully disconnect the three connectors from the circuit board.

    • Don't worry about remembering which direction the connectors go in, they will not fit in the board in the wrong direction.

  7. Planet Eclipse Etha Eyes Replacement: 手順 7、 2の画像 1 Planet Eclipse Etha Eyes Replacement: 手順 7、 2の画像 2
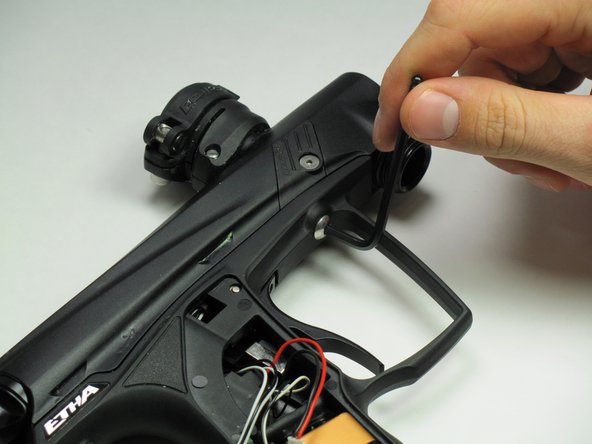
    • Use the 1/8" hex key to remove the two dome-headed screws by rotating them counter-clockwise.

  8. Planet Eclipse Etha Eyes Replacement: 手順 8、 1の画像 1
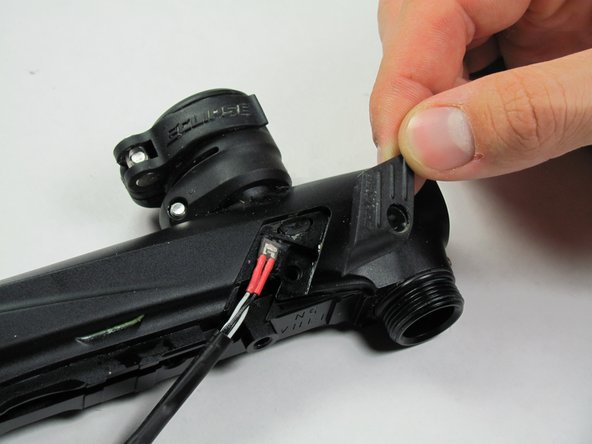
    • Be very careful during the step to avoid damage to the solenoid or wiring.

    • Gently separate the top and bottom of the marker.

  9. Planet Eclipse Etha Eyes Replacement, Eyes: 手順 9、 2の画像 1 Planet Eclipse Etha Eyes Replacement, Eyes: 手順 9、 2の画像 2
    • Use the 5/64" hex key to turn the screw counterclockwise.

    • Carefully remove the screw and place it off to the side.

    • Remove the panel and place it off to the side.

  10. Planet Eclipse Etha Eyes Replacement: 手順 10、 2の画像 1 Planet Eclipse Etha Eyes Replacement: 手順 10、 2の画像 2
    • Carefully flip the marker over.

    • Use the 5/64" hex key to turn the screw counterclockwise.

    • Remove the screw and place it off to the side.

    • Carefully remove the panel and place it off to the side.

  11. Planet Eclipse Etha Eyes Replacement: 手順 11、 2の画像 1 Planet Eclipse Etha Eyes Replacement: 手順 11、 2の画像 2
    • Grip the marker with one hand and gently pull the eyes out with your other hand.

終わりに

To reassemble your device, follow these instructions in reverse order.

ある他の人がこのガイドを完成しました。

作成者

3人の作成者と共同で作成されました。

Hannah Lancaster

メンバー登録日: 10/14/14

132 ポイント

1ガイドが承認済み

チーム

Cal Poly, Team 10-42, Amido Fall 2014 Cal Poly, Team 10-42, Amido Fall 2014人のメンバー

CPSU-AMIDO-F14S10G42

5 メンバー

7のガイドは作成済み

0 件のコメント

コメントを追加

統計データ:

過去 24時間: 0

過去 7 日: 1

過去 30 日: 2

今までの合計 1,197