メインコンテンツにスキップ

Pioneer Steel Wheels Aluminum Plates Replacement

必要な工具と部品

  1. Pioneer Steel Wheels Aluminum Plates Replacement, Headband: 手順 1、 2の画像 1 Pioneer Steel Wheels Aluminum Plates Replacement, Headband: 手順 1、 2の画像 2
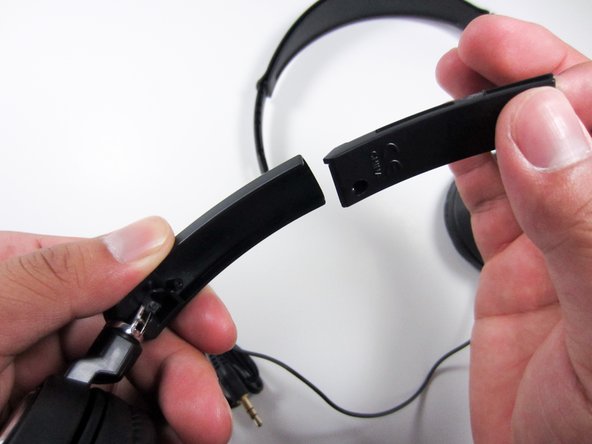
    • Remove the two screws on the underside of the headband with the PH0 Phillips screw driver.

  2. Pioneer Steel Wheels Aluminum Plates Replacement: 手順 2、 2の画像 1 Pioneer Steel Wheels Aluminum Plates Replacement: 手順 2、 2の画像 2
    • With the headband fully extended, hold the base of the headband with one hand and with your other hand, hold the top of the headband.

    • With force, pull upwards.

  3. Pioneer Steel Wheels Aluminum Plates Replacement: 手順 3、 3の画像 1 Pioneer Steel Wheels Aluminum Plates Replacement: 手順 3、 3の画像 2 Pioneer Steel Wheels Aluminum Plates Replacement: 手順 3、 3の画像 3
    • Remove the rail-piece that is now sticking up by pulling it up and out of the headphone.

    • Repeat on the opposite side and the headband will be released.

    • During reassembly, make the sure the rail-pieces match their respective sides so the headband reinserts properly.

  4. Pioneer Steel Wheels Aluminum Plates Replacement, Foam Ear Pads: 手順 4、 2の画像 1 Pioneer Steel Wheels Aluminum Plates Replacement, Foam Ear Pads: 手順 4、 2の画像 2
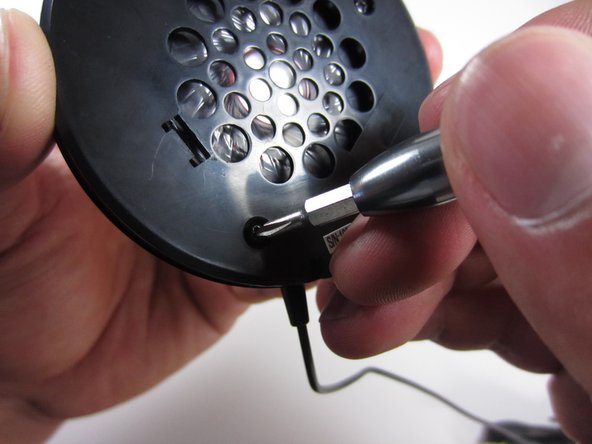
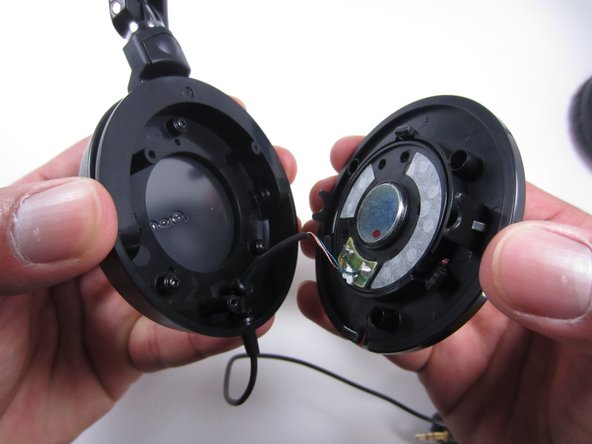
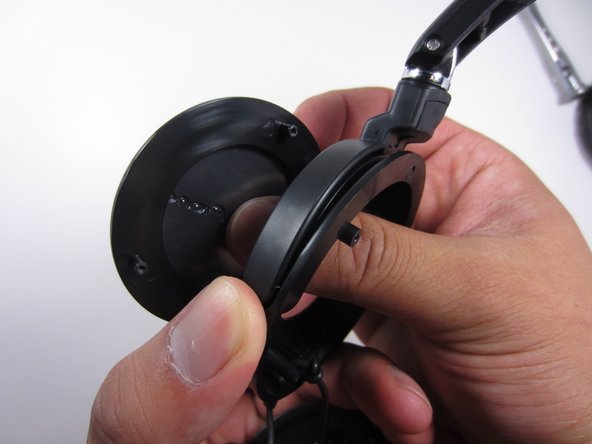
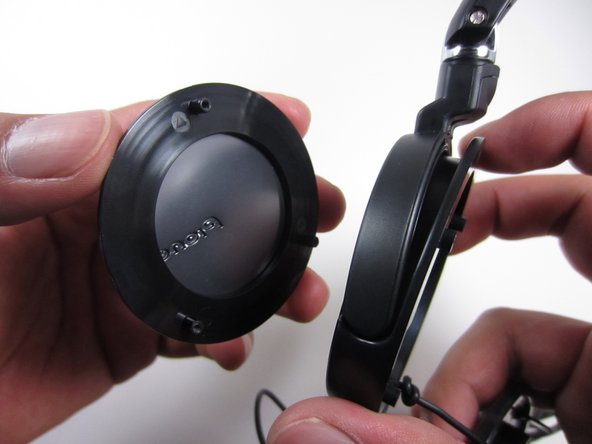
    • While holding the base of the ear cup with one hand, insert your index finger from your other hand into the inside of the foam ear piece.

  5. Pioneer Steel Wheels Aluminum Plates Replacement: 手順 5、 3の画像 1 Pioneer Steel Wheels Aluminum Plates Replacement: 手順 5、 3の画像 2 Pioneer Steel Wheels Aluminum Plates Replacement: 手順 5、 3の画像 3
    • With slight force, peel the foam ear pieces away from the ear cup.

    • Make sure to pull out the foam ear pieces slowly. Pulling on them fast will tear the leather wrapping.

    • Repeat for the opposite side if necessary.

  6. Pioneer Steel Wheels Aluminum Plates Replacement, Drivers: 手順 6、 2の画像 1 Pioneer Steel Wheels Aluminum Plates Replacement, Drivers: 手順 6、 2の画像 2
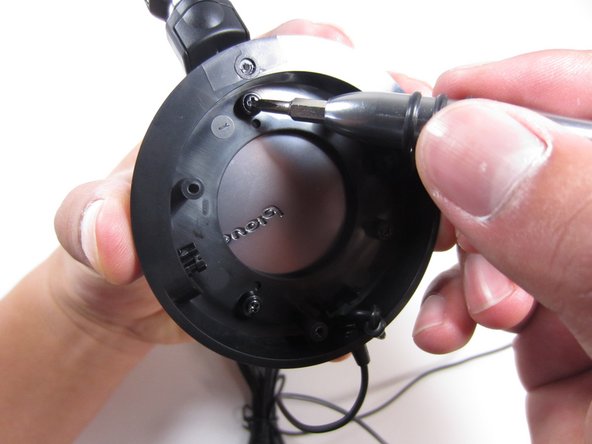
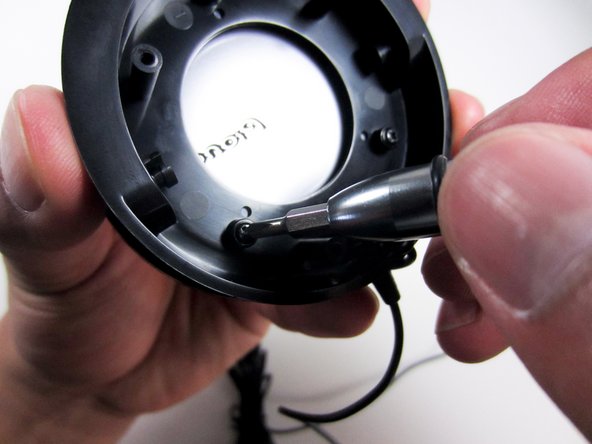
    • Remove the three screws located on the driver cover of the ear cup with the PH0 Phillips screw driver.

  7. Pioneer Steel Wheels Aluminum Plates Replacement: 手順 7、 2の画像 1 Pioneer Steel Wheels Aluminum Plates Replacement: 手順 7、 2の画像 2
    • Pull the driver cover away from the headphone.

    • Do not pull the driver cover away too fast since there are wires connecting the driver to the ear cup.

    • During reassembly, make sure the two wires are pointing downward before screwing the driver back in.

  8. Pioneer Steel Wheels Aluminum Plates Replacement, Aluminum Plates: 手順 8、 3の画像 1 Pioneer Steel Wheels Aluminum Plates Replacement, Aluminum Plates: 手順 8、 3の画像 2 Pioneer Steel Wheels Aluminum Plates Replacement, Aluminum Plates: 手順 8、 3の画像 3
    • Remove the three screws located on the driver casing.

  9. Pioneer Steel Wheels Aluminum Plates Replacement: 手順 9、 3の画像 1 Pioneer Steel Wheels Aluminum Plates Replacement: 手順 9、 3の画像 2 Pioneer Steel Wheels Aluminum Plates Replacement: 手順 9、 3の画像 3
    • With your thumb, push the middle of the aluminum piece outwards while holding the ear cup base with your other hand.

    • During reassembly, make sure the aluminum plates line up with the holes for the screws.

終わりに

To reassemble your device, follow these instructions in reverse order.

作成者

2人の作成者と共同で作成されました。

Garrett Leung

メンバー登録日: 04/16/13

955 ポイント

8のガイドは作成済み

チーム

Cal Poly, Team 10-40, Amido Spring 2013 Cal Poly, Team 10-40, Amido Spring 2013人のメンバー

CPSU-AMIDO-S13S10G40

4 メンバー

37のガイドは作成済み

0 件のコメント

コメントを追加

統計データ:

過去 24時間: 0

過去 7 日: 1

過去 30 日: 4

今までの合計 447