メインコンテンツにスキップ

Pioneer MXT-X366BT Metal Case Replacement

必要な工具と部品

  1. Pioneer MXT-X366BT Metal Case Replacement, Metal Casing: 手順 1、 2の画像 1 Pioneer MXT-X366BT Metal Case Replacement, Metal Casing: 手順 1、 2の画像 2
    • Apply small amount of pressure inward with a plastic opening tool to release bottom clip.

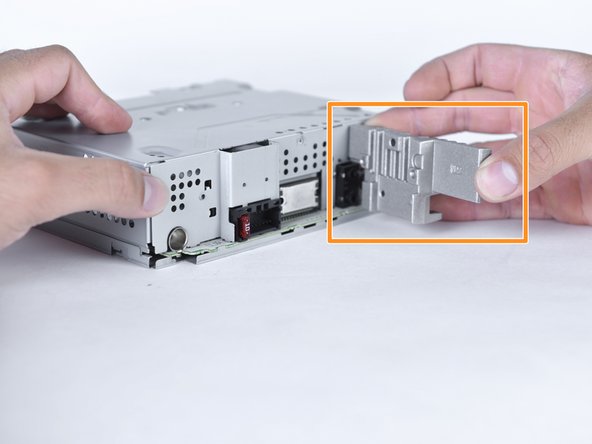
    • Pry the top clip with the plastic opening tool to release it.

    • The head unit is symmetrical and has the same amount of clips on the other side.

  2. Pioneer MXT-X366BT Metal Case Replacement: 手順 2、 1の画像 1
    • Remove the face plate holder.

  3. Pioneer MXT-X366BT Metal Case Replacement: 手順 3、 1の画像 1
    • Remove the six 5mm Phillips-head screws with Philips #2 screwdriver.

  4. Pioneer MXT-X366BT Metal Case Replacement: 手順 4、 2の画像 1 Pioneer MXT-X366BT Metal Case Replacement: 手順 4、 2の画像 2
    • Remove the inner three 5mm Phillips head screws, with a Phillips #2 screwdriver, attached to the metal backing.

    • Remove the metal backing that is now free.

  5. Pioneer MXT-X366BT Metal Case Replacement: 手順 5、 1の画像 1
    • Carefully slide the metal casing forward.

    • Metal piece standing is the rear of the head unit.

    • Edges are sharp.

  6. Pioneer MXT-X366BT Metal Case Replacement: 手順 6、 1の画像 1
    • Lift the metal casing from the rear and pull it away.

    • Edges are sharp.

  7. Pioneer MXT-X366BT Metal Case Replacement: 手順 7、 1の画像 1
    • The metal casing is now fully removed.

終わりに

To reassemble your device, follow these instructions in reverse order.

ある他の人がこのガイドを完成しました。

作成者

2人の作成者と共同で作成されました。

Blaine Kaiser

メンバー登録日: 03/22/18

169 ポイント

1ガイドが承認済み

チーム

Sam Houston State, Team S17-G7, Blackburne Spring 2018 Sam Houston State, Team S17-G7, Blackburne Spring 2018人のメンバー

SHSU-BLACKBURNE-S18S17G7

4 メンバー

5のガイドは作成済み

0 件のコメント

コメントを追加

統計データ:

過去 24時間: 1

過去 7 日: 2

過去 30 日: 7

今までの合計 278