メインコンテンツにスキップ

Pioneer MXT-X366BT Knob Replacement

必要な工具と部品

  1. Pioneer MXT-X366BT Knob Replacement, Volume Knob: 手順 1、 1の画像 1
    • Push the eject button to release the faceplate.

  2. Pioneer MXT-X366BT Knob Replacement: 手順 2、 2の画像 1 Pioneer MXT-X366BT Knob Replacement: 手順 2、 2の画像 2
    • Carefully separate the faceplate from the radio.

  3. Pioneer MXT-X366BT Knob Replacement: 手順 3、 1の画像 1
    • Remove three 3mm Phillips-head screws with a Phillips #1 screwdriver.

  4. Pioneer MXT-X366BT Knob Replacement: 手順 4、 3の画像 1 Pioneer MXT-X366BT Knob Replacement: 手順 4、 3の画像 2 Pioneer MXT-X366BT Knob Replacement: 手順 4、 3の画像 3
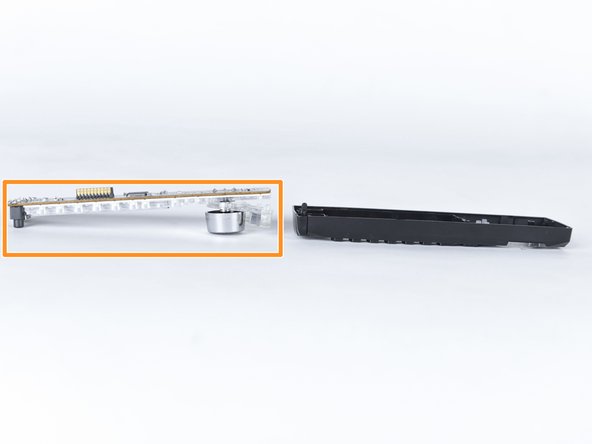
    • Remove the back of the face plate.

    • Separate the motherboard from the casing.

    • Handle the motherboard with care.

  5. Pioneer MXT-X366BT Knob Replacement: 手順 5、 2の画像 1 Pioneer MXT-X366BT Knob Replacement: 手順 5、 2の画像 2
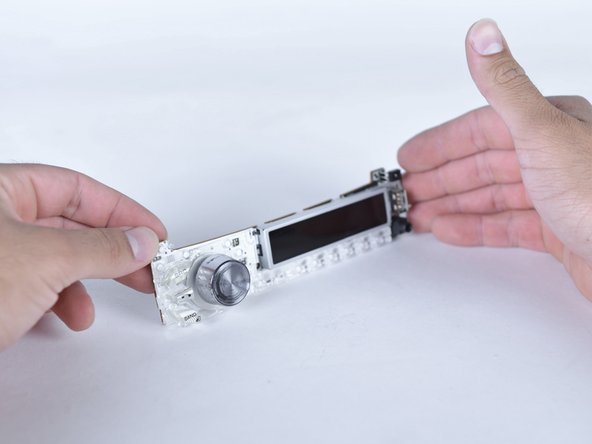
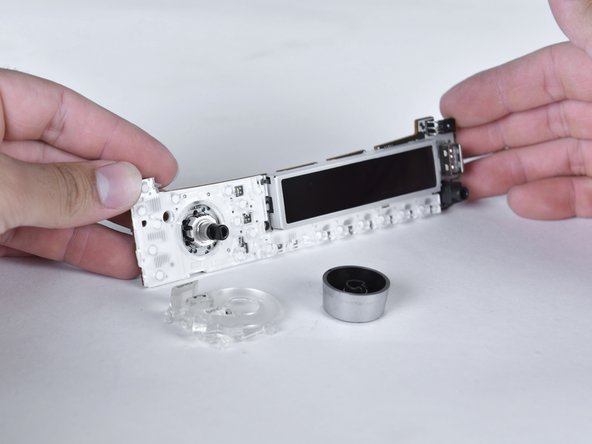
    • Firmly pull the volume knob.

    • Carefully handle the motherboard to not break it.

    • Some force may be required to remove the knob.

    • Buttons are attached by a ring behind the volume knob.

終わりに

To reassemble your device, follow these instructions in reverse order.

作成者

4人の作成者と共同で作成されました。

martin esquivel

メンバー登録日: 03/22/18

323 ポイント

2のガイドは作成済み

チーム

Sam Houston State, Team S17-G7, Blackburne Spring 2018 Sam Houston State, Team S17-G7, Blackburne Spring 2018人のメンバー

SHSU-BLACKBURNE-S18S17G7

4 メンバー

5のガイドは作成済み

0 件のコメント

コメントを追加

統計データ:

過去 24時間: 0

過去 7 日: 4

過去 30 日: 8

今までの合計 341