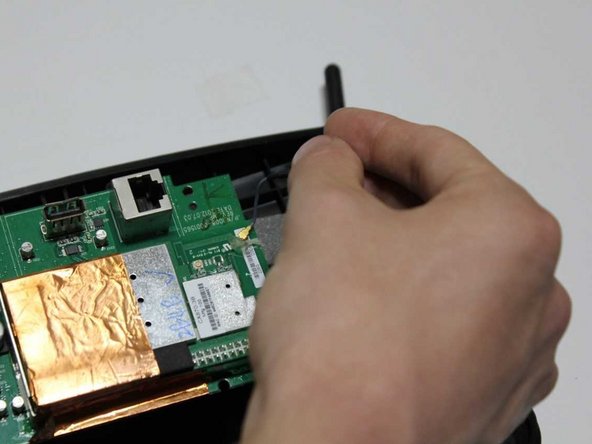
メインコンテンツにスキップ

Pioneer A1 XW-SMA1-K Antenna Replacement

必要な工具と部品

  1. Pioneer A1 XW-SMA1-K Antenna Replacement, Back Panel: 手順 1、 1の画像 1
    • Use the spudger to remove the mesh front panel.

  2. Pioneer A1 XW-SMA1-K Antenna Replacement: 手順 2、 2の画像 1 Pioneer A1 XW-SMA1-K Antenna Replacement: 手順 2、 2の画像 2
    • Use a Phillips #1 screwdriver to remove the thirteen 12 mm screws in the speaker frame.

    • Remove the speaker frame by pulling vertically upwards revealing the motherboard.

  3. Pioneer A1 XW-SMA1-K Antenna Replacement: 手順 3、 3の画像 1 Pioneer A1 XW-SMA1-K Antenna Replacement: 手順 3、 3の画像 2 Pioneer A1 XW-SMA1-K Antenna Replacement: 手順 3、 3の画像 3
    • Use a Phillips #1 screwdriver to remove the twelve 12 mm screws from the middle frame.

    • Remove the middle frame by pulling upward and vertically.

  4. Pioneer A1 XW-SMA1-K Antenna Replacement: 手順 4、 2の画像 1 Pioneer A1 XW-SMA1-K Antenna Replacement: 手順 4、 2の画像 2
    • Use the Phillips #1 screwdriver to remove the nine 12 mm screws from the motherboard.

    • Flip the motherboard over.

    • Remove the motherboard by detaching the antenna.

  5. Pioneer A1 XW-SMA1-K Antenna Replacement, Motherboard: 手順 5、 1の画像 1
    • Remove the motherboard from the speaker.

  6. Pioneer A1 XW-SMA1-K Antenna Replacement, Antenna: 手順 6、 2の画像 1 Pioneer A1 XW-SMA1-K Antenna Replacement, Antenna: 手順 6、 2の画像 2
    • Flip over the back panel and pull the antenna up and out.

終わりに

To reassemble your device, follow these instructions in reverse order.

作成者

2人の作成者と共同で作成されました。

Drew Dickenson

メンバー登録日: 02/14/19

295 ポイント

2のガイドは作成済み

チーム

Carson-Newman University, Team S1-G2, Sobiech Spring 2019 Carson-Newman University, Team S1-G2, Sobiech Spring 2019人のメンバー

CNU-SOBIECH-S19S1G2

5 メンバー

5のガイドは作成済み

0 件のコメント

コメントを追加

統計データ:

過去 24時間: 1

過去 7 日: 4

過去 30 日: 10

今までの合計 534