メインコンテンツにスキップ

Philips SBA1060 Capacitor Replacement

必要な工具と部品

  1. Philips SBA1060 Capacitor Replacement, Battery Casing: 手順 1、 1の画像 1
    • Remove the back cover by sliding it off.

    • Remove the 3 AAA batteries.

  2. Philips SBA1060 Capacitor Replacement: 手順 2、 3の画像 1 Philips SBA1060 Capacitor Replacement: 手順 2、 3の画像 2 Philips SBA1060 Capacitor Replacement: 手順 2、 3の画像 3
    • Unscrew the nine exterior screws on the back panel using a PH0-size Philips-head screwdriver.

    • A larger screwdriver head and more force may be required for damaged screws.

    • Remove the triangular end piece by pulling it straight off.

  3. Philips SBA1060 Capacitor Replacement: 手順 3、 2の画像 1 Philips SBA1060 Capacitor Replacement: 手順 3、 2の画像 2
    • Remove the colored grill by sliding it off in the direction of the removed end piece.

    • Pry off the back battery panel with the plastic opening tool.

    • Be careful to avoid tearing any wires.

  4. Philips SBA1060 Capacitor Replacement, Capacitor: 手順 4、 1の画像 1
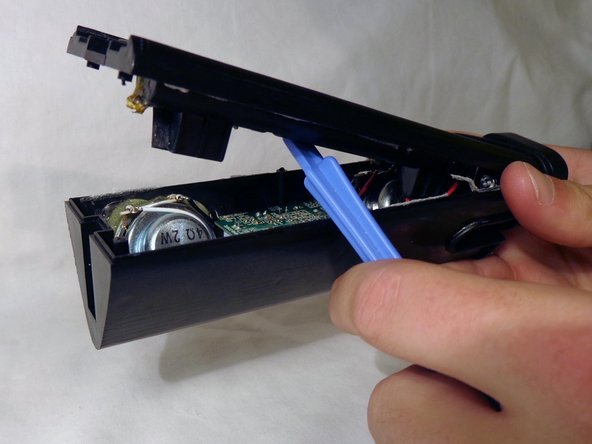
    • Remove the two screws on opposite ends of the circuit board with the PH0 size philips head screw driver.

    • Slowly pull the circuit board out of the device

    • NOTE: Be careful not to damage any of the wires protruding from the back of the circuit board.

  5. Philips SBA1060 Capacitor Replacement: 手順 5、 2の画像 1 Philips SBA1060 Capacitor Replacement: 手順 5、 2の画像 2
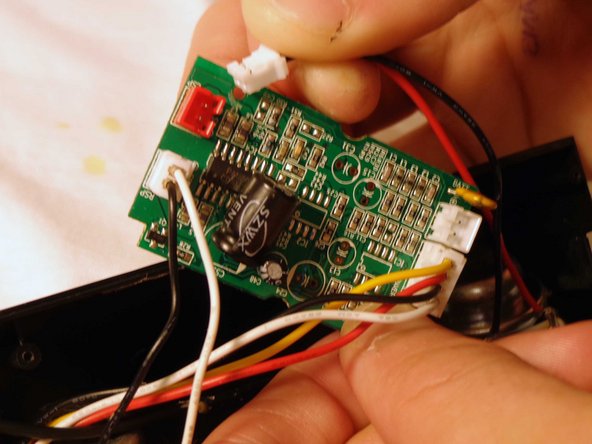
    • Flip the device and remove the battery plug from the circuit board by pulling out the plugs to fully remove back panel.

    • Remove the speaker plugs from the circuit board by pulling out the plugs. They are located on opposite sides of the circuit board.

    • NOTE: When reassembling, note that the speaker with the red wire goes to the red plug, and the speaker with the white wire goes to the adjacent white plug.

    • Remove the light plug from the circuit board.

    • NOTE: This plug is twice as wide as the speaker and battery plugs.

  6. Philips SBA1060 Capacitor Replacement: 手順 6、 2の画像 1 Philips SBA1060 Capacitor Replacement: 手順 6、 2の画像 2
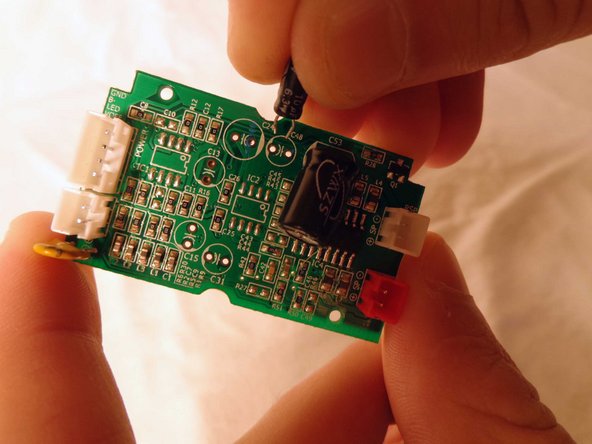
    • Locate the capacitor and carefully slide it out of the circuit board.

    • NOTE: The capacitor will be a cylindrical object protruding vertically near the center of the circuit board.

    • Slide the prongs of the replacement capacitor into the two holes of the circuit board where the original capacitor was removed from.

    • Reassemble the speaker.

終わりに

To reassemble your device, follow these instructions in reverse order.

作成者

4人の作成者と共同で作成されました。

April Driscoll

メンバー登録日: 10/21/13

321 ポイント

3のガイドは作成済み

チーム

Clemson, Team 14-4, Benson Fall 2013 Clemson, Team 14-4, Benson Fall 2013人のメンバー

CLEM-BENSON-F13S14G4

3 メンバー

4のガイドは作成済み

0 件のコメント

コメントを追加

統計データ:

過去 24時間: 0

過去 7 日: 0

過去 30 日: 1

今までの合計 726