メインコンテンツにスキップ

このバージョンは誤った内容を含んでいる可能性があります。最新の承認済みスナップショットに切り替えてください。

必要な工具と部品

  1. この手順は未翻訳です。 翻訳を手伝う。

    : 手順 1、 3の画像 1 : 手順 1、 3の画像 2 : 手順 1、 3の画像 3
    • Lay the player flat so the bottom outside is showing. Using the Phillips #0 screwdriver, unscrew all the housing screws on the bottom of the player.

    • Have the player sitting upright, remove the rubber stoppers in order to get to the screw. Unscrew the inside screws by the screen using the Philips #0 screwdriver.

    • Remove the rubber stoppers for the bottom two screws as well. Unscrew the middle two screws.

  2. この手順は未翻訳です。 翻訳を手伝う。

    : 手順 2、 2の画像 1 : 手順 2、 2の画像 2
    • Open the disc flap and remove the screws inside with the Phillips #0 screwdriver. There will be three screws.

  3. この手順は未翻訳です。 翻訳を手伝う。

    : 手順 3、 3の画像 1 : 手順 3、 3の画像 2 : 手順 3、 3の画像 3
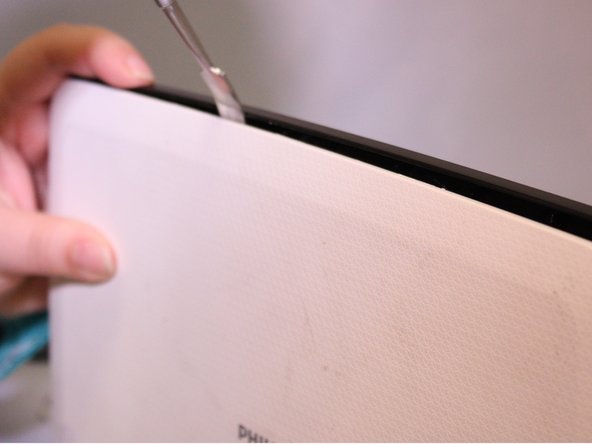
    • Start removing the inside black face plate of the player by using a prying method between the white outer housing and the black face plate with a metal spudger.

    • Pull the black face plate off once you have pried it from the white housing. The bottom inside layer should pop off.

    • Using the same prying method with the metal spudger, start prying off the screens white outer housing.

  4. この手順は未翻訳です。 翻訳を手伝う。

    : 手順 4、 3の画像 1 : 手順 4、 3の画像 2 : 手順 4、 3の画像 3
    • The light panel on the front can just pop right off.

    • To remove the metal bar against the battery, unscrew the screws with the phillips #0 screwdriver.

    • After unscrewing you can just lift the metal bar off.

ゴール

作成者

4人の作成者と共同で作成されました。

Julia Sheremet

メンバー登録日: 09/28/15

303 ポイント

2のガイドは作成済み

チーム

Eastern Washington University, Team 1-3, Matresse Fall 2015 Eastern Washington University, Team 1-3, Matresse Fall 2015人のメンバー

EWU-MATRESSE-F15S1G3

3 メンバー

4のガイドは作成済み

0 件のコメント

コメントを追加

統計データ:

過去 24時間: 0

過去 7 日: 1

過去 30 日: 4

今までの合計 466