メインコンテンツにスキップ

Philips DVP5992-F7 Screen Replacement

必要な工具と部品

  1. Philips DVP5992-F7 Screen Replacement, Screen: 手順 1、 3の画像 1 Philips DVP5992-F7 Screen Replacement, Screen: 手順 1、 3の画像 2 Philips DVP5992-F7 Screen Replacement, Screen: 手順 1、 3の画像 3
    • Remove the three 6.4 mm Phillips #1 screws on the back of the device with a Phillips head screwdriver.

    • Remove the 6.4 mm Phillips #1 screws on each side of the device.

  2. Philips DVP5992-F7 Screen Replacement: 手順 2、 2の画像 1 Philips DVP5992-F7 Screen Replacement: 手順 2、 2の画像 2
    • Remove the top plate of the DVD by firmly grasping the player on both sides.

    • Shift the top plate towards the backside of the player.

    • Lift the back half of the top plate up to remove it from the player.

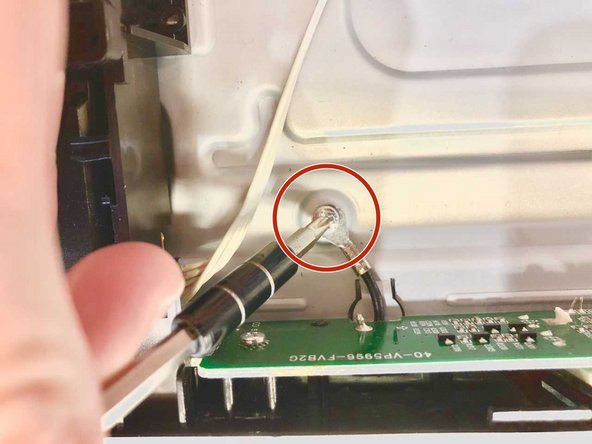
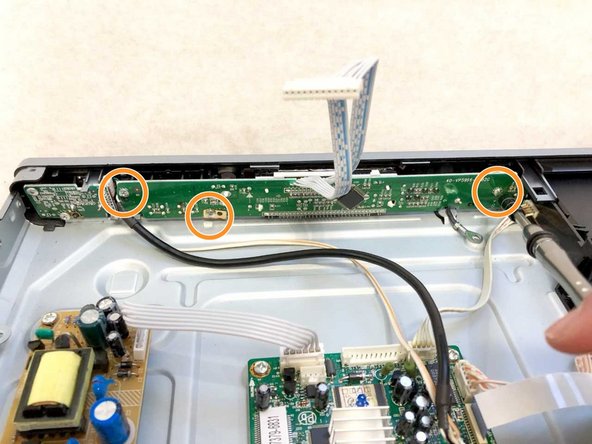
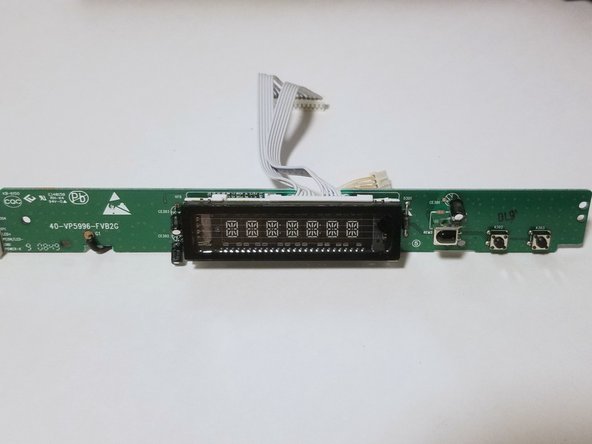
  3. Philips DVP5992-F7 Screen Replacement: 手順 3、 3の画像 1 Philips DVP5992-F7 Screen Replacement: 手順 3、 3の画像 2 Philips DVP5992-F7 Screen Replacement: 手順 3、 3の画像 3
    • Unplug the bundled cable connector that attaches the screen to the motherboard.

    • Remove the 3.175 mm Phillips #1 screw that connects the screen's ground wire to the shell of the DVD player.

    • Remove the three 6.35 mm Phillips #1 screws that attach the screen to the front cover of the DVD player.

  4. Philips DVP5992-F7 Screen Replacement: 手順 4、 2の画像 1 Philips DVP5992-F7 Screen Replacement: 手順 4、 2の画像 2
    • Slowly pull the screen backwards starting with the side farthest from the disc tray.

    • Unplug the bundled cable connector that is located close to the disc tray as you pull the screen out of the DVD player.

終わりに

To reassemble your device, follow these instructions in reverse order.

作成者

2人の作成者と共同で作成されました。

Hunter McCraw

メンバー登録日: 08/31/18

186 ポイント

1ガイドが承認済み

チーム

Western Carolina University, Team S1-G6, Virtue Fall 2018 Western Carolina University, Team S1-G6, Virtue Fall 2018人のメンバー

WCU-VIRTUE-F18S1G6

3 メンバー

9のガイドは作成済み

0 件のコメント

コメントを追加

統計データ:

過去 24時間: 0

過去 7 日: 1

過去 30 日: 4

今までの合計 221