メインコンテンツにスキップ

この修理ガイドは変更されています。最新の未承認バージョンに切り替えます。

Philips DVP5992-F7 Audio Video Port Replacement

必要な工具と部品

  1. Philips DVP5992-F7 Audio Video Port Replacement, Audio/Video Port: 手順 1、 3の画像 1 Philips DVP5992-F7 Audio Video Port Replacement, Audio/Video Port: 手順 1、 3の画像 2 Philips DVP5992-F7 Audio Video Port Replacement, Audio/Video Port: 手順 1、 3の画像 3
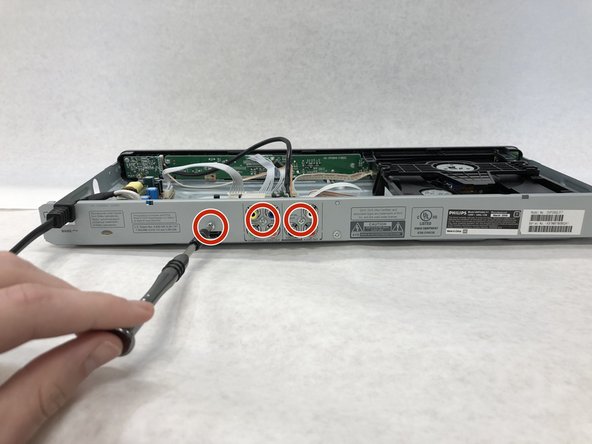
    • Remove the three 6.4 mm Phillips #1 screws on the back of the device with a Phillips head screwdriver.

    • Remove the 6.4 mm Phillips #1 screws on each side of the device.

  2. Philips DVP5992-F7 Audio Video Port Replacement: 手順 2、 2の画像 1 Philips DVP5992-F7 Audio Video Port Replacement: 手順 2、 2の画像 2
    • Remove the top plate of the DVD by firmly grasping the player on both sides.

    • Shift the top plate towards the backside of the player.

    • Lift the back half of the top plate up to remove it from the player.

  3. Philips DVP5992-F7 Audio Video Port Replacement: 手順 3、 3の画像 1 Philips DVP5992-F7 Audio Video Port Replacement: 手順 3、 3の画像 2 Philips DVP5992-F7 Audio Video Port Replacement: 手順 3、 3の画像 3
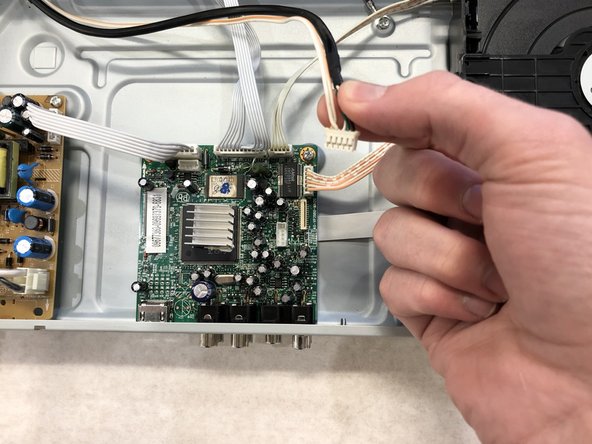
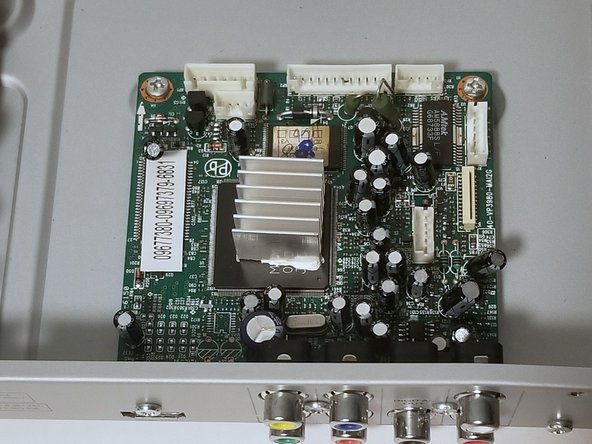
    • Unplug the one ribbon wire and the five bundled cable connectors that are plugged into the motherboard.

  4. Philips DVP5992-F7 Audio Video Port Replacement: 手順 4、 1の画像 1
    • Remove the three 4.76 mm #1 Phillips head screws located on the back of the DVD player.

  5. Philips DVP5992-F7 Audio Video Port Replacement: 手順 5、 1の画像 1
    • Remove the two 7.94 mm #1 Phillips head screws from the motherboard.

  6. Philips DVP5992-F7 Audio Video Port Replacement: 手順 6、 1の画像 1
    • Remove the motherboard from the DVD player.

終わりに

To reassemble your device, follow these instructions in reverse order.

3 の人々がこのガイドを完成させました。

作成者

2人の作成者と共同で作成されました。

Dyllon Phuong

メンバー登録日: 08/31/18

540 ポイント

3のガイドは作成済み

チーム

Western Carolina University, Team S1-G6, Virtue Fall 2018 Western Carolina University, Team S1-G6, Virtue Fall 2018人のメンバー

WCU-VIRTUE-F18S1G6

3 メンバー

9のガイドは作成済み

0 件のコメント

コメントを追加

統計データ:

過去 24時間: 0

過去 7 日: 0

過去 30 日: 3

今までの合計 288