メインコンテンツにスキップ

Parrot FLYPAD Joystick Replacement

必要な工具と部品

  1. Parrot FLYPAD Joystick Replacement, Joystick: 手順 1、 1の画像 1
    この手順で使用する道具:
    Magnetic Project Mat
    $19.95
    購入する
    • Total of 6 Screws are located in the back of the controller.

    • Four 0.9mm T6 screws

    • Two 0.1mm T6 screws

    • Flip the Flypad over.

    • Remove the six screws using a T6 screwdriver.

    • Use a Magnetic Mat to prevent loss of screws. Set aside.

  2. Parrot FLYPAD Joystick Replacement: 手順 2、 1の画像 1
    • Flip the Flypad over again and separate the front and back. Be sure to remove the foam adhesive that connects the front plate to the motherboard.

    • Be aware that the Buttons (L1,R1) may fall out. Remember to put them back in place during reassembly.

    • Use Ph0 tool to remove the screws holding the motherboard in place.

    • Gently remove the motherboard from the front plate.

  3. Parrot FLYPAD Joystick Replacement: 手順 3、 2の画像 1 Parrot FLYPAD Joystick Replacement: 手順 3、 2の画像 2
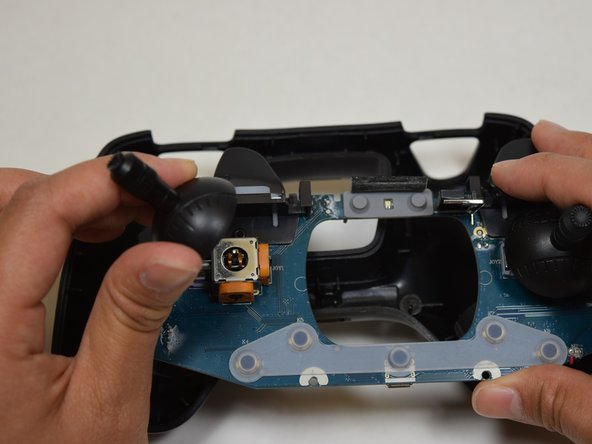
    • Pop the joysticks out by pulling gently.

  4. Parrot FLYPAD Joystick Replacement: 手順 4、 1の画像 1
    • Unscrew and replace joystick caps for a more comfortable grip.

終わりに

To reassemble your device, follow these instructions in reverse order.

作成者

5人の作成者と共同で作成されました。

HUY NGUYEN

メンバー登録日: 04/10/17

376 ポイント

3のガイドは作成済み

チーム

UW Tacoma, Team S3-G5, Liner Spring 2017 UW Tacoma, Team S3-G5, Liner Spring 2017人のメンバー

UWT-LINER-S17S3G5

5 メンバー

3のガイドは作成済み

2 件のコメント

Do you know where I can find replacement joystick caps like the one shown in Step 4, please?

cbeilstein - 返信

Same question as above regarding joystick caps please

Alex - 返信

コメントを追加

統計データ:

過去 24時間: 0

過去 7 日: 0

過去 30 日: 3

今までの合計 684