メインコンテンツにスキップ

この修理ガイドは変更されています。最新の未承認バージョンに切り替えます。

Panasonic PV-GS9 Speaker Replacement

必要な工具と部品

  1. Panasonic PV-GS9 Speaker Replacement, Microphone Replacement: 手順 1、 3の画像 1 Panasonic PV-GS9 Speaker Replacement, Microphone Replacement: 手順 1、 3の画像 2 Panasonic PV-GS9 Speaker Replacement, Microphone Replacement: 手順 1、 3の画像 3
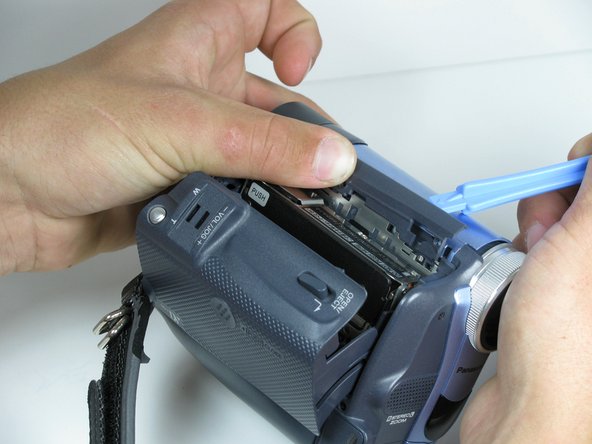
    • Locate the blue plastic tool opener, then remove both the round record/playback and record/power control knobs by prying it open from the camcorder.

  2. Panasonic PV-GS9 Speaker Replacement: 手順 2、 2の画像 1 Panasonic PV-GS9 Speaker Replacement: 手順 2、 2の画像 2
    • Open the tape compartment.

    • Then flip the camcorder and locate two 4.5mm screws that are horizontal from each other and about 2 inches apart using a #00 Phillips screwdriver.

  3. Panasonic PV-GS9 Speaker Replacement: 手順 3、 3の画像 1 Panasonic PV-GS9 Speaker Replacement: 手順 3、 3の画像 2 Panasonic PV-GS9 Speaker Replacement: 手順 3、 3の画像 3
    • Use the blue plastic opening tool to remove the gray trim piece by prying it from top of the camcorder.

    • Be gentle when removing the trim piece. The plastic parts are fragile and can break easily.

  4. Panasonic PV-GS9 Speaker Replacement: 手順 4、 1の画像 1
    • Rotate the camcorder so that the eye piece is facing you.

    • Remove the four black 4.5mm screws, sitting behind the battery.

    • Remove the 5th screw to the right of the battery dock.

    • Remove the battery by gently pulling away from the camcorder.

    • Be careful and place screws together so you don't lose any.

  5. Panasonic PV-GS9 Speaker Replacement: 手順 5、 2の画像 1 Panasonic PV-GS9 Speaker Replacement: 手順 5、 2の画像 2
    • Rotate the camcorder so that the tape compartment is facing you.

    • Remove the single 4.5mm black screw above the hook for the hand strap.

    • Undoing the strap on one end may help.

    • Rotate the camcorder so that the lens is facing you.

    • Remove the single 4.5mm black screw from the front panel.

  6. Panasonic PV-GS9 Speaker Replacement: 手順 6、 2の画像 1 Panasonic PV-GS9 Speaker Replacement: 手順 6、 2の画像 2
    • Rotate the camcorder so that the bottom is facing towards you.

    • Remove the single remaining 4.5mm black screw from the bottom.

    • Remove the four silver 4.5mm screws from the body.

  7. Panasonic PV-GS9 Speaker Replacement: 手順 7、 1の画像 1
    • Open the LCD screen on the side of the camcorder.

    • Using a #00 screwdriver, remove the two 4.5mm silver screws located on either side of the hinge of the LCD screen.

  8. Panasonic PV-GS9 Speaker Replacement: 手順 8、 2の画像 1 Panasonic PV-GS9 Speaker Replacement: 手順 8、 2の画像 2
    • Carefully remove the front cover from the body of the camcorder.

    • This should come apart with relative ease, however a plastic opening tool may help remove the panel.

    • There is a ribbon cable attached to the front panel and the camcorder body, DO NOT pull that off when you remove this panel.

  9. Panasonic PV-GS9 Speaker Replacement: 手順 9、 2の画像 1 Panasonic PV-GS9 Speaker Replacement: 手順 9、 2の画像 2
    • Using your fingers, carefully pull the ribbon cable away from the logic board.

  10. Panasonic PV-GS9 Speaker Replacement, LCD Panel Removal: 手順 10、 2の画像 1 Panasonic PV-GS9 Speaker Replacement, LCD Panel Removal: 手順 10、 2の画像 2
    • Remove the indicated 4.5mm screws from the LCD side of the camera.

  11. Panasonic PV-GS9 Speaker Replacement: 手順 11、 3の画像 1 Panasonic PV-GS9 Speaker Replacement: 手順 11、 3の画像 2 Panasonic PV-GS9 Speaker Replacement: 手順 11、 3の画像 3
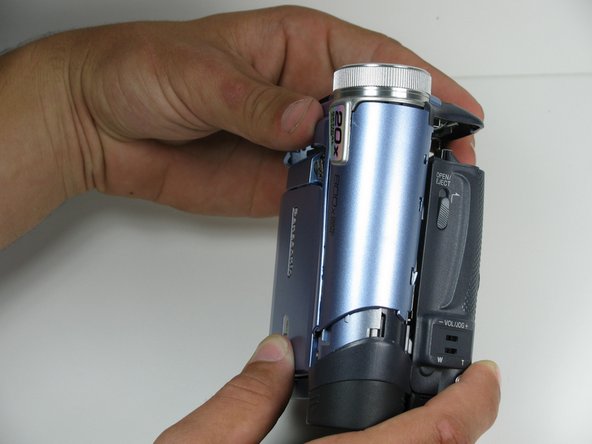
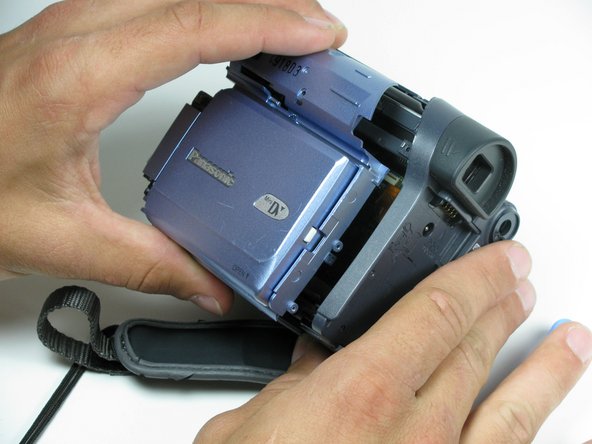
    • Place a plastic opening tool under the bottom of the blue panel beneath the camcorder.

    • Using two tools may be useful, if difficult.

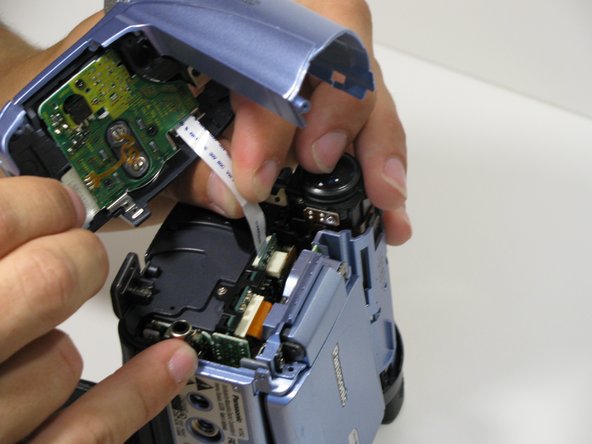
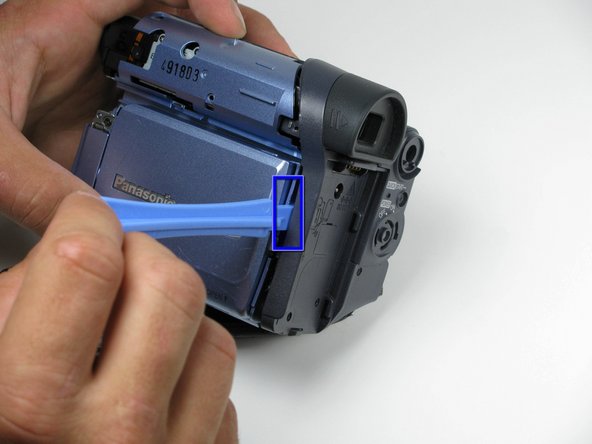
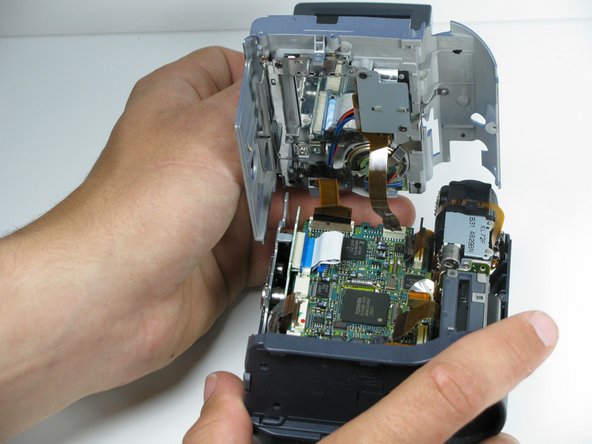
    • Move the plastic opening tool up the side of the camcorder as shown. Carefully separate the LCD panel from the rest of the camcorder.

    • Remove the panel from the camcorder.

  12. Panasonic PV-GS9 Speaker Replacement: 手順 12、 3の画像 1 Panasonic PV-GS9 Speaker Replacement: 手順 12、 3の画像 2 Panasonic PV-GS9 Speaker Replacement: 手順 12、 3の画像 3
    • Before removing the LCD panel from the camcorder, disconnect the ribbon cables joining the LCD panel to the logic board.

    • There may be multiple ribbon cables attached to the same point on the logic board.

  13. Panasonic PV-GS9 Speaker Replacement, Speaker: 手順 13、 1の画像 1
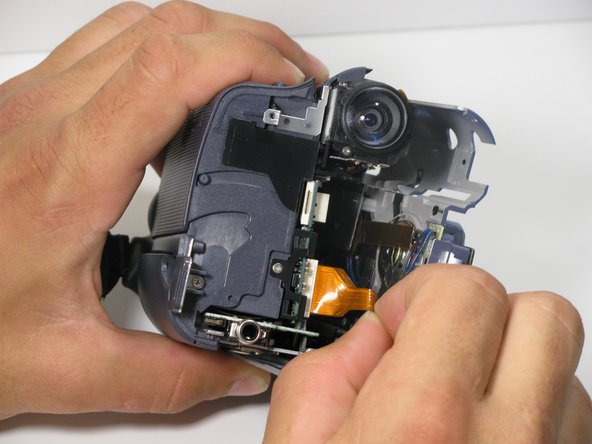
    • On the LCD housing plate, remove the two 4.5mm phillips screws on the ribbon cable plate using a #00 philips screwdriver.

  14. Panasonic PV-GS9 Speaker Replacement: 手順 14、 2の画像 1 Panasonic PV-GS9 Speaker Replacement: 手順 14、 2の画像 2
    • Using tweezers, remove the black tape that is holding the speaker in place.

  15. Panasonic PV-GS9 Speaker Replacement: 手順 15、 1の画像 1
    • Using #00 philips screwdriver, remove the 4.5mm silver screw on the speaker bracket.

  16. Panasonic PV-GS9 Speaker Replacement: 手順 16、 1の画像 1
    • The speaker is soldered to both ends of the board. Check the connections to see if they are still good. Desolder wires from speaker to replace, if necessary.

終わりに

To reassemble your device, follow these instructions in reverse order.

作成者

4人の作成者と共同で作成されました。

Joey Bradshaw

メンバー登録日: 04/18/10

10 ポイント

2のガイドは作成済み

チーム

Cal Poly, Team 7-9, Maness Spring 2010 Cal Poly, Team 7-9, Maness Spring 2010人のメンバー

CPSU-MANESS-S10S7G9

4 メンバー

15のガイドは作成済み

0 件のコメント

コメントを追加

統計データ:

過去 24時間: 0

過去 7 日: 0

過去 30 日: 1

今までの合計 1,394