メインコンテンツにスキップ

Panasonic Lumix DMC-ZS8 Mounting Bracket Replacement

必要な工具と部品

  1. Panasonic Lumix DMC-ZS8 Mounting Bracket Replacement, Mounting Bracket: 手順 1、 3の画像 1 Panasonic Lumix DMC-ZS8 Mounting Bracket Replacement, Mounting Bracket: 手順 1、 3の画像 2 Panasonic Lumix DMC-ZS8 Mounting Bracket Replacement, Mounting Bracket: 手順 1、 3の画像 3
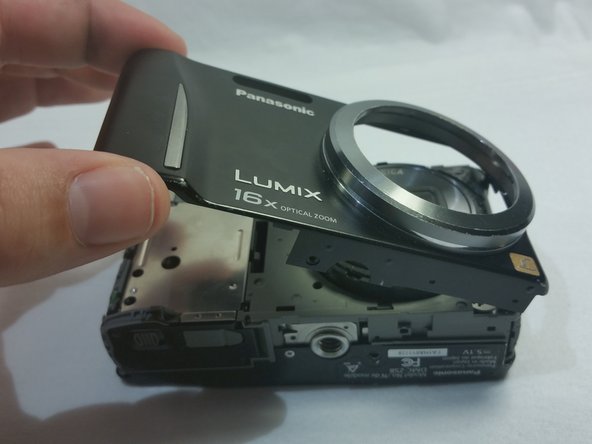
    • Remove the side panels by unscrewing the Phillips head screws on both sides of the camera.

  2. Panasonic Lumix DMC-ZS8 Mounting Bracket Replacement: 手順 2、 3の画像 1 Panasonic Lumix DMC-ZS8 Mounting Bracket Replacement: 手順 2、 3の画像 2 Panasonic Lumix DMC-ZS8 Mounting Bracket Replacement: 手順 2、 3の画像 3
    • Remove the back panel by unscrewing the two Phillips head screws on the bottom of the camera towards the back.

    • Lift the back panel from the camera and set it aside.

  3. Panasonic Lumix DMC-ZS8 Mounting Bracket Replacement: 手順 3、 3の画像 1 Panasonic Lumix DMC-ZS8 Mounting Bracket Replacement: 手順 3、 3の画像 2 Panasonic Lumix DMC-ZS8 Mounting Bracket Replacement: 手順 3、 3の画像 3
    • Unscrew the Phillips head screw shown in the picture to remove the front panel.

    • Remove the front panel to expose the bracket at the bottom of the camera.

  4. Panasonic Lumix DMC-ZS8 Mounting Bracket Replacement: 手順 4、 3の画像 1 Panasonic Lumix DMC-ZS8 Mounting Bracket Replacement: 手順 4、 3の画像 2 Panasonic Lumix DMC-ZS8 Mounting Bracket Replacement: 手順 4、 3の画像 3
    • Pry the right side of the bracket up to allow you to grab the bracket with tweezers.

    • Grab the bracket with tweezers and slide it toward the battery door to remove it from the frame of the camera.

終わりに

To reassemble your device, follow these instructions in reverse order.

作成者

4人の作成者と共同で作成されました。

Trevor Meyers

メンバー登録日: 03/03/15

356 ポイント

2のガイドは作成済み

チーム

Sam Houston State, Team 13-13, Blackburne Spring 2015 Sam Houston State, Team 13-13, Blackburne Spring 2015人のメンバー

SHSU-BLACKBURNE-S15S13G13

4 メンバー

10のガイドは作成済み

0 件のコメント

コメントを追加

統計データ:

過去 24時間: 0

過去 7 日: 0

過去 30 日: 1

今までの合計 296