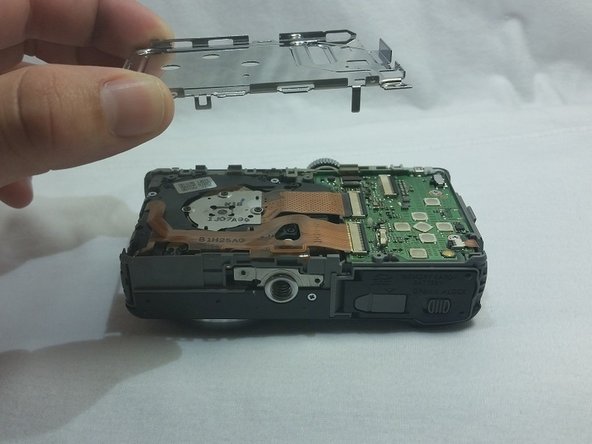
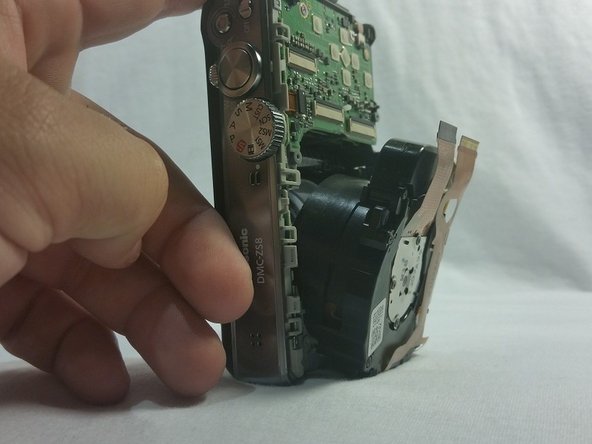
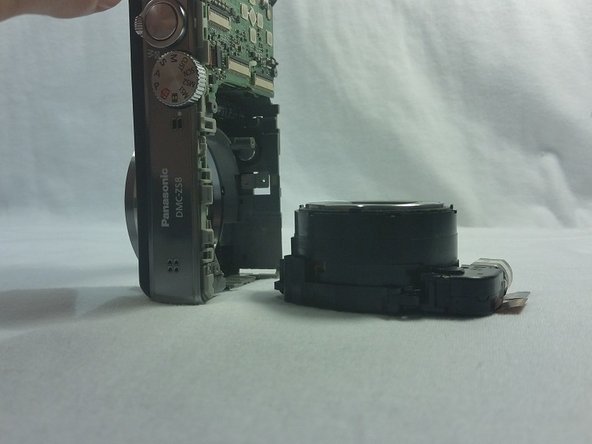
メインコンテンツにスキップ

Panasonic Lumix DMC-ZS8 Lens Replacement

必要な工具と部品

  1. Panasonic Lumix DMC-ZS8 Lens Replacement, Lens: 手順 1、 3の画像 1 Panasonic Lumix DMC-ZS8 Lens Replacement, Lens: 手順 1、 3の画像 2 Panasonic Lumix DMC-ZS8 Lens Replacement, Lens: 手順 1、 3の画像 3
    • Take a Phillips Head screwdriver and remove the 2mm screws on the left and right side of the camera.

  2. Panasonic Lumix DMC-ZS8 Lens Replacement: 手順 2、 1の画像 1
    • Remove the 3 Phillips 4mm screws located on the aluminum plating inside the camera.

    • Then remove the 3 Phillips 2mm screws located in the middle of the aluminum plating.

  3. Panasonic Lumix DMC-ZS8 Lens Replacement: 手順 3、 2の画像 1 Panasonic Lumix DMC-ZS8 Lens Replacement: 手順 3、 2の画像 2
    • Lay the camera on the front side where the aluminum panel is facing up.

    • Once the camera is in the right position, lift up the aluminum plating.

  4. Panasonic Lumix DMC-ZS8 Lens Replacement: 手順 4、 2の画像 1 Panasonic Lumix DMC-ZS8 Lens Replacement: 手順 4、 2の画像 2
    • Stand the camera up in the upright position.

    • Unplug both copper wiring plugs from the motherboard.

  5. Panasonic Lumix DMC-ZS8 Lens Replacement: 手順 5、 3の画像 1 Panasonic Lumix DMC-ZS8 Lens Replacement: 手順 5、 3の画像 2 Panasonic Lumix DMC-ZS8 Lens Replacement: 手順 5、 3の画像 3
    • Lift your camera into the upright position

    • The camera lens should slide out. (Pry it out with a spudger or a plastic opening tool if needed)

終わりに

To reassemble your device, follow these instructions in reverse order.

ある他の人がこのガイドを完成しました。

作成者

2人の作成者と共同で作成されました。

Elijah Painter

メンバー登録日: 03/03/15

153 ポイント

1ガイドが承認済み

チーム

Sam Houston State, Team 13-13, Blackburne Spring 2015 Sam Houston State, Team 13-13, Blackburne Spring 2015人のメンバー

SHSU-BLACKBURNE-S15S13G13

4 メンバー

10のガイドは作成済み

0 件のコメント

コメントを追加

統計データ:

過去 24時間: 0

過去 7 日: 3

過去 30 日: 10

今までの合計 1,478