メインコンテンツにスキップ

Panasonic Lumix DMC-ZS60 Camera Lens Replacement

必要な工具と部品

  1. Panasonic Lumix DMC-ZS60 Camera Lens Replacement, Battery: 手順 1、 1の画像 1
    • Use your finger to slide the black latch from the locked position to the open position on the memory card/battery door. This will open the door of the camera.

  2. Panasonic Lumix DMC-ZS60 Camera Lens Replacement: 手順 2、 2の画像 1 Panasonic Lumix DMC-ZS60 Camera Lens Replacement: 手順 2、 2の画像 2
    • Push up the black tab on the right-hand-side to spring release the battery.

  3. Panasonic Lumix DMC-ZS60 Camera Lens Replacement: 手順 3、 1の画像 1
    • Remove the battery by sliding it out from the camera.

  4. Panasonic Lumix DMC-ZS60 Camera Lens Replacement, LCD Screen: 手順 4、 3の画像 1 Panasonic Lumix DMC-ZS60 Camera Lens Replacement, LCD Screen: 手順 4、 3の画像 2 Panasonic Lumix DMC-ZS60 Camera Lens Replacement, LCD Screen: 手順 4、 3の画像 3
    • Using the Phillips #000 Screwdriver, unscrew six 3mm screws. There are two screws located on three sides excluding the top.

  5. Panasonic Lumix DMC-ZS60 Camera Lens Replacement: 手順 5、 1の画像 1
    • Pry off back casing and set aside.

  6. Panasonic Lumix DMC-ZS60 Camera Lens Replacement: 手順 6、 2の画像 1 Panasonic Lumix DMC-ZS60 Camera Lens Replacement: 手順 6、 2の画像 2
    • Pull the right side control dial circuit board up.

    • Use tweezers to pry up the white retaining flap and gently pull the circuit board out.

  7. Panasonic Lumix DMC-ZS60 Camera Lens Replacement: 手順 7、 3の画像 1 Panasonic Lumix DMC-ZS60 Camera Lens Replacement: 手順 7、 3の画像 2 Panasonic Lumix DMC-ZS60 Camera Lens Replacement: 手順 7、 3の画像 3
    • Flip the LCD screen to the left.

    • Unscrew the two 3mm on the top right side using the Phillips #000 Screwdriver.

    • Lift the gray plate cover off.

  8. Panasonic Lumix DMC-ZS60 Camera Lens Replacement: 手順 8、 2の画像 1 Panasonic Lumix DMC-ZS60 Camera Lens Replacement: 手順 8、 2の画像 2
    • Use tweezers to pry up the black retaining flat and gently pull to free the LCD screen from the device.

  9. Panasonic Lumix DMC-ZS60 Camera Lens Replacement, Motherboard: 手順 9、 1の画像 1
    • Remove these three 3 mm screws with a Phillips #000 screwdriver.

  10. Panasonic Lumix DMC-ZS60 Camera Lens Replacement: 手順 10、 3の画像 1 Panasonic Lumix DMC-ZS60 Camera Lens Replacement: 手順 10、 3の画像 2 Panasonic Lumix DMC-ZS60 Camera Lens Replacement: 手順 10、 3の画像 3
    • Disconnect these 9 ribbon cables from the motherboard. One ribbon cable is hidden underneath the larger one on the left.

    • Use tweezers to first lift up the retaining flaps for each connector, then pull out the ribbon cable.

  11. Panasonic Lumix DMC-ZS60 Camera Lens Replacement: 手順 11、 2の画像 1 Panasonic Lumix DMC-ZS60 Camera Lens Replacement: 手順 11、 2の画像 2
    • Now you will able to lift the motherboard up and it will only be connected by two cables.

    • To fully remove the motherboard, you will have to solder the metal in order to remove the wires.

    • For more information on soldering, please visit the How to Solder and Desolder Connections guide.

  12. Panasonic Lumix DMC-ZS60 Camera Lens Replacement, Camera Lens: 手順 12、 2の画像 1 Panasonic Lumix DMC-ZS60 Camera Lens Replacement, Camera Lens: 手順 12、 2の画像 2
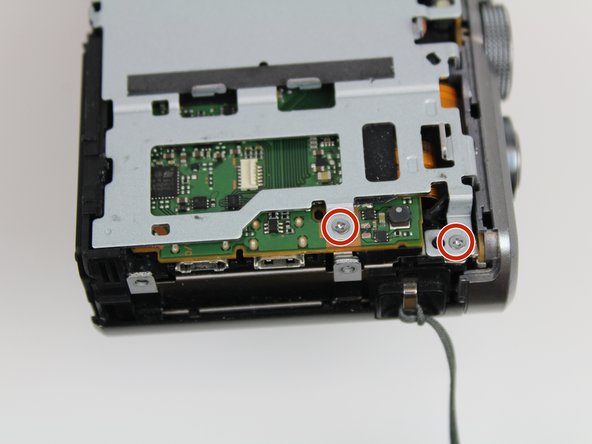
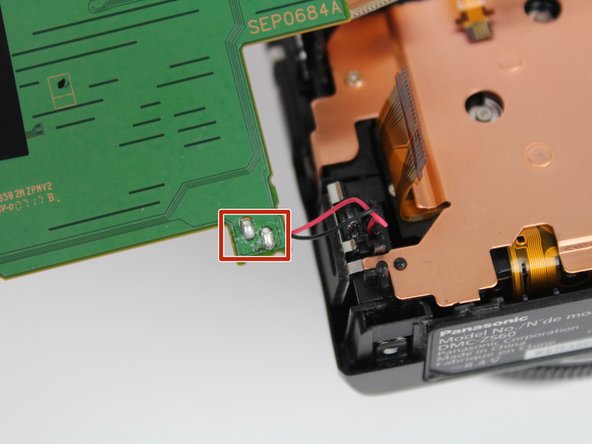
    • Unscrew the three 3mm screws attached to the plate cover using a Phillips #000 Screwdriver.

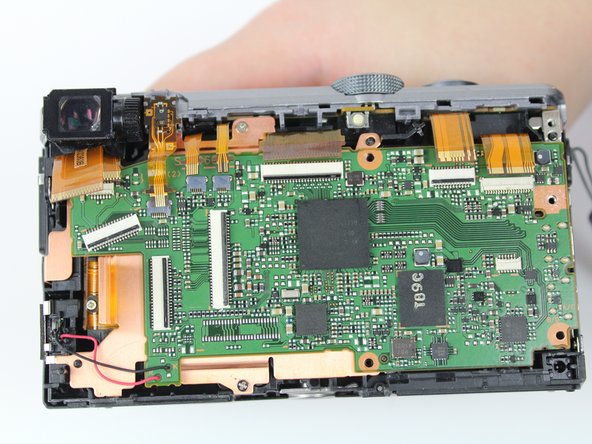
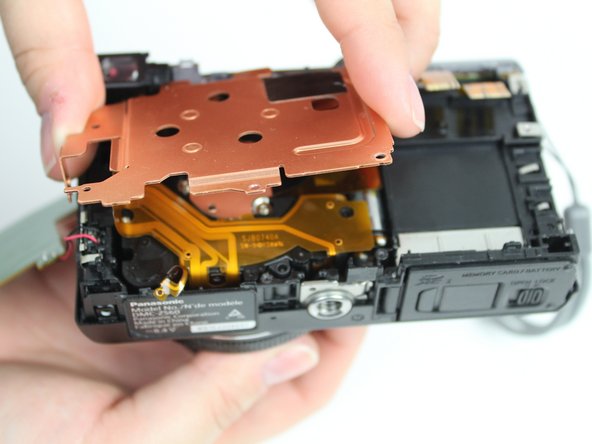
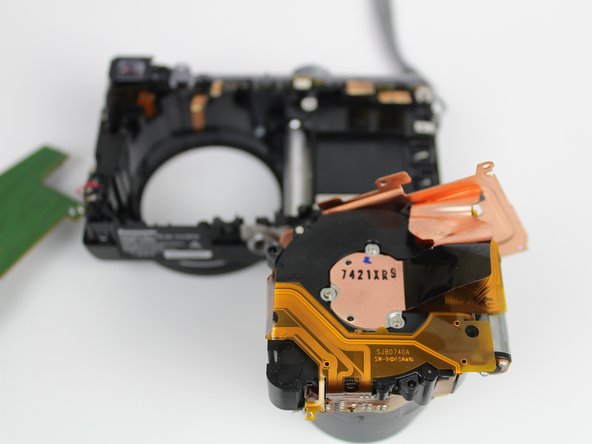
    • Pull off the plate cover to uncover the camera lens.

  13. Panasonic Lumix DMC-ZS60 Camera Lens Replacement: 手順 13、 2の画像 1 Panasonic Lumix DMC-ZS60 Camera Lens Replacement: 手順 13、 2の画像 2
    • Lift the camera lens from the camera.

終わりに

To reassemble your device, follow these instructions in reverse order.

ある他の人がこのガイドを完成しました。

作成者

2人の作成者と共同で作成されました。

Jade Blackert

メンバー登録日: 01/16/20

205 ポイント

2のガイドは作成済み

コメント 1 件

A few years ago, I had a 30x zoom like this. It got a spot of dust inside the lens that showed up in photos, especially zoomed-in. I tried to unscrew the front of the lens to clean out the dust but the plastic broke, ruining the camera.

Fred Oswald - 返信

コメントを追加

統計データ:

過去 24時間: 3

過去 7 日: 13

過去 30 日: 40

今までの合計 2,216