メインコンテンツにスキップ

Panasonic Lumix DMC-ZS40 Motherboard Replacement

必要な工具と部品

  1. Panasonic Lumix DMC-ZS40 Motherboard Replacement, Battery: 手順 1、 2の画像 1 Panasonic Lumix DMC-ZS40 Motherboard Replacement, Battery: 手順 1、 2の画像 2
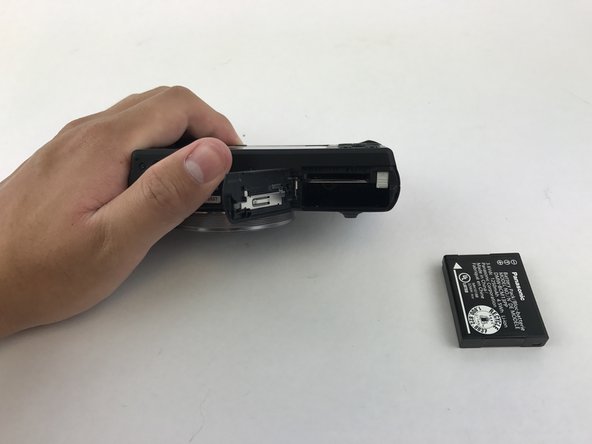
    • Find the battery/memory card door on the bottom right of the camera.

    • Use your finger or screw driver to slide the grey latch from the locked position to the open position. This will swing open the door.

  2. Panasonic Lumix DMC-ZS40 Motherboard Replacement: 手順 2、 1の画像 1
    • Push up on the right-hand-side tab to release the battery.

  3. Panasonic Lumix DMC-ZS40 Motherboard Replacement: 手順 3、 2の画像 1 Panasonic Lumix DMC-ZS40 Motherboard Replacement: 手順 3、 2の画像 2
    • Remove battery from camera.

  4. Panasonic Lumix DMC-ZS40 Motherboard Replacement, LCD Screen: 手順 4、 3の画像 1 Panasonic Lumix DMC-ZS40 Motherboard Replacement, LCD Screen: 手順 4、 3の画像 2 Panasonic Lumix DMC-ZS40 Motherboard Replacement, LCD Screen: 手順 4、 3の画像 3
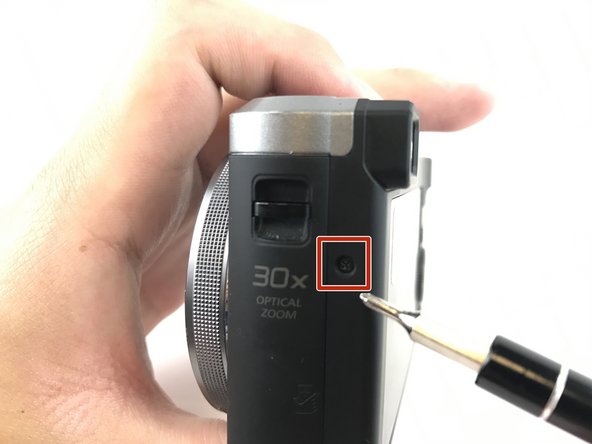
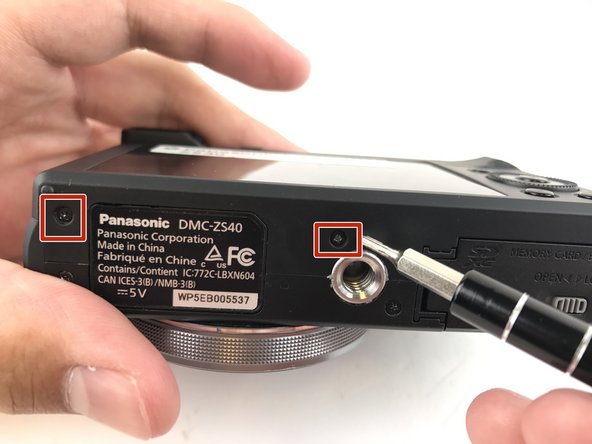
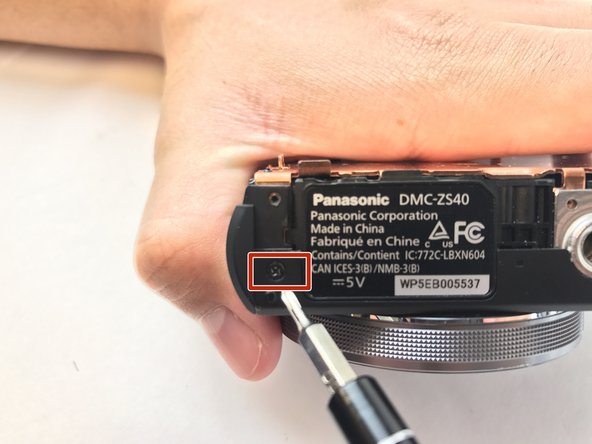
    • Unscrew the five 3mm screws located around the sides of the camera using a PH000 bit or Phillips 000 Screwdriver.

  5. Panasonic Lumix DMC-ZS40 Motherboard Replacement: 手順 5、 2の画像 1 Panasonic Lumix DMC-ZS40 Motherboard Replacement: 手順 5、 2の画像 2
    • Pry off the back casing of the camera and place the camera face down.

  6. Panasonic Lumix DMC-ZS40 Motherboard Replacement: 手順 6、 1の画像 1
    • Flip the right hand side control dial circuit board up.

  7. Panasonic Lumix DMC-ZS40 Motherboard Replacement: 手順 7、 3の画像 1 Panasonic Lumix DMC-ZS40 Motherboard Replacement: 手順 7、 3の画像 2 Panasonic Lumix DMC-ZS40 Motherboard Replacement: 手順 7、 3の画像 3
    • Turn the LCD screen over to the side exposing the connection to the motherboard.

    • Remove the display data cable connecting the LCD screen to the motherboard. Using tweezers, pry up the black retaining flap then gently pull the display data cable free.

    • Be careful when handling any display data cables in the camera as they are prone to tearing.

    • To close for reassembly, slide the display data cable back into the ZIF connector and close the retaining flap.

  8. Panasonic Lumix DMC-ZS40 Motherboard Replacement, Motherboard: 手順 8、 1の画像 1
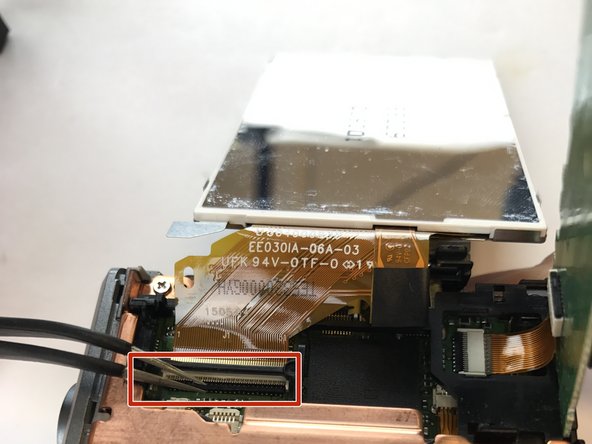
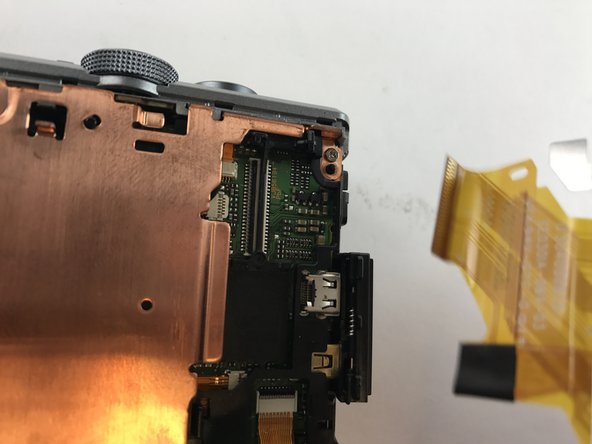
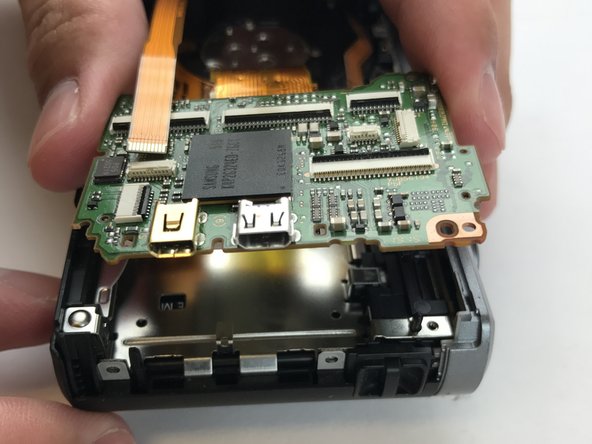
    • Disconnect the control dial from the motherboard. Locate the ZIF connector for the control dial. Use tweezers or screwdrivers to lift up on the retaining flap to remove the ribbon cable.

    • The connector ribbons are prone to tearing so use care during removal.

  9. Panasonic Lumix DMC-ZS40 Motherboard Replacement: 手順 9、 1の画像 1
    • Pry the HDMI cover off the side of the camera.

    • No tools are required for this step.

  10. Panasonic Lumix DMC-ZS40 Motherboard Replacement: 手順 10、 3の画像 1 Panasonic Lumix DMC-ZS40 Motherboard Replacement: 手順 10、 3の画像 2 Panasonic Lumix DMC-ZS40 Motherboard Replacement: 手順 10、 3の画像 3
    • Remove these four 4mm on the top of the plate cover and the 3mm screw on the side of the camera using a PH000 bit head. Once the screws are removed, the plate cover should lift right up.

    • Keep track of the different screw lengths and do not mix them up.

  11. Panasonic Lumix DMC-ZS40 Motherboard Replacement: 手順 11、 2の画像 1 Panasonic Lumix DMC-ZS40 Motherboard Replacement: 手順 11、 2の画像 2
    • Pry the black cover shielding the ZIF connectors off with your hand.

  12. Panasonic Lumix DMC-ZS40 Motherboard Replacement: 手順 12、 2の画像 1 Panasonic Lumix DMC-ZS40 Motherboard Replacement: 手順 12、 2の画像 2
    • Disconnect these 6 ribbon cables from the motherboard. Use tweezers or a screw driver to lift up on the retaining flaps for each ZIF connector.

終わりに

To reassemble your device, follow these instructions in reverse order.

ある他の人がこのガイドを完成しました。

作成者

3人の作成者と共同で作成されました。

Kevin Tran

メンバー登録日: 02/14/17

215 ポイント

1ガイドが承認済み

チーム

USF Tampa, Team 20-3, Remmell Spring 2017 USF Tampa, Team 20-3, Remmell Spring 2017人のメンバー

USFT-REMMELL-S17S20G3

3 メンバー

10のガイドは作成済み

0 件のコメント

コメントを追加

統計データ:

過去 24時間: 0

過去 7 日: 2

過去 30 日: 4

今までの合計 661