メインコンテンツにスキップ

Panasonic Lumix DMC-ZS35 LCD Screen Replacement

必要な工具と部品

  1. Panasonic Lumix DMC-ZS35 LCD Screen Replacement, Back Casing: 手順 1、 3の画像 1 Panasonic Lumix DMC-ZS35 LCD Screen Replacement, Back Casing: 手順 1、 3の画像 2 Panasonic Lumix DMC-ZS35 LCD Screen Replacement, Back Casing: 手順 1、 3の画像 3
    • Remove the six 4mm screws located on the side and bottom of the camera casing using a Phillips #000 screwdriver.

  2. Panasonic Lumix DMC-ZS35 LCD Screen Replacement: 手順 2、 2の画像 1 Panasonic Lumix DMC-ZS35 LCD Screen Replacement: 手順 2、 2の画像 2
    • Use a plastic opening tool to carefully separate the back casing from the main body of the camera. It's advised to run along the entire "seam" of the casing and the camera with the tool to ensure full separation.

  3. Panasonic Lumix DMC-ZS35 LCD Screen Replacement: 手順 3、 1の画像 1
    • Gently pry apart the back casing from the body of the camera. It's recommended to apply as minimal force as is necessary to prevent unintended damage to the camera or the casing.

  4. Panasonic Lumix DMC-ZS35 LCD Screen Replacement, Screen: 手順 4、 2の画像 1 Panasonic Lumix DMC-ZS35 LCD Screen Replacement, Screen: 手順 4、 2の画像 2
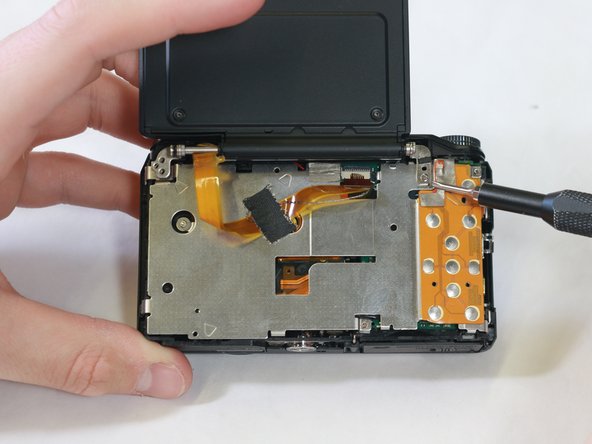
    • Unscrew the four 3mm screws holding the LCD screen hinge in place using a Phillips #000 screwdriver.

  5. Panasonic Lumix DMC-ZS35 LCD Screen Replacement: 手順 5、 1の画像 1
    • Gently pull LCD screen ribbon cable from internal port to disconnect the screen and prevent unwanted damage.

    • Lift the freed LCD screen from the base camera to complete the process.

終わりに

To reassemble your device, follow these instructions in reverse order.

作成者

2人の作成者と共同で作成されました。

Rachel Hughes

メンバー登録日: 01/31/20

688 ポイント

4のガイドは作成済み

チーム

UW Stout, Team S1-G2, Schneider-Bateman Spring 2020 UW Stout, Team S1-G2, Schneider-Bateman Spring 2020人のメンバー

UWSTOUT-SCHNEIDER-BATEMAN-S20S1G2

4 メンバー

10のガイドは作成済み

0 件のコメント

コメントを追加

統計データ:

過去 24時間: 0

過去 7 日: 4

過去 30 日: 23

今までの合計 287