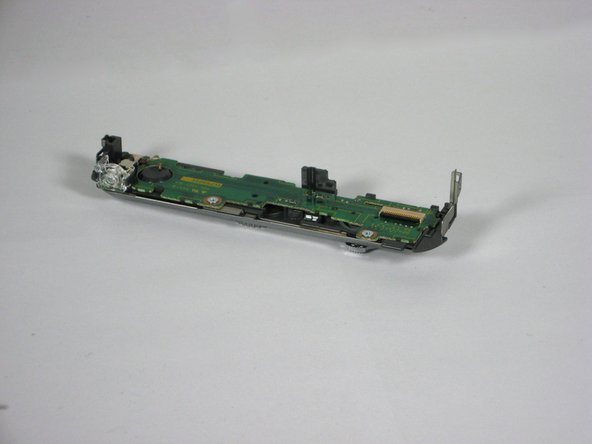
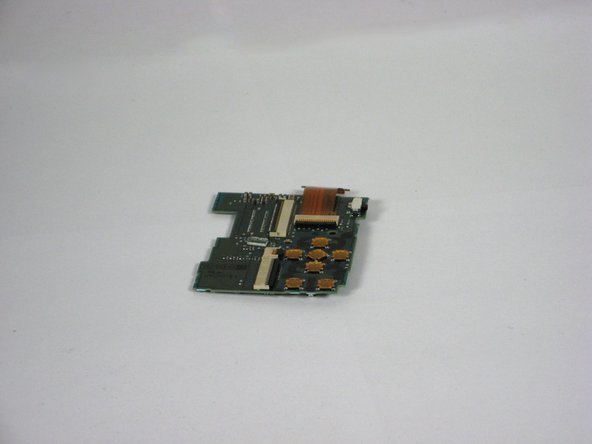
メインコンテンツにスキップ

Panasonic Lumix DMC-TZ5 AV port circuit board Replacement

必要な工具と部品

  1. Panasonic Lumix DMC-TZ5 AV port circuit board Replacement, Back Cover: 手順 1、 1の画像 1
    • Remove the battery and memory card from the device.

  2. Panasonic Lumix DMC-TZ5 AV port circuit board Replacement: 手順 2、 1の画像 1
    • Remove 4 screws from the right side of the camera.

    • There are two 3.4mm screws at the top.

    • There are two 2.2mm screws at the bottom.

  3. Panasonic Lumix DMC-TZ5 AV port circuit board Replacement: 手順 3、 1の画像 1
    • Remove the single 3.4mm screw on the left side of the camera.

  4. Panasonic Lumix DMC-TZ5 AV port circuit board Replacement: 手順 4、 1の画像 1
    • Remove 5 screws from the base of the camera.

    • There are two 2.2mm screws next to the battery compartment.

    • There are three 4mm screws around the tripod mount.

  5. Panasonic Lumix DMC-TZ5 AV port circuit board Replacement: 手順 5、 1の画像 1
    • Slowly slide the back cover away from the device

    • The back casing is held in place by two ribbon cables. Do not pull the back cover too far from the camera.

  6. Panasonic Lumix DMC-TZ5 AV port circuit board Replacement: 手順 6、 2の画像 1 Panasonic Lumix DMC-TZ5 AV port circuit board Replacement: 手順 6、 2の画像 2
    • Detach both ribbon cables using a spudger.

    • Use the tip of the spudger to lift the black clip upward, unlocking the ribbon cable.

  7. Panasonic Lumix DMC-TZ5 AV port circuit board Replacement: 手順 7、 1の画像 1
    • Remove the back casing from the camera.

  8. Panasonic Lumix DMC-TZ5 AV port circuit board Replacement, button board: 手順 8、 2の画像 1 Panasonic Lumix DMC-TZ5 AV port circuit board Replacement, button board: 手順 8、 2の画像 2
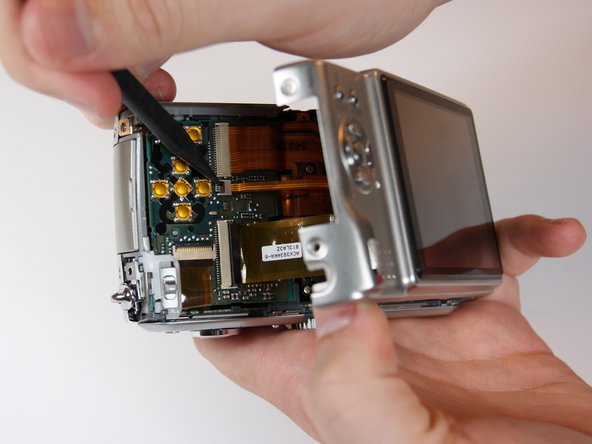
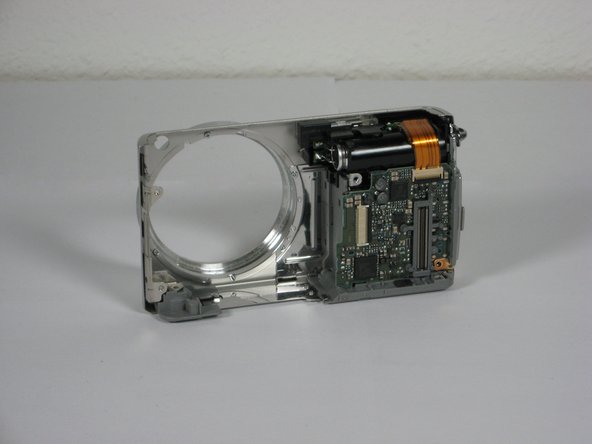
    • Use the spudger to remove the ribbon cable connecting the lens casing to the circuit board by lifting up the black clip.

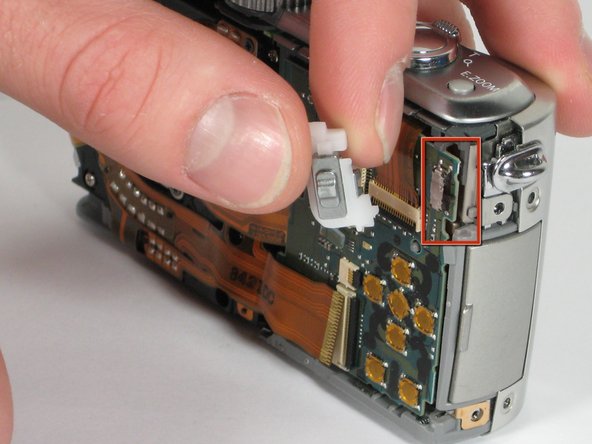
    • Carefully remove the function switch cover. This unit snaps on and off.

  9. Panasonic Lumix DMC-TZ5 AV port circuit board Replacement: 手順 9、 1の画像 1
    • Carefully unsnap the front logic board from the rear logic board using a spudger.

  10. Panasonic Lumix DMC-TZ5 AV port circuit board Replacement: 手順 10、 2の画像 1 Panasonic Lumix DMC-TZ5 AV port circuit board Replacement: 手順 10、 2の画像 2
    • Slide the entire top part of the camera that is attached to the logic board, horizontally away from the camera.

  11. Panasonic Lumix DMC-TZ5 AV port circuit board Replacement: 手順 11、 3の画像 1 Panasonic Lumix DMC-TZ5 AV port circuit board Replacement: 手順 11、 3の画像 2 Panasonic Lumix DMC-TZ5 AV port circuit board Replacement: 手順 11、 3の画像 3
    • Remove the ribbon cable from the top connection panel by unlocking the black clip with a spudger.

    • This leaves you with the logic board and the top connection panel separate and free from the camera

  12. Panasonic Lumix DMC-TZ5 AV port circuit board Replacement, Camera Lens Assembly: 手順 12、 1の画像 1
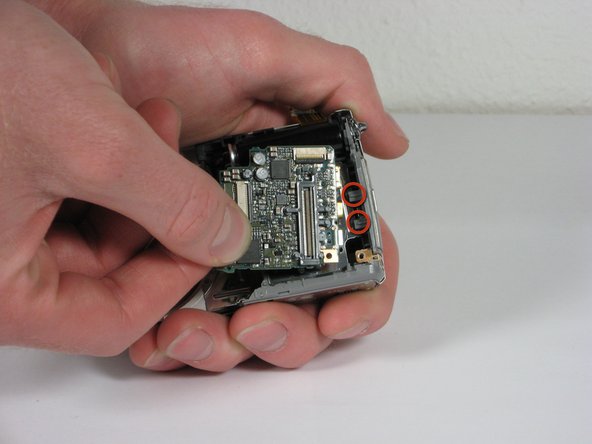
    • Use a spudger to detach the ribbon cable from the circuit board. Lift the black clip up to unlock it as before.

  13. Panasonic Lumix DMC-TZ5 AV port circuit board Replacement: 手順 13、 1の画像 1
    • Remove the 3 screws holding the lens assembly in place.

    • The two screws on the left are 4.5mm with washers.

    • The single screw on the right is 4mm.

  14. Panasonic Lumix DMC-TZ5 AV port circuit board Replacement: 手順 14、 1の画像 1
    • Push the lens assembly slightly toward the circuit board, and pull the left side out of the casing first. You will have to wiggle this out gently.

  15. Panasonic Lumix DMC-TZ5 AV port circuit board Replacement: 手順 15、 2の画像 1 Panasonic Lumix DMC-TZ5 AV port circuit board Replacement: 手順 15、 2の画像 2
    • Remove the entire assembly out of the casing.

    • The ribbons on the left and bottom of the assembly simply rest on the camera housing.

  16. Panasonic Lumix DMC-TZ5 AV port circuit board Replacement, AV port circuit board: 手順 16、 1の画像 1
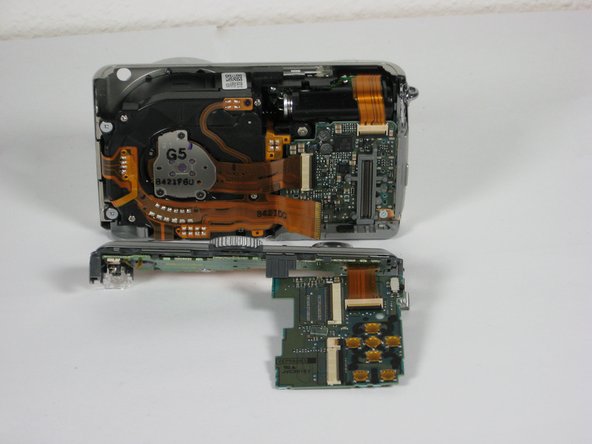
    • Use the spudger to unclip the top ribbon cable from the circuit board.

  17. Panasonic Lumix DMC-TZ5 AV port circuit board Replacement: 手順 17、 1の画像 1
    • Remove the single 2mm screw in the bottom right corner of the circuit board

  18. Panasonic Lumix DMC-TZ5 AV port circuit board Replacement: 手順 18、 2の画像 1 Panasonic Lumix DMC-TZ5 AV port circuit board Replacement: 手順 18、 2の画像 2
    • Gently slide the circuit board out away from the port connections. Pull it toward where the lens used to be. Some wiggling may be necessary to remove.

    • The circuit board is fitted into slots attached to the side of the camera. Do not angle upwards to remove.

  19. Panasonic Lumix DMC-TZ5 AV port circuit board Replacement: 手順 19、 1の画像 1
    • Take note of how the slots fit into the circuit board for easy replacement.

終わりに

To reassemble your device, follow these instructions in reverse order.

2 の人々がこのガイドを完成させました。

作成者

5人の作成者と共同で作成されました。

Kevin Lufkin

メンバー登録日: 10/11/10

158 ポイント

2のガイドは作成済み

チーム

Cal Poly, Team 9-21, Regan Fall 2010 Cal Poly, Team 9-21, Regan Fall 2010人のメンバー

CPSU-REGAN-F10S9G21

4 メンバー

14のガイドは作成済み

コメント 1 件

Where can I buy this part? Thanks!

Janx38 - 返信

コメントを追加

統計データ:

過去 24時間: 0

過去 7 日: 0

過去 30 日: 9

今までの合計 8,365