メインコンテンツにスキップ

Panasonic Lumix DMC-G7 Electronic Viewfinder Replacement

必要な工具と部品

  1. Panasonic Lumix DMC-G7 Electronic Viewfinder Replacement, Mainboard: 手順 1、 2の画像 1 Panasonic Lumix DMC-G7 Electronic Viewfinder Replacement, Mainboard: 手順 1、 2の画像 2
    • Unlock and open the battery compartment on the bottom of the camera.

    • Remove both the battery and SD card.

  2. Panasonic Lumix DMC-G7 Electronic Viewfinder Replacement: 手順 2、 3の画像 1 Panasonic Lumix DMC-G7 Electronic Viewfinder Replacement: 手順 2、 3の画像 2 Panasonic Lumix DMC-G7 Electronic Viewfinder Replacement: 手順 2、 3の画像 3
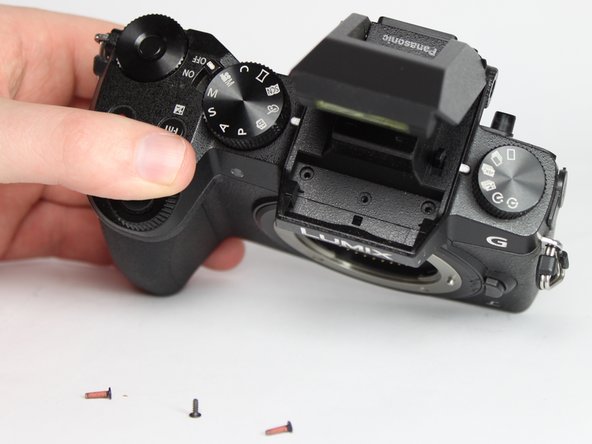
    • Remove the four indicated 3.0mm long black screws from the bottom of the camera and the viewfinder housing using a PH0 Phillips screwdriver.

    • There are four screws on the bottom of the camera. Only remove the two nearest to the screen.

  3. Panasonic Lumix DMC-G7 Electronic Viewfinder Replacement: 手順 3、 3の画像 1 Panasonic Lumix DMC-G7 Electronic Viewfinder Replacement: 手順 3、 3の画像 2 Panasonic Lumix DMC-G7 Electronic Viewfinder Replacement: 手順 3、 3の画像 3
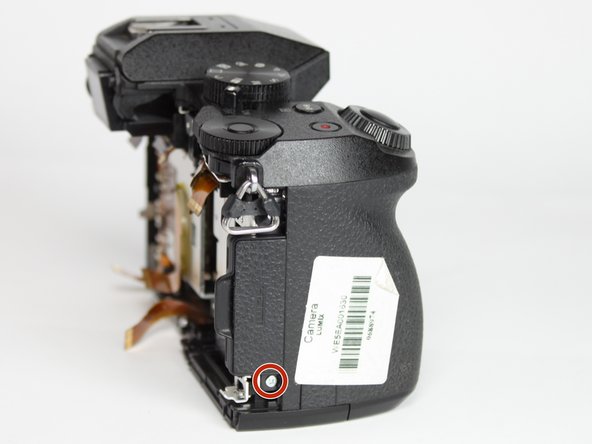
    • Remove the four indicated 6.0mm long black screws using a PH0 Phillips screwdriver.

    • Three of the screws are located on the sides of the chassis and one is directly underneath the battery compartment lid.

  4. Panasonic Lumix DMC-G7 Electronic Viewfinder Replacement: 手順 4、 3の画像 1 Panasonic Lumix DMC-G7 Electronic Viewfinder Replacement: 手順 4、 3の画像 2 Panasonic Lumix DMC-G7 Electronic Viewfinder Replacement: 手順 4、 3の画像 3
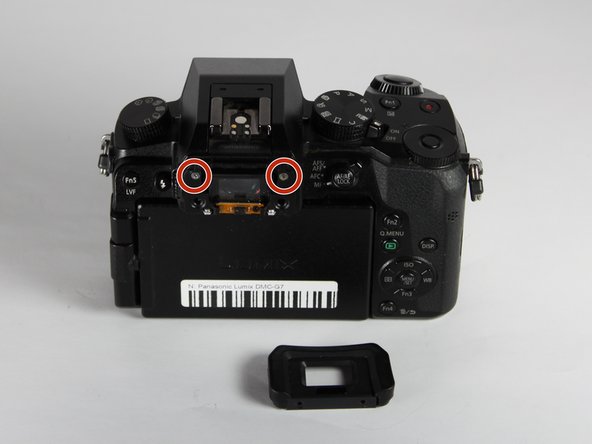
    • Remove the viewfinder eye cup by pulling up and out from the bottom to separate the locking clips from the camera.

    • Do not flex the eye cup too aggressively as it may lose its shape.

    • Remove the two indicated silver 3.5mm long screws adjacent to the viewfinder screen using a PH0 Phillips screwdriver.

  5. Panasonic Lumix DMC-G7 Electronic Viewfinder Replacement: 手順 5、 2の画像 1 Panasonic Lumix DMC-G7 Electronic Viewfinder Replacement: 手順 5、 2の画像 2
    • Use an iFixit opening tool (or similarly long and thin object) to insert into the gap between the two camera halves and pry the camera apart from the top.

  6. Panasonic Lumix DMC-G7 Electronic Viewfinder Replacement: 手順 6、 3の画像 1 Panasonic Lumix DMC-G7 Electronic Viewfinder Replacement: 手順 6、 3の画像 2 Panasonic Lumix DMC-G7 Electronic Viewfinder Replacement: 手順 6、 3の画像 3
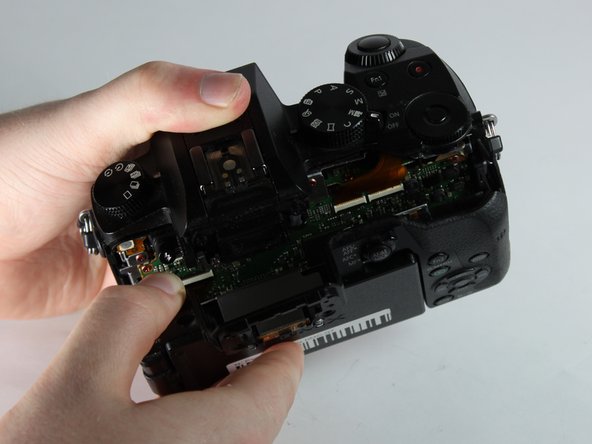
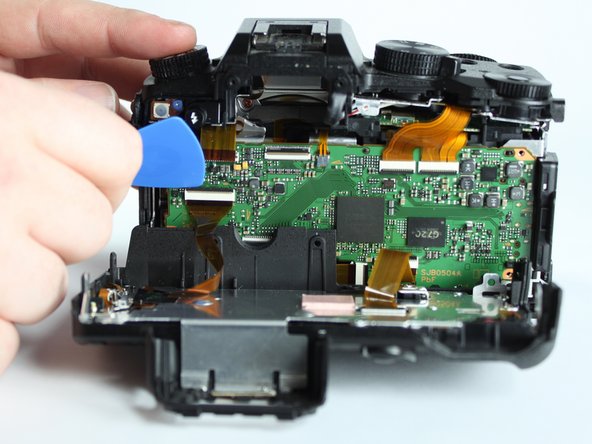
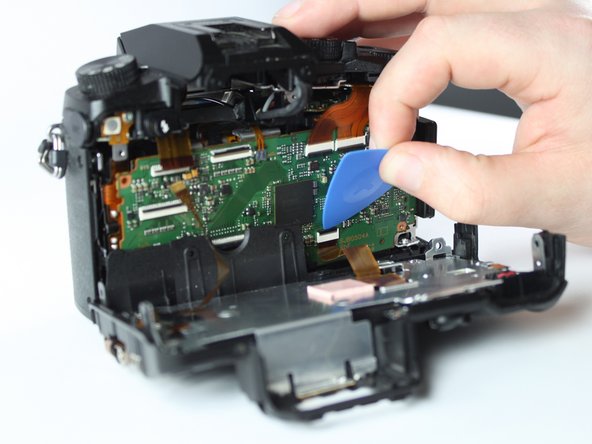
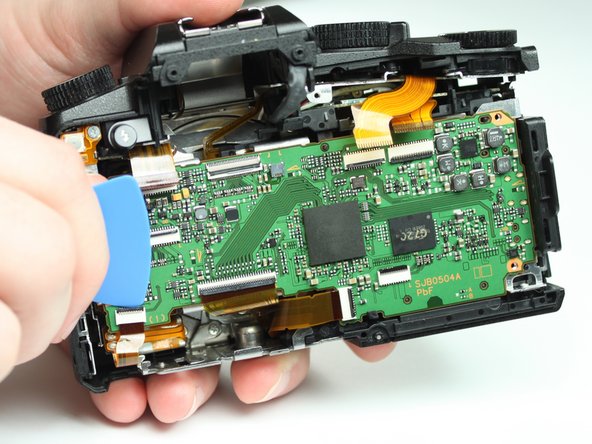
    • Remove the two indicated ribbon cables before separating the two halves of the camera.

    • Using a flat object, pry open the black tabs above the ribbon cable connectors by gently pulling away from the motherboard.

    • An opening pick is recommended, but any equally small and flat object will work.

    • Ribbon cables are fragile, so put as little stress on them as possible.

  7. Panasonic Lumix DMC-G7 Electronic Viewfinder Replacement: 手順 7、 2の画像 1 Panasonic Lumix DMC-G7 Electronic Viewfinder Replacement: 手順 7、 2の画像 2
    • Remove the 4 indicated flex cables from top of mainboard

    • Remove the indicated small flex cable from top of mainboard.

    • The small flex cable does not have a lock: simply pull to disconnect it.

  8. Panasonic Lumix DMC-G7 Electronic Viewfinder Replacement: 手順 8、 2の画像 1 Panasonic Lumix DMC-G7 Electronic Viewfinder Replacement: 手順 8、 2の画像 2
    • Remove the 3 indicated flex cables from the bottom of the mainboard.

  9. Panasonic Lumix DMC-G7 Electronic Viewfinder Replacement: 手順 9、 3の画像 1 Panasonic Lumix DMC-G7 Electronic Viewfinder Replacement: 手順 9、 3の画像 2 Panasonic Lumix DMC-G7 Electronic Viewfinder Replacement: 手順 9、 3の画像 3
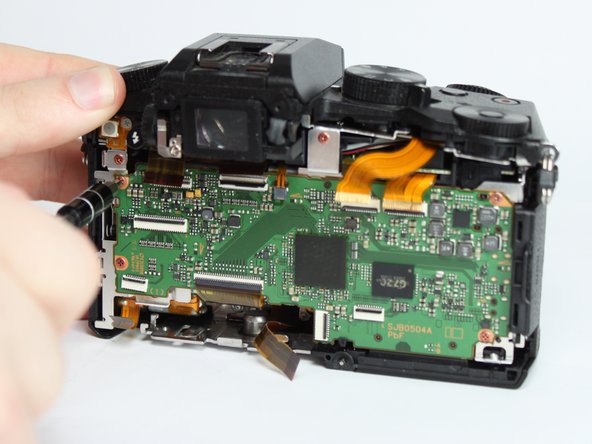
    • Remove the 4 indicated red 3.0mm long screws from the corners of mainboard using a Phillips PH0 screwdriver.

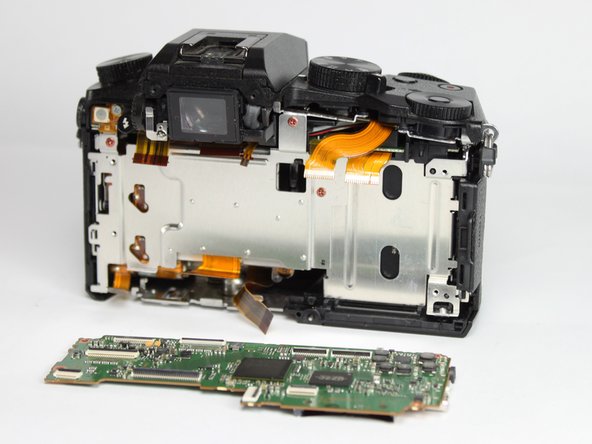
    • With the eyepiece facing away from you, pull up on the main PCB from the left side and then pull it away from the chassis.

    • There is a plastic locking tab on the bottom of the camera that holds the mainboard PCB.

    • A replacement mainboard can be purchased from AliExpress here

  10. Panasonic Lumix DMC-G7 Electronic Viewfinder Replacement, Electronic Viewfinder: 手順 10、 3の画像 1 Panasonic Lumix DMC-G7 Electronic Viewfinder Replacement, Electronic Viewfinder: 手順 10、 3の画像 2 Panasonic Lumix DMC-G7 Electronic Viewfinder Replacement, Electronic Viewfinder: 手順 10、 3の画像 3
    • Remove the three indicated red 3.0mm screws from heat sink shield using a Phillips PH0 screwdriver, then remove the heat sink.

  11. Panasonic Lumix DMC-G7 Electronic Viewfinder Replacement: 手順 11、 2の画像 1 Panasonic Lumix DMC-G7 Electronic Viewfinder Replacement: 手順 11、 2の画像 2
    • Use a Phillips PH0 screwdriver to remove the two indicated black 6.0mm long screws from top of camera, underneath the flash mechanism.

    • Remove the indicated black 4.0mm long screw from the top of the camera.

  12. Panasonic Lumix DMC-G7 Electronic Viewfinder Replacement: 手順 12、 2の画像 1 Panasonic Lumix DMC-G7 Electronic Viewfinder Replacement: 手順 12、 2の画像 2
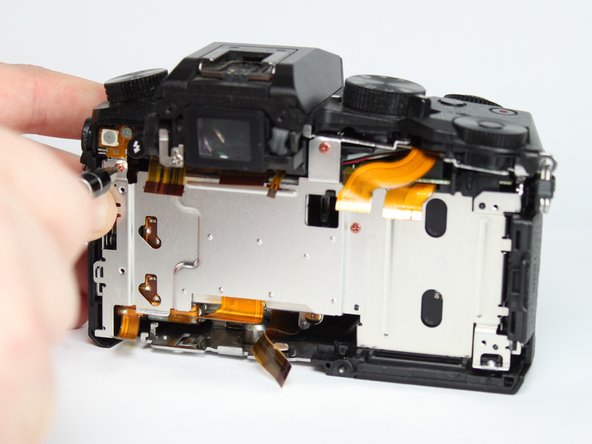
    • Remove the three indicated silver 5.0mm long screws from the back of the camera and the right side using a Phillips PH0 screwdriver.

    • The two screws on the back require a very thin screwdriver as they are only accessible through the holes on the back shield.

  13. Panasonic Lumix DMC-G7 Electronic Viewfinder Replacement: 手順 13、 3の画像 1 Panasonic Lumix DMC-G7 Electronic Viewfinder Replacement: 手順 13、 3の画像 2 Panasonic Lumix DMC-G7 Electronic Viewfinder Replacement: 手順 13、 3の画像 3
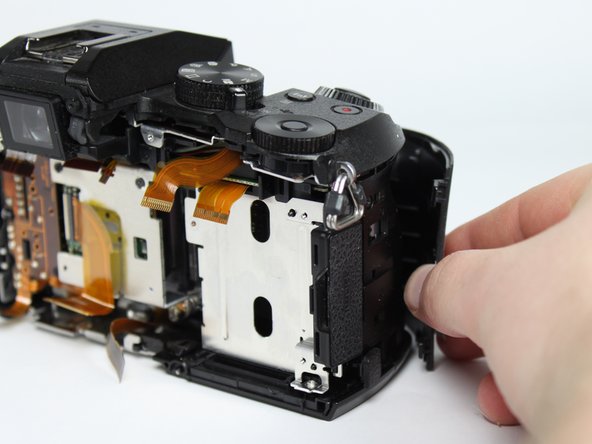
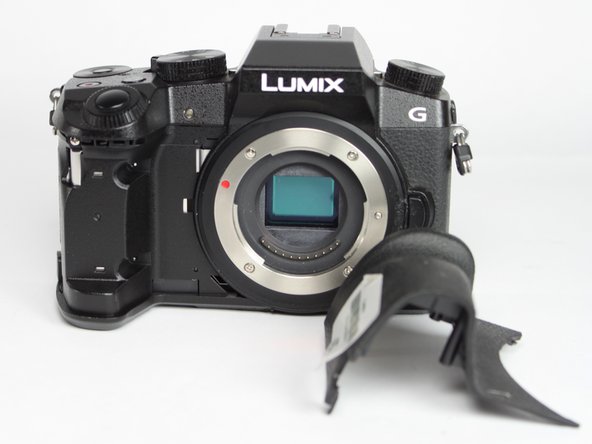
    • Remove the front grip from the camera by pulling it forward and out.

  14. Panasonic Lumix DMC-G7 Electronic Viewfinder Replacement: 手順 14、 2の画像 1 Panasonic Lumix DMC-G7 Electronic Viewfinder Replacement: 手順 14、 2の画像 2
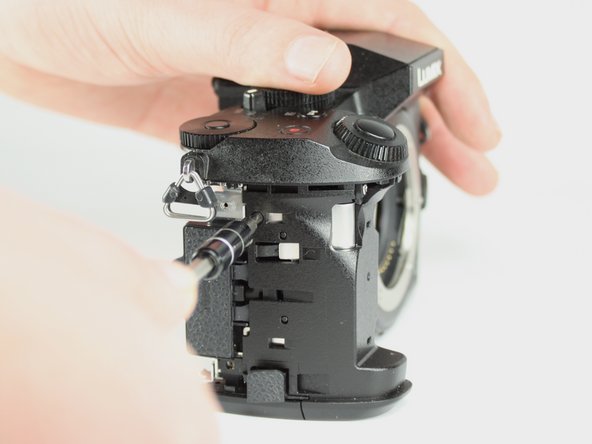
    • Remove the indicated black 4.0mm long screw from the side under the front cover using a Phillips PH0 screwdriver.

  15. Panasonic Lumix DMC-G7 Electronic Viewfinder Replacement: 手順 15、 2の画像 1 Panasonic Lumix DMC-G7 Electronic Viewfinder Replacement: 手順 15、 2の画像 2
    • Remove the indicated silver 5.0mm long screw from under the front cover using a Phillips PH0 screwdriver.

  16. Panasonic Lumix DMC-G7 Electronic Viewfinder Replacement: 手順 16、 3の画像 1 Panasonic Lumix DMC-G7 Electronic Viewfinder Replacement: 手順 16、 3の画像 2 Panasonic Lumix DMC-G7 Electronic Viewfinder Replacement: 手順 16、 3の画像 3
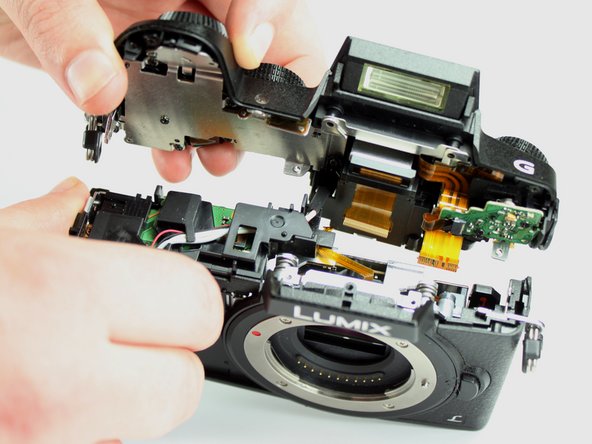
    • Lift the top unit away, separating it from the rest of the unit.

  17. Panasonic Lumix DMC-G7 Electronic Viewfinder Replacement: 手順 17、 3の画像 1 Panasonic Lumix DMC-G7 Electronic Viewfinder Replacement: 手順 17、 3の画像 2 Panasonic Lumix DMC-G7 Electronic Viewfinder Replacement: 手順 17、 3の画像 3
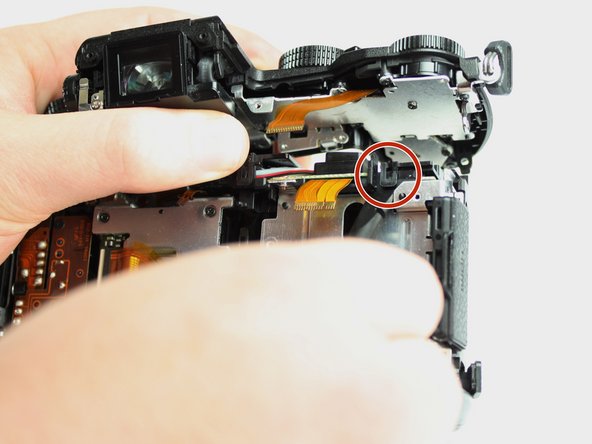
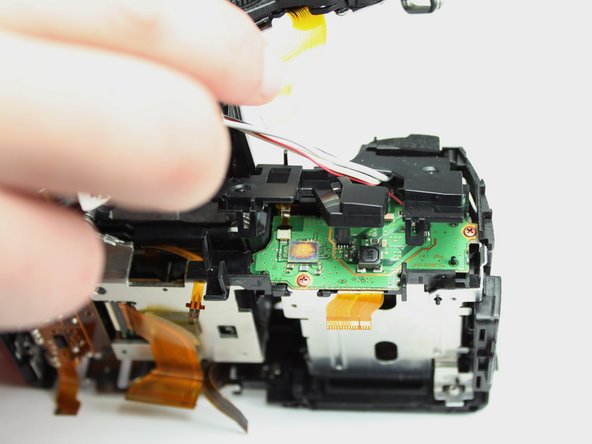
    • Pull the top panel away from the rest of the camera to reveal the flash wire and plastic cover.

    • Use a spudger (or other small prying tool) to release the locking tab on the plastic cover.

    • Pull the flash wire out under the plastic capacitor PCB cover. At the same time lift the cover away.

  18. Panasonic Lumix DMC-G7 Electronic Viewfinder Replacement: 手順 18、 2の画像 1 Panasonic Lumix DMC-G7 Electronic Viewfinder Replacement: 手順 18、 2の画像 2
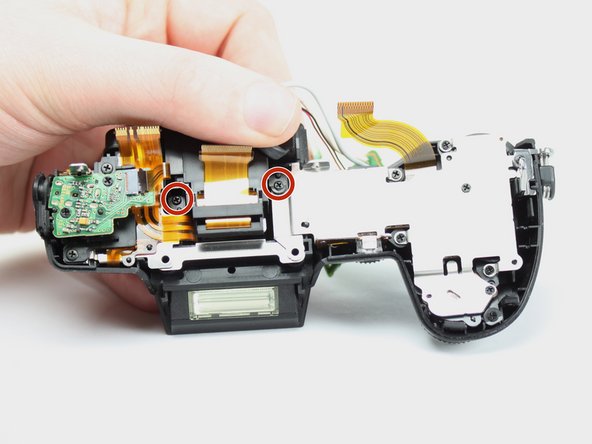
    • Remove the two indicated black 6.0mm long screws next to the viewfinder unit using a Phillips PH0 screwdriver.

  19. Panasonic Lumix DMC-G7 Electronic Viewfinder Replacement: 手順 19、 3の画像 1 Panasonic Lumix DMC-G7 Electronic Viewfinder Replacement: 手順 19、 3の画像 2 Panasonic Lumix DMC-G7 Electronic Viewfinder Replacement: 手順 19、 3の画像 3
    • Pull the viewfinder unit away from the camera top.

  20. Panasonic Lumix DMC-G7 Electronic Viewfinder Replacement: 手順 20、 3の画像 1 Panasonic Lumix DMC-G7 Electronic Viewfinder Replacement: 手順 20、 3の画像 2 Panasonic Lumix DMC-G7 Electronic Viewfinder Replacement: 手順 20、 3の画像 3
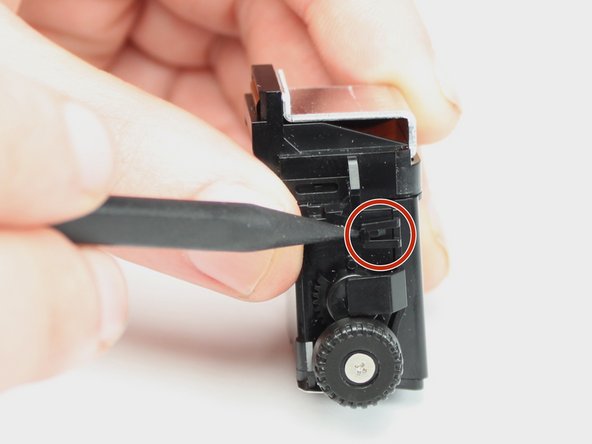
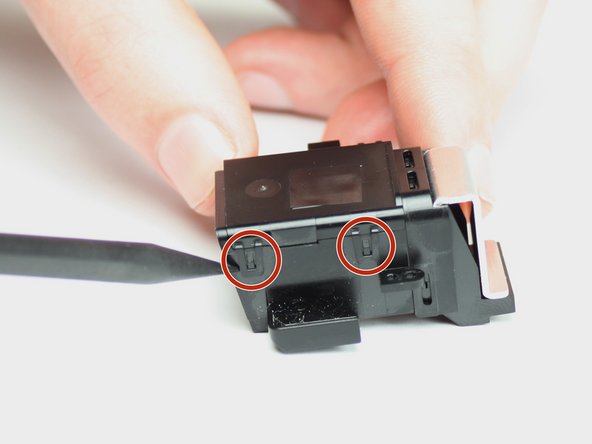
    • Disconnect the four indicated locking tabs and remove the LVF module from the mounting unit using a spudger (or other small prying tool).

終わりに

To reassemble your device, follow these instructions in reverse order.

作成者

4人の作成者と共同で作成されました。

Alden Chu

メンバー登録日: 04/03/19

439 ポイント

2のガイドは作成済み

チーム

0 件のコメント

コメントを追加

統計データ:

過去 24時間: 3

過去 7 日: 7

過去 30 日: 35

今までの合計 2,092