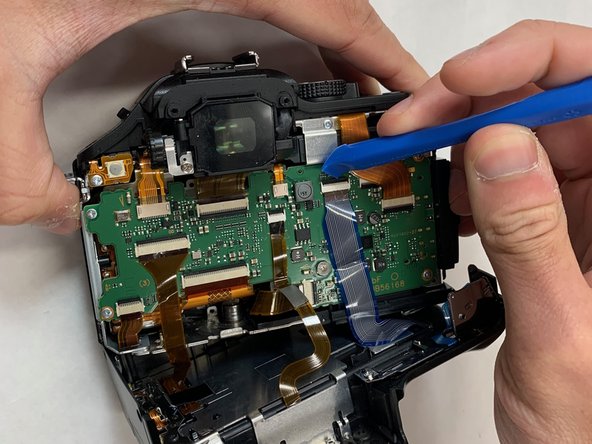
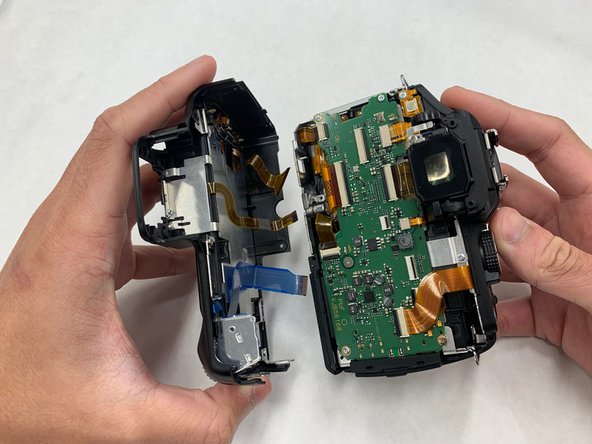
メインコンテンツにスキップ

Panasonic Lumix DMC-G5 Back Panel Replacement

必要な工具と部品

  1. Panasonic Lumix DMC-G5 Back Panel Replacement, Back Panel: 手順 1、 1の画像 1
    • Remove four JIS #000 screws from the bottom part of the camera.

  2. Panasonic Lumix DMC-G5 Back Panel Replacement: 手順 2、 2の画像 1 Panasonic Lumix DMC-G5 Back Panel Replacement: 手順 2、 2の画像 2
    • Remove two JIS #000 screws from both sides of the camera.

  3. Panasonic Lumix DMC-G5 Back Panel Replacement: 手順 3、 1の画像 1
    • Remove two JIS #000 screws under the viewfinder.

  4. Panasonic Lumix DMC-G5 Back Panel Replacement: 手順 4、 2の画像 1 Panasonic Lumix DMC-G5 Back Panel Replacement: 手順 4、 2の画像 2
    • Remove the viewfinder lid.

    • Then, remove the two JIS #000 screws on the viewfinder.

  5. Panasonic Lumix DMC-G5 Back Panel Replacement: 手順 5、 3の画像 1 Panasonic Lumix DMC-G5 Back Panel Replacement: 手順 5、 3の画像 2 Panasonic Lumix DMC-G5 Back Panel Replacement: 手順 5、 3の画像 3
    • Gently remove the back panel from the camera.

    • Unclip the ribbon cable from the motherboard using Wide Plastic Opening Tools and pull the cable gently.

終わりに

To reassemble your device, follow these instructions in reverse order.

ある他の人がこのガイドを完成しました。

作成者

3人の作成者と共同で作成されました。

Khairul Samsudin

メンバー登録日: 05/22/19

412 ポイント

4のガイドは作成済み

チーム

IUPUI, Team S1-G4, Harley Summer 2019 IUPUI, Team S1-G4, Harley Summer 2019人のメンバー

IUPUI-HARLEY-SU19S1G4

3 メンバー

8のガイドは作成済み

0 件のコメント

コメントを追加

統計データ:

過去 24時間: 2

過去 7 日: 4

過去 30 日: 9

今までの合計 644