メインコンテンツにスキップ

Panasonic Lumix DMC-FX9 Selector Buttons Replacement

必要な工具と部品

  1. Panasonic Lumix DMC-FX9 Selector Buttons Replacement, Selector Buttons: 手順 1、 1の画像 1
    • Make sure the power is off by switching the power switch to the left.

  2. Panasonic Lumix DMC-FX9 Selector Buttons Replacement: 手順 2、 2の画像 1 Panasonic Lumix DMC-FX9 Selector Buttons Replacement: 手順 2、 2の画像 2
    • Use a Phillips #00 screwdriver to remove the screws on the left side of the camera.

  3. Panasonic Lumix DMC-FX9 Selector Buttons Replacement: 手順 3、 1の画像 1
    • Remove the screws on the right side of the camera by using the Philips #00 screwdriver.

  4. Panasonic Lumix DMC-FX9 Selector Buttons Replacement: 手順 4、 2の画像 1 Panasonic Lumix DMC-FX9 Selector Buttons Replacement: 手順 4、 2の画像 2
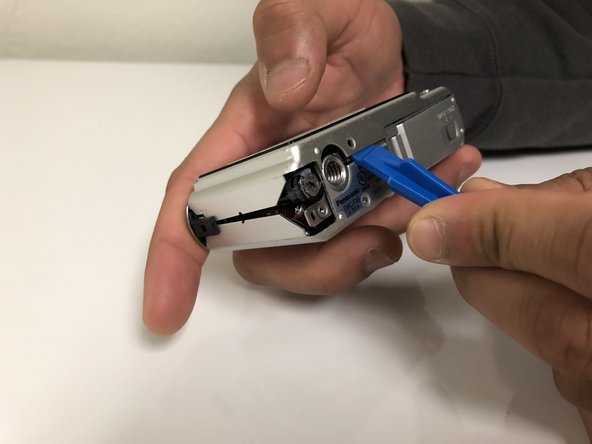
    • Remove the screws on the bottom side of the camera using the Philips #00 Screwdriver.

    • Separate the covers by gently applying force upwards, carefully placing the opening tool between the two covers.

  5. Panasonic Lumix DMC-FX9 Selector Buttons Replacement: 手順 5、 2の画像 1 Panasonic Lumix DMC-FX9 Selector Buttons Replacement: 手順 5、 2の画像 2
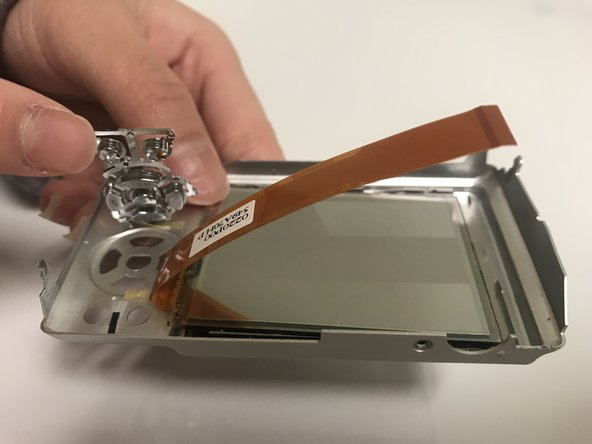
    • Lift the ZIF tabs up with the opening tool and carefully remove the digitizer ribbon cables.

    • Remove the LCD Screen from the glass frame carefully with the opening tool.

  6. Panasonic Lumix DMC-FX9 Selector Buttons Replacement: 手順 6、 2の画像 1 Panasonic Lumix DMC-FX9 Selector Buttons Replacement: 手順 6、 2の画像 2
    • Push on the back panel buttons on the front side to remove the buttons.

    • Be cautious of the adhesive holding the button panels to the cover. Apply extra force if necessary.

終わりに

To reassemble your device, follow these instructions in reverse order.

作成者

3人の作成者と共同で作成されました。

Kriselle Tubongbanua

メンバー登録日: 02/21/18

133 ポイント

1ガイドが承認済み

チーム

University of North Texas, Team S6-G1, Thomas Spring 2018 University of North Texas, Team S6-G1, Thomas Spring 2018人のメンバー

UNT-THOMAS-S18S6G1

4 メンバー

9のガイドは作成済み

0 件のコメント

コメントを追加

統計データ:

過去 24時間: 0

過去 7 日: 2

過去 30 日: 8

今までの合計 258