このバージョンは誤った内容を含んでいる可能性があります。最新の承認済みスナップショットに切り替えてください。
必要な工具と部品
-
この手順は未翻訳です。 翻訳を手伝う。
-
Use a Phillips #000 screwdriver to remove the five 4.5 mm screws located on the bottom of the camera and the top one on the left side, with the lens facing you.
-
Use a Phillips #000 screwdriver to remove the two 3.5 mm screws, one below the lens and one on the left side.
-
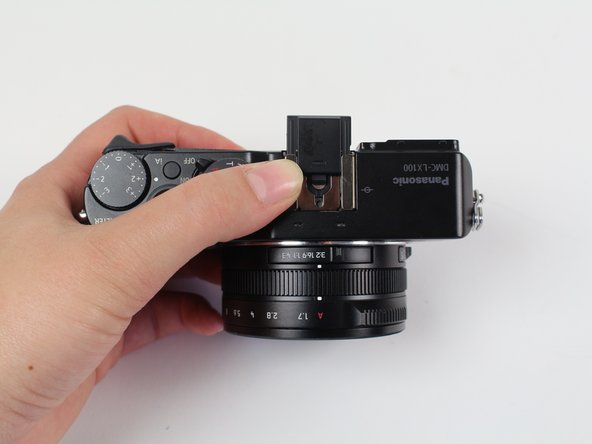
Use a Phillips #000 screwdriver to remove the 7.1 mm screw from the right side of the camera.
-
-


8 の人々がこのガイドを完成させました。
チーム

Cal Poly, Team 70-4, Forte Winter 2016 Cal Poly, Team 70-4, Forte Winter 2016人のメンバー
CPSU-FORTE-W16S70G4
4 メンバー
9のガイドは作成済み
8 件のコメント
Fantastic guide, what a help. Follow the caution details about stripping screws. I found that a #00 screwdriver worked better in some places than the #000. The screw in step 9 holds onto the back of the cameras frame in step 8 on my camera, so you might have to peel back the rubber thumb grip to get at it before you start prying the back case off so you don't bend or break the case. Other than that if I had to do it again it probably would take less than 20 minutes.Iit took me about an hour after stripping a couple screws with my #000 and looking for another screwdriver. Also a spudger isn't necessary, I used a guitar pick and a tooth pick to accomplish the same thing.
gunsr4kids - 返信
Same questions as pouliquen, where to find a new LCD and part number ? thanks for help :)
Brilliant guide! I had the same problem as gunsr4kids. The screw in step 9 was actually holding the frame in place. I had to lift up the thumb rubber on the left side (there is adhesive on the back) to reveal the screw. Don't pull the rubber to hard
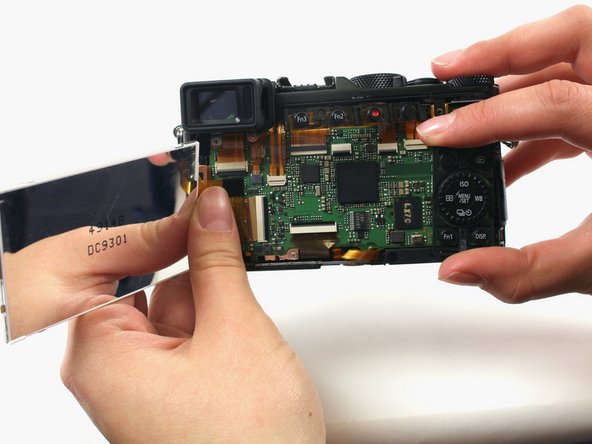
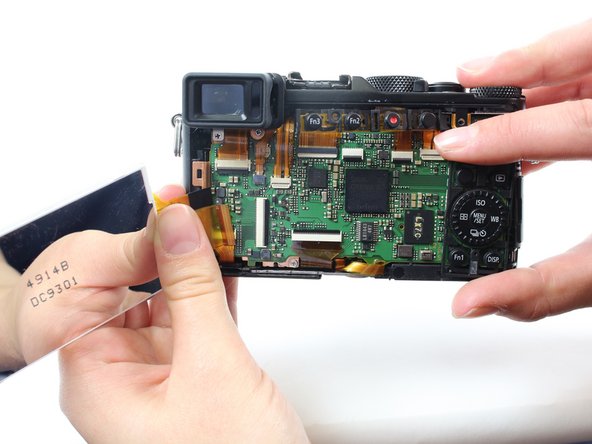
The part number is DC9301