メインコンテンツにスキップ

この修理ガイドは変更されています。最新の未承認バージョンに切り替えます。

Panasonic DMC-FZ70 Back Panel Replacement

必要な工具と部品

  1. Panasonic DMC-FZ70 Back Panel Replacement, Back Panel: 手順 1、 2の画像 1 Panasonic DMC-FZ70 Back Panel Replacement, Back Panel: 手順 1、 2の画像 2
    • All screws should be removed using a Phillips #0 screwdriver.

    • Using your screwdriver, unscrew the two 5.0 mm Philips screws to the right of the LCD screen.

  2. Panasonic DMC-FZ70 Back Panel Replacement: 手順 2、 2の画像 1 Panasonic DMC-FZ70 Back Panel Replacement: 手順 2、 2の画像 2
    • Flip the camera over to the left side of the screen and unscrew the 5mm Phillips screw found there.

  3. Panasonic DMC-FZ70 Back Panel Replacement: 手順 3、 2の画像 1 Panasonic DMC-FZ70 Back Panel Replacement: 手順 3、 2の画像 2
    • Turn the camera upside down and unscrew the three 5mm screws found on the bottom.

  4. Panasonic DMC-FZ70 Back Panel Replacement: 手順 4、 2の画像 1 Panasonic DMC-FZ70 Back Panel Replacement: 手順 4、 2の画像 2
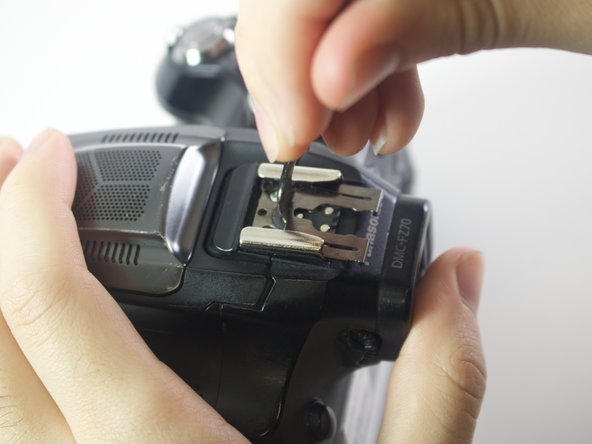
    • On the top of the camera locate the two rails with a thin sheet of metal on the floor between them.

    • With a metal spudger, lift this sheet and push it out of the rail device to detach it from the camera.

  5. Panasonic DMC-FZ70 Back Panel Replacement: 手順 5、 1の画像 1
    • Proceed to remove the four 5mm Phillips screws that you just uncovered.

  6. Panasonic DMC-FZ70 Back Panel Replacement: 手順 6、 1の画像 1
    • Slowly pull on both side of the camera, until both halves begin to separate from each other.

    • Do not pull too hard, as both halves are held together with ZIF connector cables.

  7. Panasonic DMC-FZ70 Back Panel Replacement: 手順 7、 3の画像 1 Panasonic DMC-FZ70 Back Panel Replacement: 手順 7、 3の画像 2 Panasonic DMC-FZ70 Back Panel Replacement: 手順 7、 3の画像 3
    • Using a plastic opening tool, carefully flip up the small black levers that attach the ribbon cables to the ZIF connectors on the motherboard.

    • Carefully pull the ribbon cables out of the slot once they have been released.

    • Only the two indicated connectors need to be removed to separate the two halves of the camera.

終わりに

To reassemble your device, follow these instructions in reverse order.

作成者

6人の作成者と共同で作成されました。

Alberto Rodriguez

メンバー登録日: 01/24/17

531 ポイント

4のガイドは作成済み

チーム

Cal Poly, Team 21-3, Maness Winter 2017 Cal Poly, Team 21-3, Maness Winter 2017人のメンバー

CPSU-MANESS-W17S21G3

6 メンバー

12のガイドは作成済み

0 件のコメント

コメントを追加

統計データ:

過去 24時間: 0

過去 7 日: 1

過去 30 日: 1

今までの合計 623