メインコンテンツにスキップ

Palm v Battery Replacement

必要な工具と部品

  1. Palm v Battery Replacement, Outer Case: 手順 1、 1の画像 1
    • Lay device face down on surface.

  2. Palm v Battery Replacement: 手順 2、 2の画像 1 Palm v Battery Replacement: 手順 2、 2の画像 2
    • Heat the left and top edges with hairdryer for one minute.

    • Move hairdryer back and forth to evenly heat up surface.

    • Caution: directly heating the screen can melt or distort the screen.

  3. Palm v Battery Replacement: 手順 3、 1の画像 1
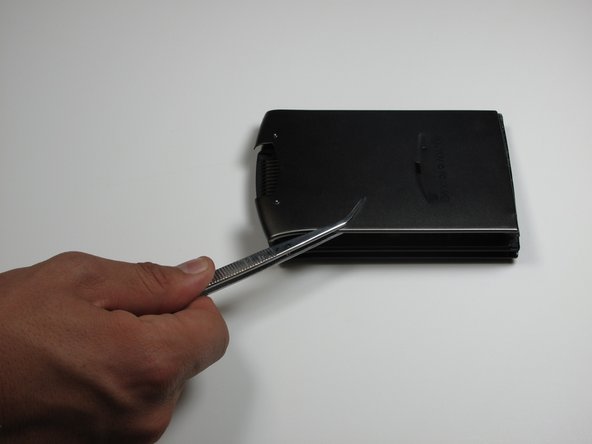
    • Use tweezers to hold Palm right side down on it's side.

    • Use a plastic opening tool to pry open front and back casing.

    • If you are unable to open you may need to heat with hairdryer for longer.

    • Be sure not to touch case directly with fingers, it will be hot!

  4. Palm v Battery Replacement: 手順 4、 1の画像 1
    • Leave plastic opening tools in between front and back casing.

    • Rotate Palm and repeat steps 2 and 3 for right and back edges.

  5. Palm v Battery Replacement: 手順 5、 3の画像 1 Palm v Battery Replacement: 手順 5、 3の画像 2 Palm v Battery Replacement: 手順 5、 3の画像 3
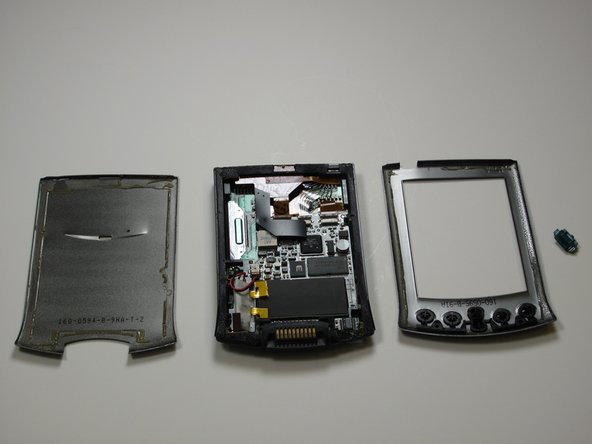
    • Now pry open front and back casing with plastic opening tools.

    • Separate front and back casing completely.

    • Power button will fall off once front and back casing have been removed. Be sure not to lose it.

  6. Palm v Battery Replacement, Screen: 手順 6、 2の画像 1 Palm v Battery Replacement, Screen: 手順 6、 2の画像 2
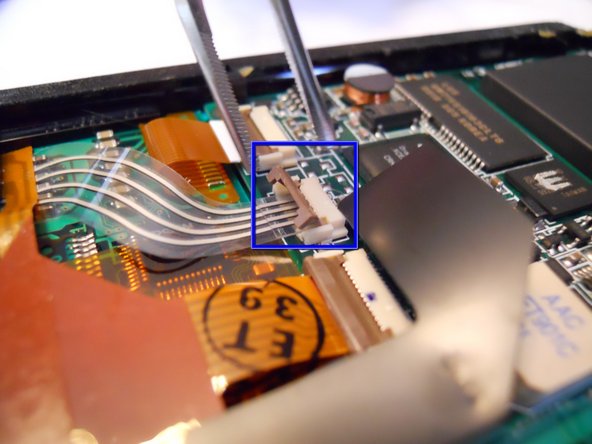
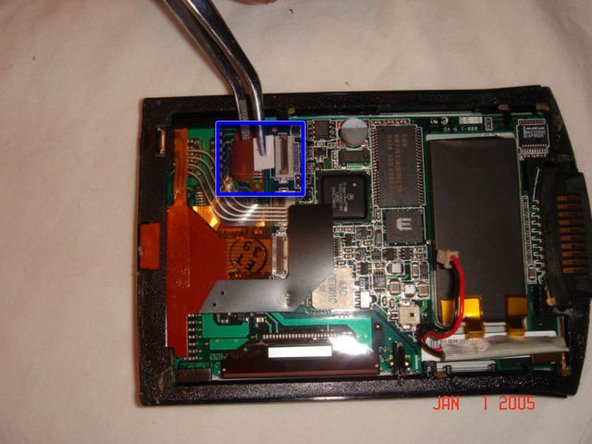
    • In order to seperate the screen from the motherboard you must disconnect the ribbon attached to the screen.

    • To do this, using tweezers, flip up the cable clamp that is connecting the ribbon to the screen.

    • Once the clamp is up you can use the tweezers to gently detach the ribbon.

  7. Palm v Battery Replacement: 手順 7、 3の画像 1 Palm v Battery Replacement: 手順 7、 3の画像 2 Palm v Battery Replacement: 手順 7、 3の画像 3
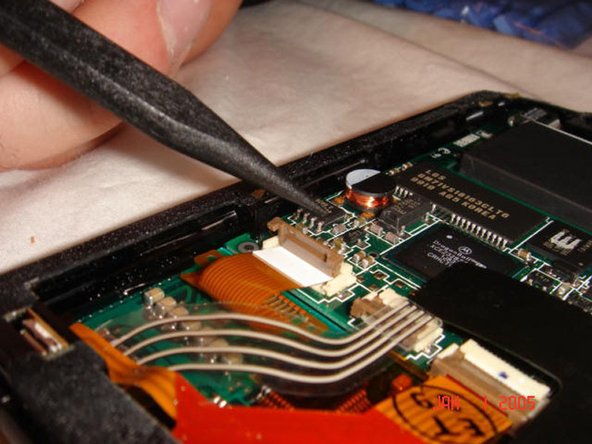
    • Now you must flip up the adjacent clamp as well, using tweezers like before.

    • After the clamp is flipped you can gently remove the second ribbon with tweezers.

  8. Palm v Battery Replacement: 手順 8、 2の画像 1 Palm v Battery Replacement: 手順 8、 2の画像 2
    • Before removing the screen you must detach one more wire, the battery connector.

    • Using the tweezers, squeeze the connector attached to the wire and genlty pull.

    • Do not pull from the wire.

  9. Palm v Battery Replacement: 手順 9、 1の画像 1
    • Now that both ribbons and the wire are disconeccted, you can apply a downward pressure to the battery. You will have to carefully rotate the frame so that the battery can go through.

  10. Palm v Battery Replacement, Battery: 手順 10、 2の画像 1 Palm v Battery Replacement, Battery: 手順 10、 2の画像 2
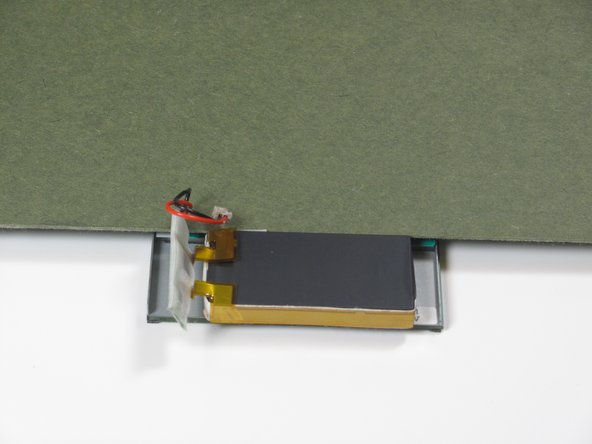
    • Lay screen face down so the battery is facing upwards.

    • Cover the upper back portion of the device so the battery is the only exposed part.

  11. Palm v Battery Replacement: 手順 11、 1の画像 1
    • Use the hairdryer to heat each side of the battery for at least 30 seconds.

  12. Palm v Battery Replacement: 手順 12、 2の画像 1 Palm v Battery Replacement: 手順 12、 2の画像 2
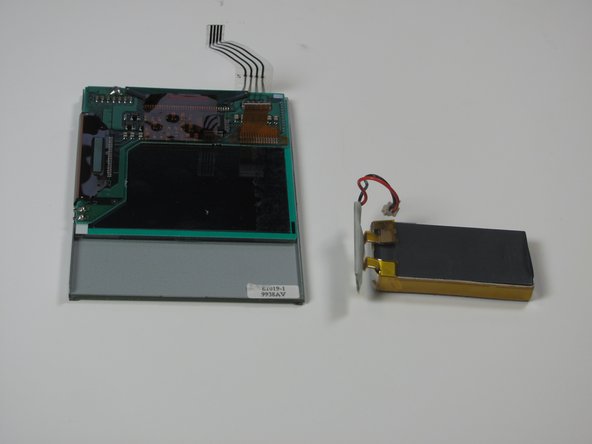
    • Using the tweezers or the spudger, pry off the battery from the screen.

    • If battery is not coming off, reheat sides and reattempt to remove.

終わりに

To reassemble your device, follow these instructions in reverse order.

3 の人々がこのガイドを完成させました。

作成者

3人の作成者と共同で作成されました。

Anthony Platt

メンバー登録日: 02/09/10

66 ポイント

3のガイドは作成済み

チーム

Cal Poly, Team 13-25, Maness Winter 2010 Cal Poly, Team 13-25, Maness Winter 2010人のメンバー

CPSU-MANESS-W10S13G25

4 メンバー

4のガイドは作成済み

0 件のコメント

コメントを追加

統計データ:

過去 24時間: 2

過去 7 日: 7

過去 30 日: 31

今までの合計 10,151