メインコンテンツにスキップ

Palm Zire 71 Battery Replacement

必要な工具と部品

  1. Palm Zire 71 Battery Replacement, Preparation: 手順 1、 1の画像 1
    • Flip the phone so it's facing screen-side down.

    • Slide the back cover upward to open.

  2. Palm Zire 71 Battery Replacement, Top Screws (2) Removal: 手順 2、 1の画像 1
    • Use a Torx T5 screwdriver to remove the top two screws.

    Informative tutorial, and the tools were required. However, there is an error in sliding the back off the lower unit. The bracket will not detach. Its wiring is glued and soldered to the back and can’t be pulled off along with the speaker without damaging the wire. Pulling the halves apart destroyed the wiring and trashed the unit.

    Bruce Johnson - 返信

  3. Palm Zire 71 Battery Replacement, Bottom Screws (3) Removal: 手順 3、 1の画像 1
    • Remove the back sticker.

    • Remove the three bottom Phillips #00 screws.

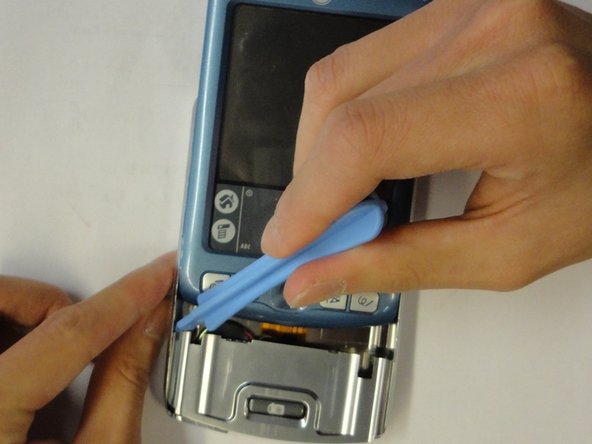
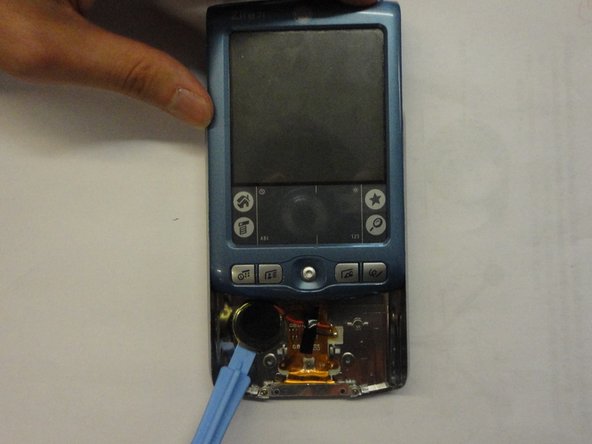
  4. Palm Zire 71 Battery Replacement, Front Panel Removal: 手順 4、 2の画像 1 Palm Zire 71 Battery Replacement, Front Panel Removal: 手順 4、 2の画像 2
    • Flip the phone over so it's facing screen-side up.

    • Slide the screen upward by a few millimeters without detaching the screen.

    • Use the plastic opening tool to pry off the front panel.

    I found it easier to go between the front panel and the back cover with a jimmy knife instead of the relatively thick plastic opening tool. It is very tight gap. Once you get inside that gap, the panel gets off immediately.

    Lukas Gwardak - 返信

  5. Palm Zire 71 Battery Replacement, Bracket and Speaker Removal: 手順 5、 2の画像 1 Palm Zire 71 Battery Replacement, Bracket and Speaker Removal: 手順 5、 2の画像 2
    • Remove the bottom two Phillips #00 screws.

    • Remove the bracket.

    • Use the plastic opening tool to pry off the speaker.

    removing this bracket also requires un-gluing the wiring harness from the back shell. This will likely destroy the speaker connection since it is soldered onto the wiring tape.

    Bruce Johnson - 返信

    When prying off the speaker, be careful to not damage the diaphragm which is glued to the speaker grill beneath. You can remove the ribbon cable by carefully pulling up the bottom connector.

    Lukas Gwardak - 返信

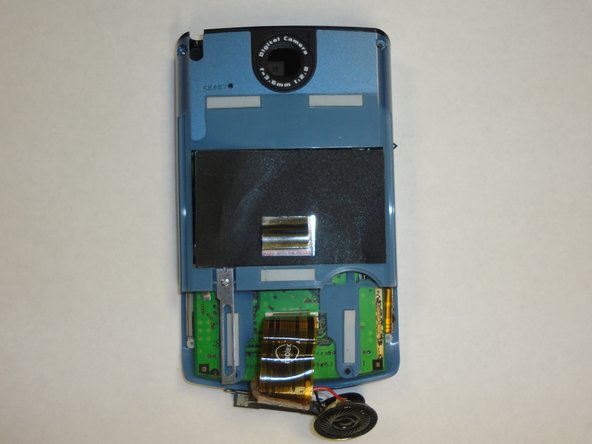
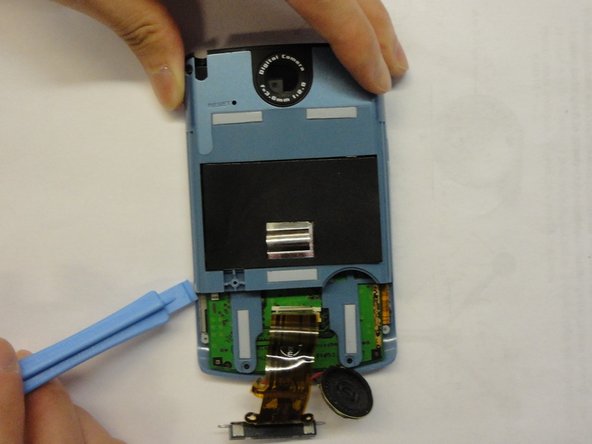
  6. Palm Zire 71 Battery Replacement, Back Cover: 手順 6、 2の画像 1 Palm Zire 71 Battery Replacement, Back Cover: 手順 6、 2の画像 2
    • Slide the back cover off.

  7. Palm Zire 71 Battery Replacement, Battery: 手順 7、 1の画像 1
    • Remove the Philips #00 screw

    • Remove the sliver metal piece

  8. Palm Zire 71 Battery Replacement: 手順 8、 2の画像 1 Palm Zire 71 Battery Replacement: 手順 8、 2の画像 2
    • Remove the Philips screws #00

    • Remove the rear blue panel by prying both sides using the plastic opening tool

  9. Palm Zire 71 Battery Replacement: 手順 9、 3の画像 1 Palm Zire 71 Battery Replacement: 手順 9、 3の画像 2 Palm Zire 71 Battery Replacement: 手順 9、 3の画像 3
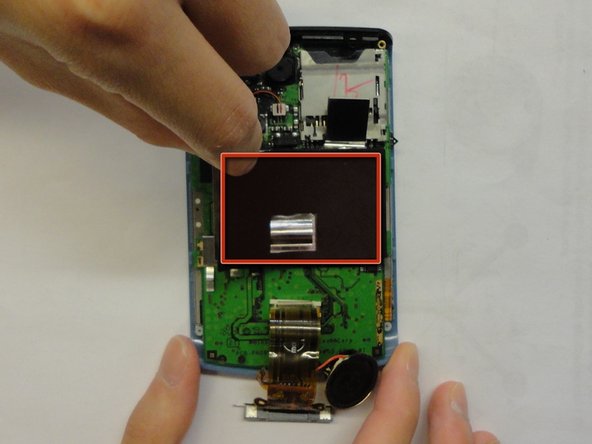
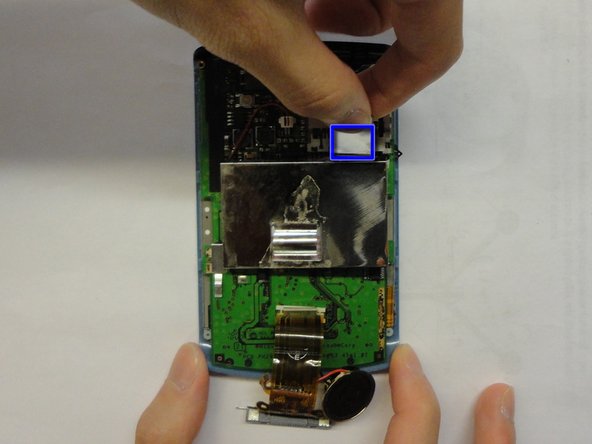
    • Remove the black plastic sticker

    • Pull the tap up to remove the metal cap

    You don't have to remove the black plastic sticker - you just need to separate the metal cap from the battery. The battery is glued to that metal cap..

    Lukas Gwardak - 返信

  10. Palm Zire 71 Battery Replacement: 手順 10、 3の画像 1 Palm Zire 71 Battery Replacement: 手順 10、 3の画像 2 Palm Zire 71 Battery Replacement: 手順 10、 3の画像 3
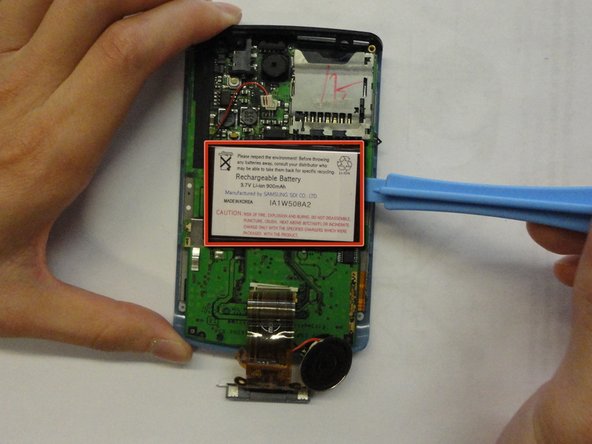
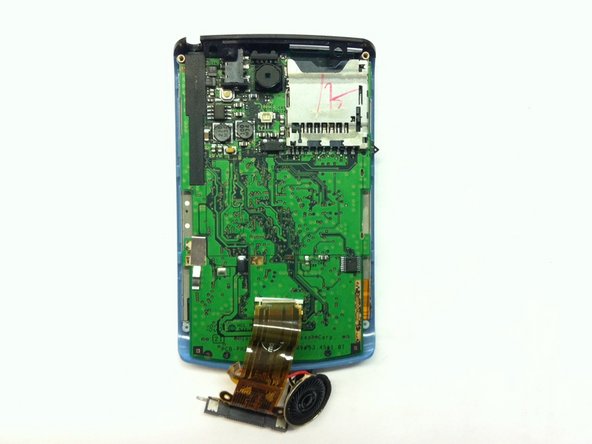
    • Remove the cable by pinching the sides and pulling

    • Pry off the battery with the plastic opening tool

    • Insert the new battery

終わりに

To reassemble your device, follow these instructions in reverse order.

7 の人々がこのガイドを完成させました。

作成者

4人の作成者と共同で作成されました。

Jinxian Jiang

メンバー登録日: 04/28/11

245 ポイント

3のガイドは作成済み

チーム

CSU Los Angeles, Team 1-5, Nelson Spring 2011 CSU Los Angeles, Team 1-5, Nelson Spring 2011人のメンバー

CSULA-NELSON-S11S1G5

3 メンバー

6のガイドは作成済み

コメント 1 件

It's clear they just want you to throw it away when the battery dies. That was quite a chore getting the parts off and such without destroying the circuit board and that fine ribbon cable. Got it done though. No wifi I see. Too bad.

dnphoton - 返信

コメントを追加

統計データ:

過去 24時間: 0

過去 7 日: 13

過去 30 日: 58

今までの合計 9,043