メインコンテンツにスキップ

Palm Vx Screen Replacement

必要な工具と部品

  1. Palm Vx Screen Replacement, Screen: 手順 1、 1の画像 1
    • Take protective cover off of organizer.

    • Note: cover slides off like pointer pen.

  2. Palm Vx Screen Replacement: 手順 2、 1の画像 1
    • Lay device face down on surface.

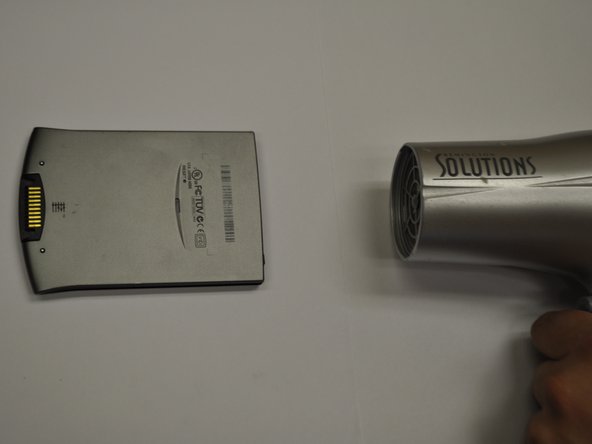
  3. Palm Vx Screen Replacement: 手順 3、 2の画像 1 Palm Vx Screen Replacement: 手順 3、 2の画像 2
    • Heat each side for 30 seconds individually.

    • Note: Be aware not to heat the screen, or any part to the point of damage.

    • Caution: Heating the metal case may cause burns.

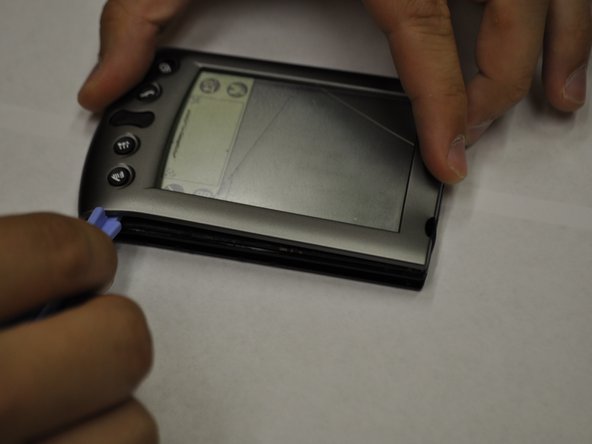
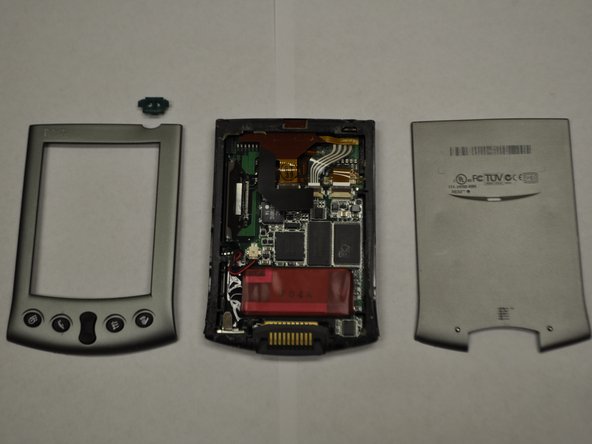
  4. Palm Vx Screen Replacement: 手順 4、 3の画像 1 Palm Vx Screen Replacement: 手順 4、 3の画像 2 Palm Vx Screen Replacement: 手順 4、 3の画像 3
    • Pry off each side individually using a plastic pry bar.

    • Note: Using a plastic pry bar will keep from damaging the case. DO NOT use a metal screwdriver or similar tool.

    • Repeat for front and back of PDA.

    • Note: Do not lose the green power button that may fall out.

  5. Palm Vx Screen Replacement: 手順 5、 1の画像 1
    • Remove the screen from the plastic casing.

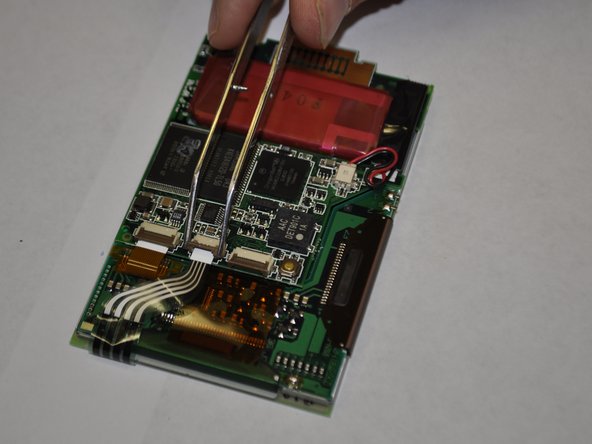
  6. Palm Vx Screen Replacement: 手順 6、 2の画像 1 Palm Vx Screen Replacement: 手順 6、 2の画像 2
    • In order to seperate the screen from the motherboard you must disconnect the ribbon attached to the screen.

    • To do this, using tweezers, flip up the cable clamp that is connecting the ribbon to the screen.

    • Once the clamp is up you can use the tweezers to gently detach the ribbon.

  7. Palm Vx Screen Replacement: 手順 7、 1の画像 1
    • Now you must flip up the adjacent clamp as well, using tweezers like before.

    • After the clamp is flipped you can gently remove the second ribbon with tweezers.

  8. Palm Vx Screen Replacement: 手順 8、 1の画像 1
    • Before removing the screen you must detach one more wire, the battery connector.

    • Using the tweezers, squeeze the connector attached to the wire and genlty pull.

    • Do not pull on the wire.

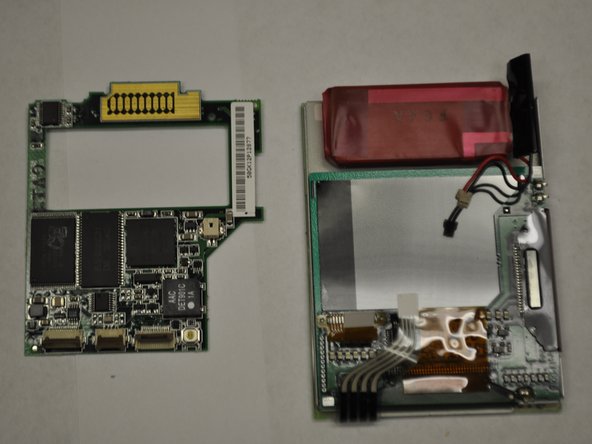
  9. Palm Vx Screen Replacement: 手順 9、 2の画像 1 Palm Vx Screen Replacement: 手順 9、 2の画像 2
    • Now that both ribbons and the wire are disconeccted, you can apply a downward pressure to the battery. You will have to carefully rotate the frame so that the battery can go through.

終わりに

To reassemble your device, follow these instructions in reverse order.

作成者

3人の作成者と共同で作成されました。

Will Doornink

メンバー登録日: 10/04/11

11 ポイント

1ガイドが承認済み

チーム

UW Stout, Team 5-4, Zhou Fall 2011 UW Stout, Team 5-4, Zhou Fall 2011人のメンバー

UWSTOUT-ZHOU-F11S5G4

4 メンバー

1のガイドは作成済み

0 件のコメント

コメントを追加

統計データ:

過去 24時間: 0

過去 7 日: 1

過去 30 日: 11

今までの合計 1,913