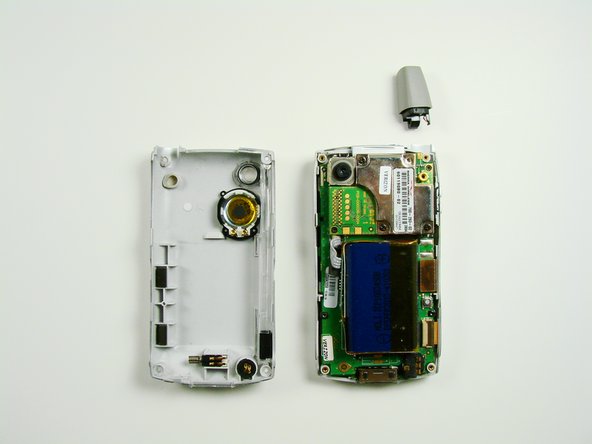
メインコンテンツにスキップ

Palm Treo 600 Logic Board Replacement

必要な工具と部品

  1. Palm Treo 600 Logic Board Replacement, Back Case: 手順 1、 1の画像 1
    • On the back of the device, locate the 3 rubber plugs, and use a plastic spudger to remove them.

  2. Palm Treo 600 Logic Board Replacement: 手順 2、 2の画像 1 Palm Treo 600 Logic Board Replacement: 手順 2、 2の画像 2
    • Use the T6 Torx Screwdriver to remove all 4 screws.

    • You have to first remove the Stylus to access the 4th screw.

  3. Palm Treo 600 Logic Board Replacement: 手順 3、 2の画像 1 Palm Treo 600 Logic Board Replacement: 手順 3、 2の画像 2
    • Using a plastic opening tool, carefully separate the front and back cases.

    • Note: The antenna will detach from the phone.

  4. Palm Treo 600 Logic Board Replacement, Motherboard: 手順 4、 1の画像 1
    • Using the Phillips #00 screwdriver, unscrew the 4 screws holding the silver casing down.

  5. Palm Treo 600 Logic Board Replacement: 手順 5、 1の画像 1
    • Lift up the silver casing.

    • Careful! The casing is connected to the body. Pull the casing up.

  6. Palm Treo 600 Logic Board Replacement: 手順 6、 1の画像 1
    • With the silver casing removed, unscrew two black screws with a #00 Phillips Screwdriver.

  7. Palm Treo 600 Logic Board Replacement: 手順 7、 2の画像 1 Palm Treo 600 Logic Board Replacement: 手順 7、 2の画像 2
    • Use the spudger to lift the logic board from its socket. Remove it from the rest of the phone.

終わりに

To reassemble your device, follow these instructions in reverse order.

作成者

4人の作成者と共同で作成されました。

Clement Poisson

メンバー登録日: 01/26/10

24 ポイント

7のガイドは作成済み

チーム

Cal Poly, Team 13-23, Maness Winter 2010 Cal Poly, Team 13-23, Maness Winter 2010人のメンバー

CPSU-MANESS-W10S13G23

4 メンバー

16のガイドは作成済み

0 件のコメント

コメントを追加

統計データ:

過去 24時間: 0

過去 7 日: 1

過去 30 日: 1

今までの合計 1,502