メインコンテンツにスキップ

Palm Pre Antenna Replacement

必要な工具と部品

  1. Palm Pre Antenna Replacement, Battery: 手順 1、 1の画像 1
    • Make sure your Palm Pre is turned off before disassembling the phone.

    • Snap off the back panel to reveal the battery.

  2. Palm Pre Antenna Replacement: 手順 2、 1の画像 1
    • Carefully pull up on the tab to remove the current battery.

  3. Palm Pre Antenna Replacement, Antenna: 手順 3、 2の画像 1 Palm Pre Antenna Replacement, Antenna: 手順 3、 2の画像 2
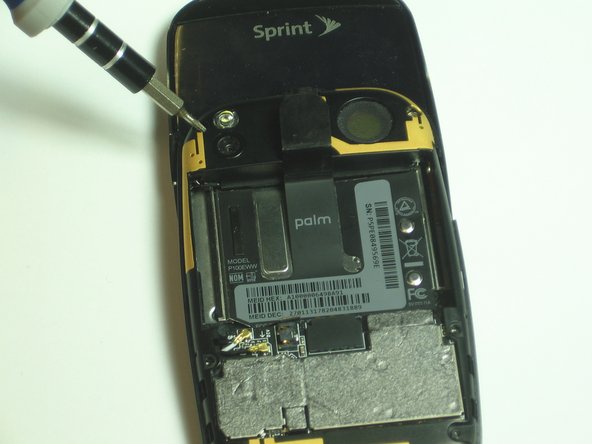
    • Use the T5 Torx Screwdriver to remove the six screws holding the backing frame in place.

  4. Palm Pre Antenna Replacement: 手順 4、 1の画像 1
    • Locate the hinge that covers the black and white GPS and DIV antennas. (The hinge will be located in the red box as portrayed in the picture.)

    • Use a spudger to pry open the hinge.

    • Use tweezers to disconnect the antennas from the keypad control board.

  5. Palm Pre Antenna Replacement: 手順 5、 2の画像 1 Palm Pre Antenna Replacement: 手順 5、 2の画像 2
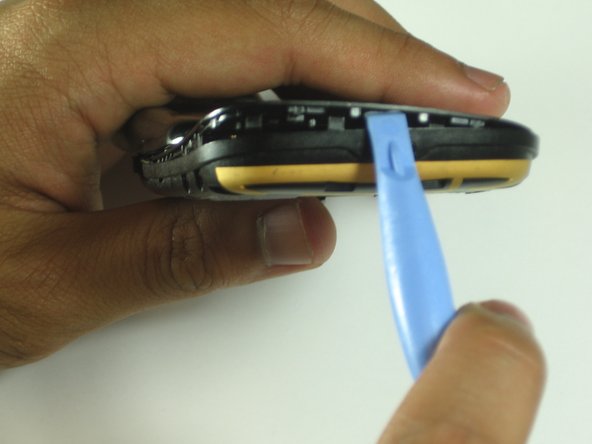
    • Use a spudger to pry off the (black and yellow) back frame.

    • Disregard the main part of the phone at this point and look only at the inside of the removed back frame. (You will need the main part of the phone for access to the keyboard and motherboard)

  6. Palm Pre Antenna Replacement: 手順 6、 1の画像 1
    • Find the small circuit board at the top right and desolder the wires that are connected to it.

    • This step is only necessary for antenna removal.

終わりに

To reassemble your device, follow these instructions in reverse order.

作成者

3人の作成者と共同で作成されました。

noha

メンバー登録日: 04/12/12

139 ポイント

6のガイドは作成済み

チーム

Cal Poly, Team 7-31, Maness Spring 2012 Cal Poly, Team 7-31, Maness Spring 2012人のメンバー

CPSU-MANESS-S12S7G31

3 メンバー

16のガイドは作成済み

0 件のコメント

コメントを追加

統計データ:

過去 24時間: 0

過去 7 日: 1

過去 30 日: 2

今までの合計 1,298