メインコンテンツにスキップ
リペアコミュニティに参加 - アカウントの作成

Palm IIIc Motherboard Replacement

必要な工具と部品

    1. Palm IIIc Motherboard Replacement, Removing broken LCD screen: 手順 1、 1の画像 1
      • Keep track of all pieces removed from the device.

      • Gently pull off the device cover. The cover snaps on and off easily where the cover attaches to the Palm IIIc device

      FixBotに聞いてみる

      コメントを追加

    2. Palm IIIc Motherboard Replacement: 手順 2、 1の画像 1
      • Using a Phillips head screwdriver, take out the four screws on the back of the device. You may have to pull them out with your hands once they are unscrewed.

      • There will be two long screws and two short screws. The long screws come from the top of the device, and the short screws come from the bottom of the device.

      FixBotに聞いてみる

      コメントを追加

    1. Palm IIIc Motherboard Replacement, Remove the Front and Back Covers: 手順 3、 1の画像 1
      • Using a spudger, carefully pry open the front and back covers along the side seam.

      • A small sensor cover will fall out when the front and back covers are removed. Keep track of it.

      FixBotに聞いてみる

      コメントを追加

    1. Palm IIIc Motherboard Replacement, Motherboard: 手順 4、 1の画像 1
      • Screen-side down, unhook the battery cable from the motherboard.

      FixBotに聞いてみる

      コメントを追加

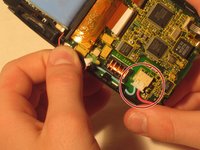
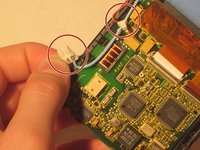
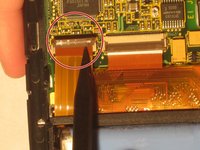
    2. Palm IIIc Motherboard Replacement: 手順 5、 2の画像 1 Palm IIIc Motherboard Replacement: 手順 5、 2の画像 2
      • Unhook the blue and red screen cables.

      FixBotに聞いてみる

      コメントを追加

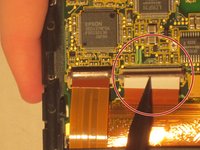
    3. Palm IIIc Motherboard Replacement: 手順 6、 2の画像 1 Palm IIIc Motherboard Replacement: 手順 6、 2の画像 2
      • On the back of the motherboard near the top, gently lift up the flap that holds the ZIF connector tab in place. This will allow you to pull out the ZIF connector tab.

      FixBotに聞いてみる

      コメントを追加

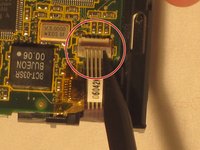
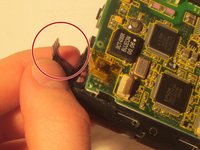
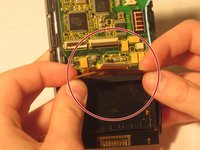
    4. Palm IIIc Motherboard Replacement: 手順 7、 3の画像 1 Palm IIIc Motherboard Replacement: 手順 7、 3の画像 2 Palm IIIc Motherboard Replacement: 手順 7、 3の画像 3
      • Located near the bottom of the motherboard will be two ZIF connector tabs. Gently lift up the flap that secures these tabs and remove the tabs.

      FixBotに聞いてみる

      コメントを追加

    5. Palm IIIc Motherboard Replacement: 手順 8、 1の画像 1
      • Gently bend back the black clips that secure the motherboard.

      • Remove the motherboard starting from the left side and pull it out away from the clips.

      FixBotに聞いてみる

      コメントを追加

終わりに

To reassemble your device, follow these instructions in reverse order.

キャンセル: このガイドを終了できませんでした。

作成者

6人の作成者と共同で作成されました。

Paulina Trujillo

メンバー登録日: 04/07/11

286 ポイント

8のガイドは作成済み

チーム

Cal Poly, Team 20-69, Walters Spring 2011 Cal Poly, Team 20-69, Walters Spring 2011人のメンバー

CPSU-WALTERS-S11S20G69

5 メンバー

40のガイドは作成済み

0件のガイドコメント

コメントを追加

統計データ:

過去 24時間: 5

過去 7 日: 10

過去 30 日: 35

今までの合計 1,522