メインコンテンツにスキップ

PSP 1000 Front Casing Replacement

必要な工具と部品

  1. PSP 1000 Front Casing Replacement, Battery: 手順 1、 1の画像 1
    • Turn the PSP over so its back is facing you.

  2. PSP 1000 Front Casing Replacement: 手順 2、 2の画像 1 PSP 1000 Front Casing Replacement: 手順 2、 2の画像 2
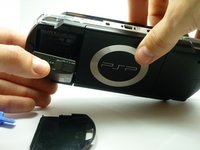
    • Locate the battery casing button on the rear-left side of the PSP.

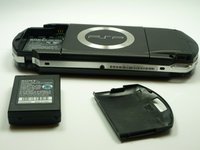
    • Press down the button and remove the battery cover.

  3. PSP 1000 Front Casing Replacement: 手順 3、 2の画像 1 PSP 1000 Front Casing Replacement: 手順 3、 2の画像 2
    • Using your finger, remove the battery upwards from the system as shown.

  4. PSP 1000 Front Casing Replacement, Front Casing: 手順 4、 2の画像 1 PSP 1000 Front Casing Replacement, Front Casing: 手順 4、 2の画像 2
    • Remove the four screws shown with a Phillips #00 screwdriver.

    • You will have to peel back the guarantee sticker to access the screw on the lower left.

  5. PSP 1000 Front Casing Replacement: 手順 5、 1の画像 1
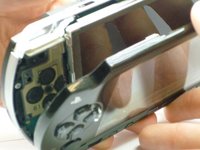
    • Remove the screw from the bottom side of the PSP. Keep it separated from the rest of the screws.

    • Remove screws from back righthand side within the holes.

  6. PSP 1000 Front Casing Replacement: 手順 6、 2の画像 1 PSP 1000 Front Casing Replacement: 手順 6、 2の画像 2
    • Gently separate the outer plastic casing from the rest of the system as shown.

終わりに

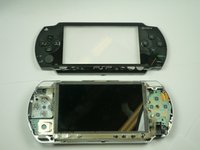
To reassemble your device, follow these instructions in reverse order.

33 の人々がこのガイドを完成させました。

作成者

13人の作成者と共同で作成されました。

Henry Lee

メンバー登録日: 01/14/10

794 ポイント

4のガイドは作成済み

チーム

Cal Poly, Team 5-6, Forte Winter 2010 Cal Poly, Team 5-6, Forte Winter 2010人のメンバー

CPSU-FORTE-W10S5G6

5 メンバー

22のガイドは作成済み

3 件のコメント

Thank you! Awesome help!

Jay Vee - 返信

My psp is updating then psp is fallen down and battery comeout so please help me please thank you

Bye

National Nazeer - 返信

i also made a video on this for anyone who needs to do it that way.

https://www.youtube.com/watch?v=EIAaJyIx...

DAS Repair - 返信

コメントを追加

統計データ:

過去 24時間: 9

過去 7 日: 62

過去 30 日: 324

今までの合計 40,361