メインコンテンツにスキップ

Ozone Acro Brake Handles Installation

必要な工具と部品

  1. Ozone Acro Brake Handles Installation, Open the brake handle knot: 手順 1、 3の画像 1 Ozone Acro Brake Handles Installation, Open the brake handle knot: 手順 1、 3の画像 2 Ozone Acro Brake Handles Installation, Open the brake handle knot: 手順 1、 3の画像 3
    • WARNING: Be sure to follow each step carefully. Failure to do so may result in serious injury or death.

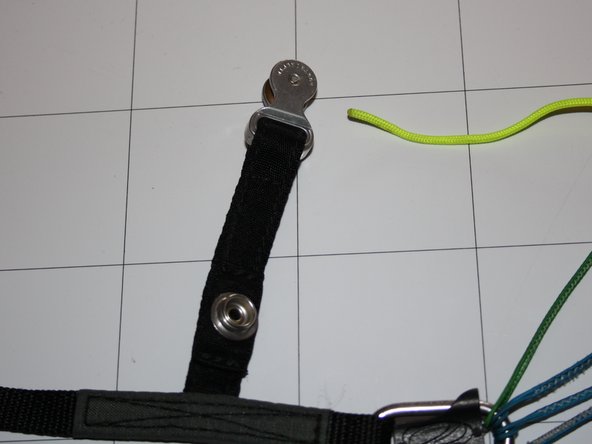
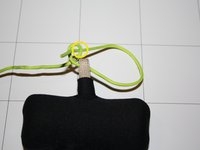
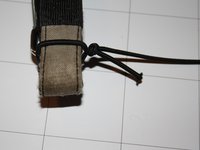
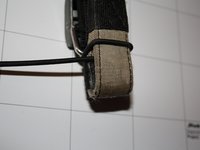
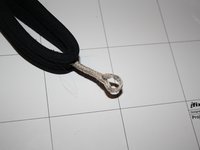
    • Open the brake handle knot on one of your brakes as shown in the pictures.

    • Take note how your brake handle knot is done. It may be a different knot than in my case which seems to be the way how Ozone and many other manufacturers do the knot.

    • Open the knot carefully. Try to not bend the line material too much!

  2. Ozone Acro Brake Handles Installation, Remove the default brake handle: 手順 2、 2の画像 1 Ozone Acro Brake Handles Installation, Remove the default brake handle: 手順 2、 2の画像 2
    • Before removing the brake line check if there is a mark on your line which marks the position of the brake handle on the line. If there is no mark on the line above the knot or somewhere else please use a feltpen to mark the position of your brake handle.

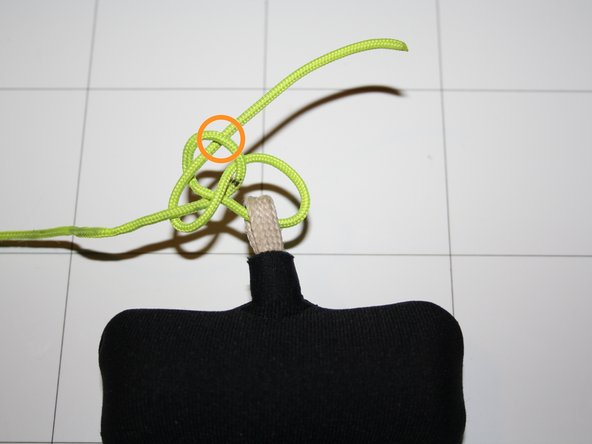
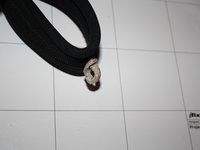
    • By default there should be a mark on your brake line just above the knot!

    • Think about the brake line length very carefully. The acro brake is very different compared to the default brake handle. It may take some time to find the best position for you.

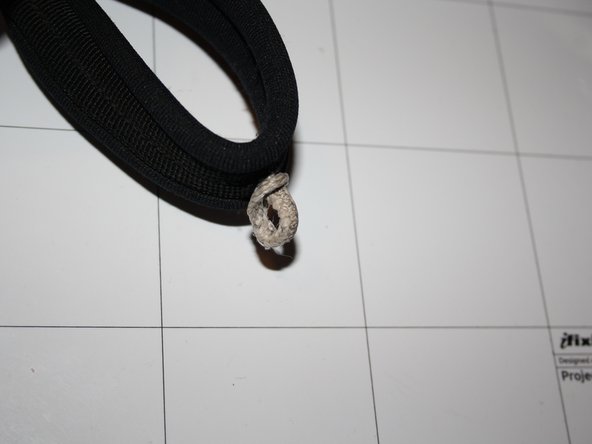
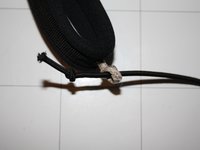
    • Finally remove the line from the brake handle

  3. Ozone Acro Brake Handles Installation, Free brakes?: 手順 3、 2の画像 1 Ozone Acro Brake Handles Installation, Free brakes?: 手順 3、 2の画像 2
    • If you would like to have free brakes - remove the break line from the pulley

    • Please think about this carefully! You should know what you are doing when removing the brake line from the pulley!

    • Do NOT fly the wing without bungees attached to the acro handle when removing the brake line from the pulleys - you may lose your brake handle during flight!

  4. Ozone Acro Brake Handles Installation, Attach the acro brake handle to the brake line - Part 1: 手順 4、 3の画像 1 Ozone Acro Brake Handles Installation, Attach the acro brake handle to the brake line - Part 1: 手順 4、 3の画像 2 Ozone Acro Brake Handles Installation, Attach the acro brake handle to the brake line - Part 1: 手順 4、 3の画像 3
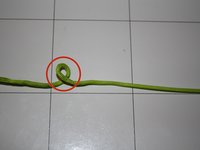
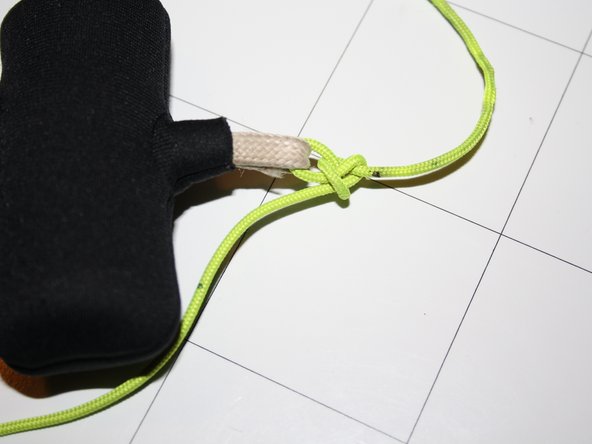
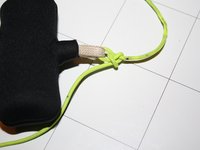
    • Make a little loop on the brake line (the open end beeing on the right hand side in the picture)

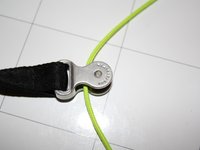
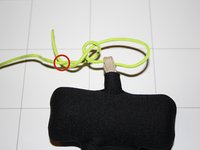
    • Put the brake line through the loop on the acro brake handle

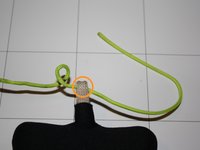
    • put the open end of the line through the loop on the brake line (from behind)

  5. Ozone Acro Brake Handles Installation, Attach the acro brake handle to the brake line - Part 2: 手順 5、 3の画像 1 Ozone Acro Brake Handles Installation, Attach the acro brake handle to the brake line - Part 2: 手順 5、 3の画像 2 Ozone Acro Brake Handles Installation, Attach the acro brake handle to the brake line - Part 2: 手順 5、 3の画像 3
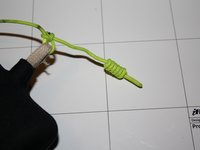
    • now route the open end of the brake line behind the brake line that goes up to the glider.

    • and back through the loop

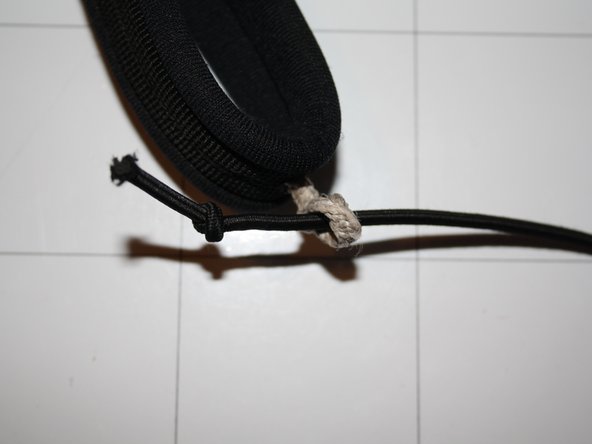
    • Arrange the brake line knot that the mark on the brake line again is just over the brake line knot - and pull the knot tight

    • Be careful not to shorten the brake line!

  6. Ozone Acro Brake Handles Installation, Store the rest of the line: 手順 6、 2の画像 1 Ozone Acro Brake Handles Installation, Store the rest of the line: 手順 6、 2の画像 2
    • If you want you can store the rest of the line like this (or any other method comfortable)

  7. Ozone Acro Brake Handles Installation, Brake handle bungee installation - Part 1: 手順 7、 3の画像 1 Ozone Acro Brake Handles Installation, Brake handle bungee installation - Part 1: 手順 7、 3の画像 2 Ozone Acro Brake Handles Installation, Brake handle bungee installation - Part 1: 手順 7、 3の画像 3
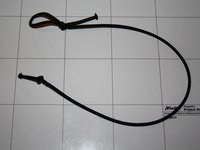
    • Prepare bungees as shown in the picture with a loop on one side and a knot on the other side.

    • The loop should just be big enough to fit over your riser and not fall off.

    • Put the loop around the bottom of the riser as shown in the 2nd picture.

    • Do not pull the open end of the bungee through the loop at the bottom of the riser - the open end should come out to the 'outside' of the riser.

    • if it is the right riser, the bungee should come out on the right hand side of the riser if you are holding the riser as you would just put it to your carabiner

  8. Ozone Acro Brake Handles Installation, Brake handle bungee installation - Part 2: 手順 8、 3の画像 1 Ozone Acro Brake Handles Installation, Brake handle bungee installation - Part 2: 手順 8、 3の画像 2 Ozone Acro Brake Handles Installation, Brake handle bungee installation - Part 2: 手順 8、 3の画像 3
    • There is a loop on the bottom of the Ozone Acro Brake Handle. Prepare the loop as shown in the first and second picture

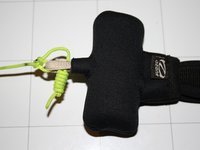
    • Put the bungee through the prepared loop

  9. Ozone Acro Brake Handles Installation, Finish and Final Warnings!: 手順 9、 1の画像 1
    • Arrange it and pull tight

    • Voila! You installed acro handles on your glider.

    • Do the same thing on the other side of the glider!

    • Attention! Your glider may behave very differently using the acro handles. Especially if you took the decision to modify to free brakes!

    • Do a symmetry check and make sure both sides of the gliders brake lines are same length

    • If you shortened the brake lines - which can be okay if you went to free brakes - make sure you know what you are doing!

終わりに

You do any modification on your glider at your own risk!

ある他の人がこのガイドを完成しました。

作成者

3人の作成者と共同で作成されました。

Michael

メンバー登録日: 11/09/11

78 ポイント

2のガイドは作成済み

0 件のコメント

コメントを追加

統計データ:

過去 24時間: 2

過去 7 日: 6

過去 30 日: 15

今までの合計 2,679