はじめに
Replacing the spring can be somewhat difficult, so be prepared to deal with a little frustration when removing the spring.
必要な工具と部品
-
-
-
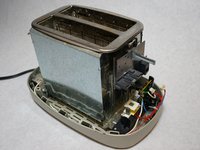
Using the Phillips-head #2 screwdriver, unscrew the three 1cm Phillips-head screws on the plastic base of the toaster to separate the outer metal shell from the plastic base.
 FixBotに聞いてみる
-
-
-
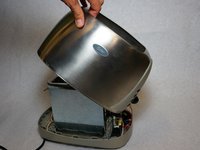
Push the plastic push-down handle down and pull the plastic handle straight from metal arm.
-
-
-
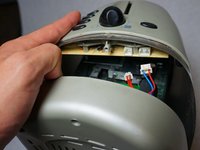
Loosen the outer metal shell from the plastic base by holding the plastic base while pulling up on the metal shell.
-
-
-
この手順で使用する道具:Tweezers$4.99
-
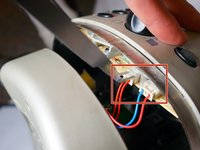
Disconnect the cable clips from the circuit board using the tweezers to free the outer metal shell from the plastic base.
-
-
-
-
この手順で使用する道具:Tweezers$4.99
-
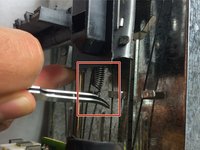
Insert the tweezers between the spring and the bottom of the lever to release the spring.
-
-
-
Remove spring from the bottom of the lever.
-
The spring should only be connected to the top of the toaster after this is complete.
-
-
-
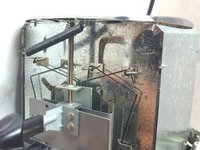
Insert the tweezers between the two metal flaps located at the top of the toaster.
-
Hold the spring and turn it sideways to lay it flat along the top of the toaster.
-
Pry the spring from the top of the toaster.
-
-


To reassemble your device, follow these instructions in reverse order.
チーム

Cal Poly, Team 13-15, Regan Winter 2014 Cal Poly, Team 13-15, Regan Winter 2014人のメンバー
CPSU-REGAN-W14S13G15
5 メンバー
12のガイドは作成済み