メインコンテンツにスキップ

Osmo Mobile Analog JoyStick Replacement

必要な工具と部品

  1. Osmo Mobile Analog JoyStick Replacement, Osmo Mobile Handle Disassembly: 手順 1、 2の画像 1 Osmo Mobile Analog JoyStick Replacement, Osmo Mobile Handle Disassembly: 手順 1、 2の画像 2
    • Remove gimbal from base handle by loosening round plate found at the top of the handle.

  2. Osmo Mobile Analog JoyStick Replacement: 手順 2、 2の画像 1 Osmo Mobile Analog JoyStick Replacement: 手順 2、 2の画像 2
    • Use Phillips #00 screwdriver to remove the three screws found on the gimbal stabilizer to detach handle from gimbal.

    • Carefully detach handle from gimbal and disconnect the cable that connects the two.

  3. Osmo Mobile Analog JoyStick Replacement: 手順 3、 1の画像 1
    • Locate the hex screws found at the top base of the handle, and unscrew using the 1.5mm hex screwdriver.

  4. Osmo Mobile Analog JoyStick Replacement: 手順 4、 2の画像 1 Osmo Mobile Analog JoyStick Replacement: 手順 4、 2の画像 2
    • Remove joystick by gently pulling away from handle

  5. Osmo Mobile Analog JoyStick Replacement: 手順 5、 3の画像 1 Osmo Mobile Analog JoyStick Replacement: 手順 5、 3の画像 2 Osmo Mobile Analog JoyStick Replacement: 手順 5、 3の画像 3
    • Remove the quick release PCBA by locating the connecting wires and release the ribbon cable with tweezers.

    • Use the spudger to pry open and remove the face plate, starting at the back of the handle.

  6. Osmo Mobile Analog JoyStick Replacement: 手順 6、 3の画像 1 Osmo Mobile Analog JoyStick Replacement: 手順 6、 3の画像 2 Osmo Mobile Analog JoyStick Replacement: 手順 6、 3の画像 3
    • Locate four screws directly on top of handle.

    • Unscrew the silver, bottom two screws, that are closest to the face plate using the 00 screwdriver.

    • Unscrew the black, top two screws, located furthest from the face plate, using the 0 screwdriver.

    • Remove the remaining two screws found on the front of the faceplate.

    • Remove the rest of the face plate shell.

  7. Osmo Mobile Analog JoyStick Replacement, Analog JoyStick: 手順 7、 1の画像 1
    • Remove the top left screw on the joystick panel with 00 screwdriver.

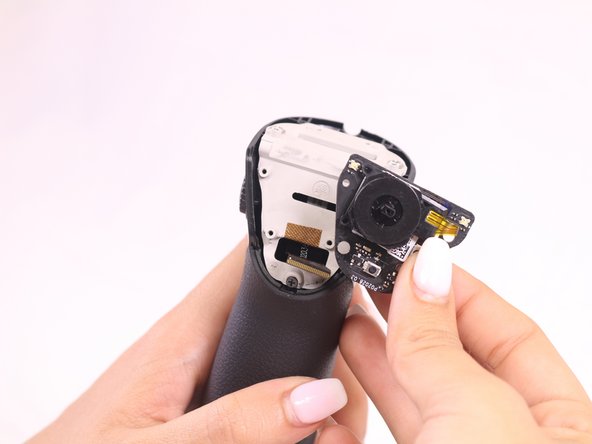
    • Lift the faceplate holding joystick module.

  8. Osmo Mobile Analog JoyStick Replacement: 手順 8、 1の画像 1
    • Remove the bottom right screw on the joystick panel with the #00 Phillips screwdriver.

  9. Osmo Mobile Analog JoyStick Replacement: 手順 9、 1の画像 1
    • Hold down the larger of the two ribbon cables, and pull on the circuit board with a constant and careful down and out motion.

  10. Osmo Mobile Analog JoyStick Replacement: 手順 10、 2の画像 1 Osmo Mobile Analog JoyStick Replacement: 手順 10、 2の画像 2
    • Gently remove joystick module by pulling it through the circuit board and inserting the new module.

終わりに

To reassemble your device, follow these instructions in reverse order.

3 の人々がこのガイドを完成させました。

作成者

3人の作成者と共同で作成されました。

William Tyler Wills

メンバー登録日: 09/28/17

426 ポイント

4のガイドは作成済み

チーム

USF Tampa, Team S2-G1, Nance Fall 2017 USF Tampa, Team S2-G1, Nance Fall 2017人のメンバー

USFT-NANCE-F17S2G1

4 メンバー

12のガイドは作成済み

2 件のコメント

Well done William! Do you know if the gimbal head of this unit can be reassembled rotated 180 degrees so that it will work with cameras like the Lenovo Mirage VR180 Camera. The Mirage has two forward facing 180 degree cameras that are partially or totally blocked when mounted in the standard configuration. There are other issues that need to be addressed to balance the camera but if the head can be rotated 180 degrees from its standard orientation then the Osmo handle can be held in its normal orientation. Just starting to experiment with this idea and thought you might be able be able to prevent any false starts.

Murray Foster - 返信

thanks alot….

this is very nice

im majid from zancko repair

zancko repair - 返信

コメントを追加

統計データ:

過去 24時間: 0

過去 7 日: 15

過去 30 日: 43

今までの合計 3,478