メインコンテンツにスキップ

Oregon Scientific RM318PA Focus Knob Replacement

必要な工具と部品

  1. Oregon Scientific RM318PA Focus Knob Replacement, A/C Adapter: 手順 1、 3の画像 1 Oregon Scientific RM318PA Focus Knob Replacement, A/C Adapter: 手順 1、 3の画像 2 Oregon Scientific RM318PA Focus Knob Replacement, A/C Adapter: 手順 1、 3の画像 3
    • Hold Clock so the screen is facing away from you.

    • Using your thumbs, push up on battery cover to remove.

    • With your other hand, pull down on the A/C Adapter jack to remove.

  2. Oregon Scientific RM318PA Focus Knob Replacement, Batteries: 手順 2、 1の画像 1
    • Remove batteries by pushing a battery toward the spring.

    • Lift battery out at an angle. Repeat with second battery.

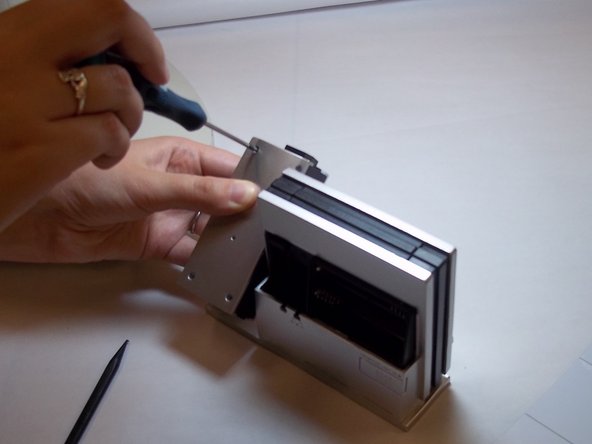
  3. Oregon Scientific RM318PA Focus Knob Replacement, Projection Arm: 手順 3、 3の画像 1 Oregon Scientific RM318PA Focus Knob Replacement, Projection Arm: 手順 3、 3の画像 2 Oregon Scientific RM318PA Focus Knob Replacement, Projection Arm: 手順 3、 3の画像 3
    • Use a Phillips #00 Screwdriver to remove the four (4) screws from the back of the projection arm.

    • Once screws are removed, lift the back up and off of the projection arm.

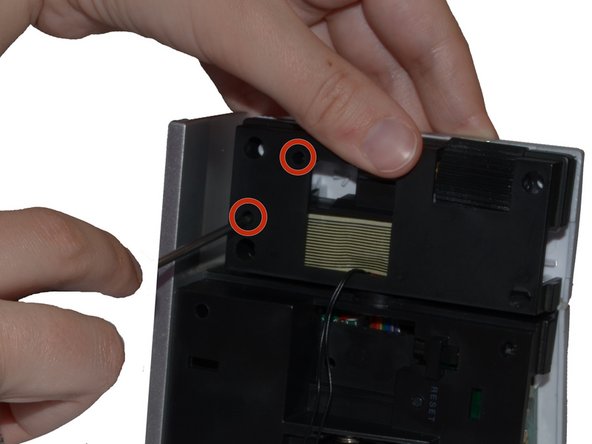
  4. Oregon Scientific RM318PA Focus Knob Replacement: 手順 4、 2の画像 1 Oregon Scientific RM318PA Focus Knob Replacement: 手順 4、 2の画像 2
    • Use a Phillips #00 Screwdriver to remove two (2) screws from back of projection arm.

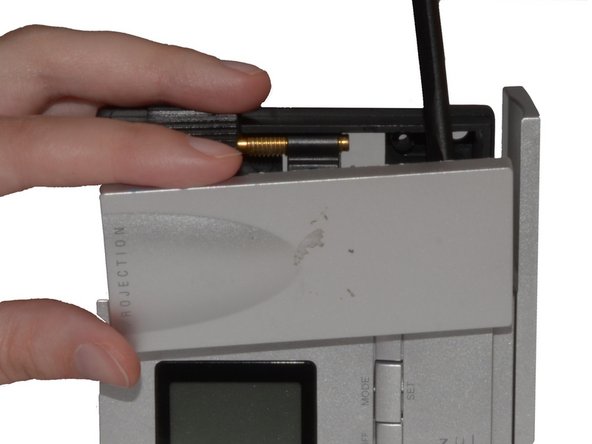
  5. Oregon Scientific RM318PA Focus Knob Replacement: 手順 5、 2の画像 1 Oregon Scientific RM318PA Focus Knob Replacement: 手順 5、 2の画像 2
    • Use a plastic opening tool to pry apart the front of the projection arm casing. Start at the top of the projection arm.

    • Once top is partially open, use a spudger to pry at the side of the projection arm.

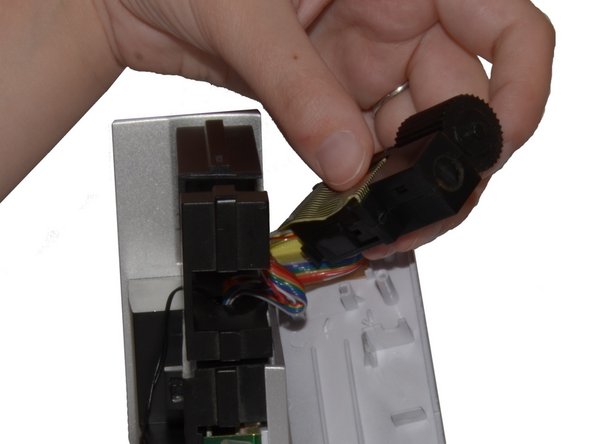
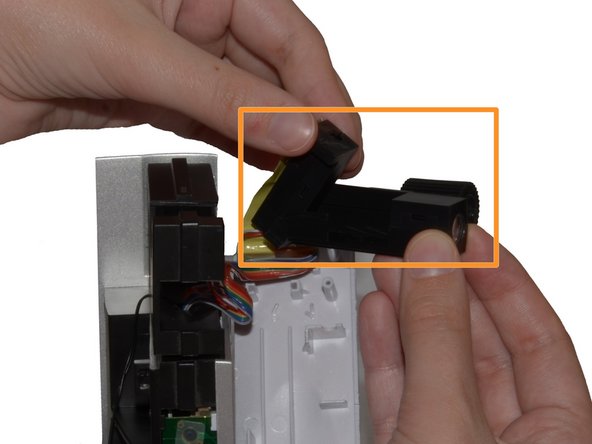
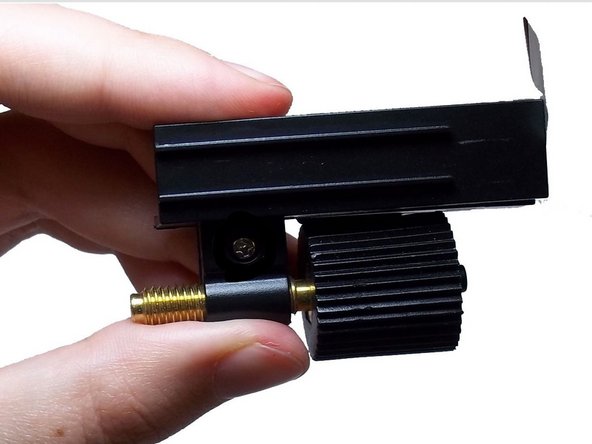
  6. Oregon Scientific RM318PA Focus Knob Replacement, Focus Knob: 手順 6、 3の画像 1 Oregon Scientific RM318PA Focus Knob Replacement, Focus Knob: 手順 6、 3の画像 2 Oregon Scientific RM318PA Focus Knob Replacement, Focus Knob: 手順 6、 3の画像 3
    • Turn the clock on its side. Slide the Focus Knob forward with your thumb.

    • The Focus Knob Component should now be free of Projection Arm.

    • Hold the Component in one hand and lift the Projection Beam up and away from the Focus Knob.

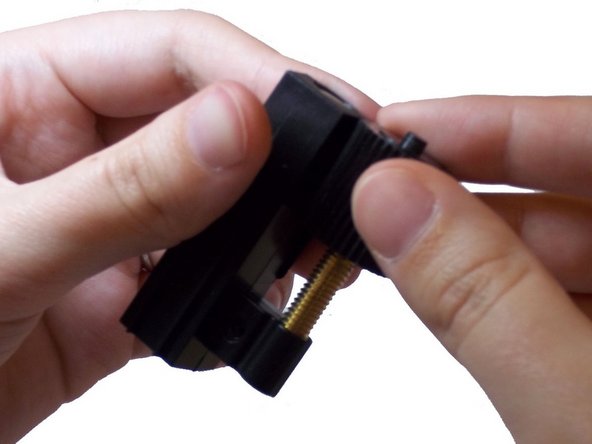
  7. Oregon Scientific RM318PA Focus Knob Replacement: 手順 7、 3の画像 1 Oregon Scientific RM318PA Focus Knob Replacement: 手順 7、 3の画像 2 Oregon Scientific RM318PA Focus Knob Replacement: 手順 7、 3の画像 3
    • Loosen Focus Knob by turning the Focus Knob counterclockwise with your fingers.

    • If needed, add a SMALL amount of WD-40 to the base of the knob and continue turning Focus Knob.

    • Place replacement Focus Knob in socket and turn clockwise to secure.

終わりに

To reassemble your device, follow these instructions in reverse order.

作成者

3人の作成者と共同で作成されました。

Liz Matresse

メンバー登録日: 10/27/14

381 ポイント

2のガイドは作成済み

チーム

Eastern Washington University, Team 1-3, Carnegie Fall 2015 Eastern Washington University, Team 1-3, Carnegie Fall 2015人のメンバー

EWU-CARNEGIE-F15S1G3

2 メンバー

2のガイドは作成済み

0 件のコメント

コメントを追加

統計データ:

過去 24時間: 0

過去 7 日: 0

過去 30 日: 3

今までの合計 830