メインコンテンツにスキップ

Orbic Wonder Speaker Replacement

必要な工具と部品

  1. Orbic Wonder Speaker Replacement, Battery: 手順 1、 3の画像 1 Orbic Wonder Speaker Replacement, Battery: 手順 1、 3の画像 2 Orbic Wonder Speaker Replacement, Battery: 手順 1、 3の画像 3
    • Remove two 2mm TR9 Torx screws from the bottoms of the device.

  2. Orbic Wonder Speaker Replacement: 手順 2、 3の画像 1 Orbic Wonder Speaker Replacement: 手順 2、 3の画像 2 Orbic Wonder Speaker Replacement: 手順 2、 3の画像 3
    • There is a border between the black phone backing and the silver screen.

    • Place the Jimmy in this border, and cautiously torque it back and forth to part the two halves.

    • When the halves are parted correctly, the gap should look like this.

    • Be careful to avoid damaging any connecting circuitry between the two halves.

  3. Orbic Wonder Speaker Replacement: 手順 3、 3の画像 1 Orbic Wonder Speaker Replacement: 手順 3、 3の画像 2 Orbic Wonder Speaker Replacement: 手順 3、 3の画像 3
    この手順で使用する道具:
    Anti-Static Wrist Strap
    $7.95
    購入する
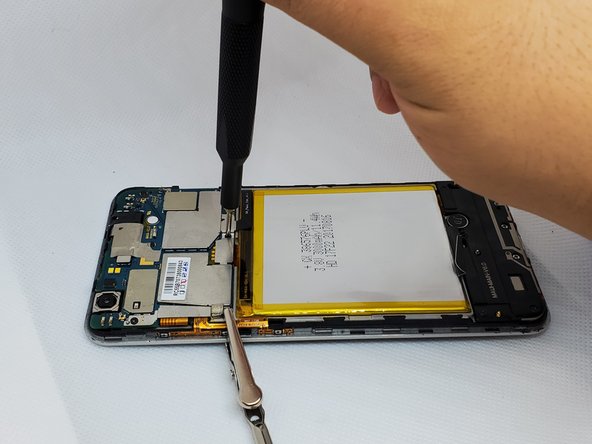
    • Before continuing, tighten the anti-static wrist strap around your wrist and connect the alligator clips to a metal portion of the phone.

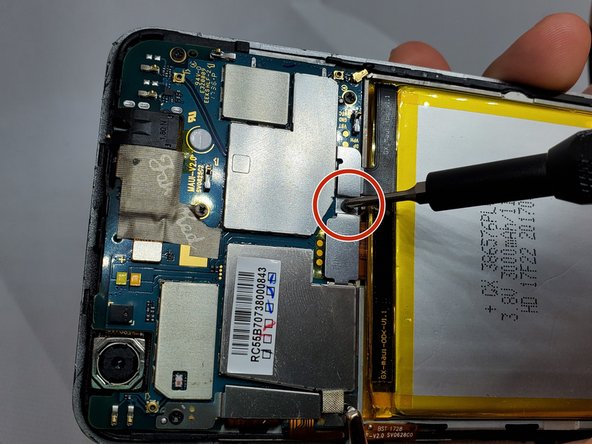
    • On the upper right side, there is a black ribbon cable in the shape of an “L”. Remove the single 1 mm Phillips #000 screw on the left side of the ribbon cable.

  4. Orbic Wonder Speaker Replacement: 手順 4、 3の画像 1 Orbic Wonder Speaker Replacement: 手順 4、 3の画像 2 Orbic Wonder Speaker Replacement: 手順 4、 3の画像 3
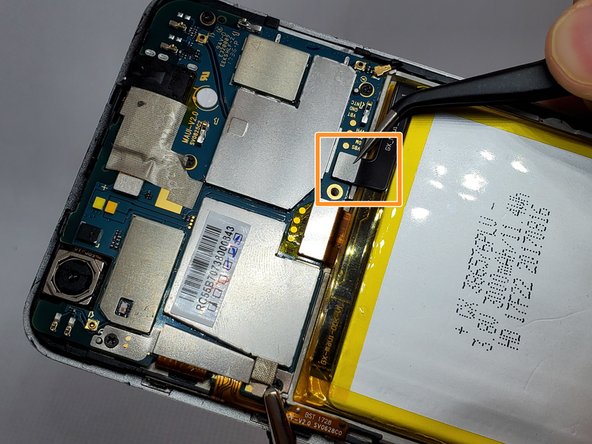
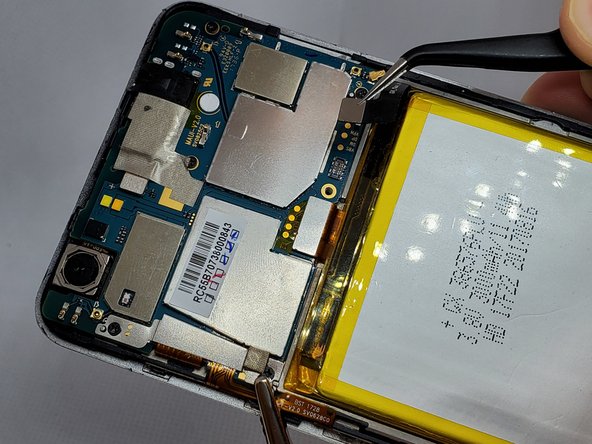
    • Use a pair of angled tweezers to carefully remove the metal casing of the ribbon cable.

    • Use a pair of angled tweezers to detach the black ribbon cable. This is done to unplug the battery.

  5. Orbic Wonder Speaker Replacement: 手順 5、 3の画像 1 Orbic Wonder Speaker Replacement: 手順 5、 3の画像 2 Orbic Wonder Speaker Replacement: 手順 5、 3の画像 3
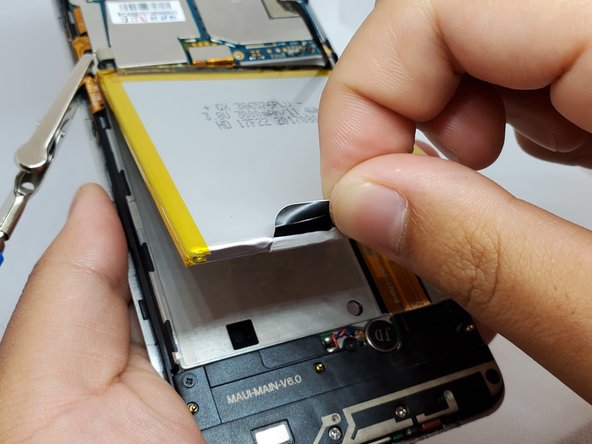
    • There is a black flap on the bottom of the battery.

    • Using your fingers, pinch this flap and carefully pull the battery up and out of the phone.

  6. Orbic Wonder Speaker Replacement, Speaker: 手順 6、 3の画像 1 Orbic Wonder Speaker Replacement, Speaker: 手順 6、 3の画像 2 Orbic Wonder Speaker Replacement, Speaker: 手順 6、 3の画像 3
    この手順で使用する道具:
    Anti-Static Wrist Strap
    $7.95
    購入する
    • Remove the anti-static wrist strap.

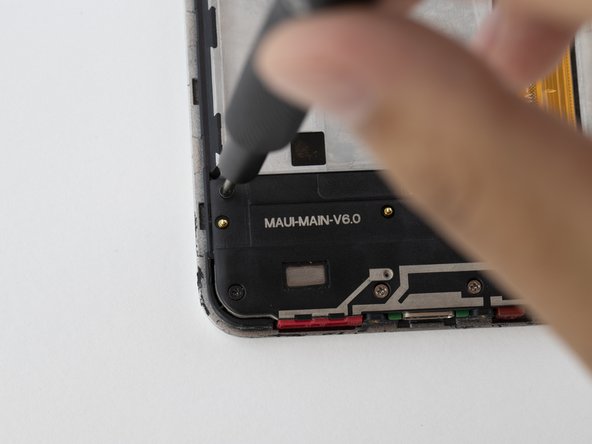
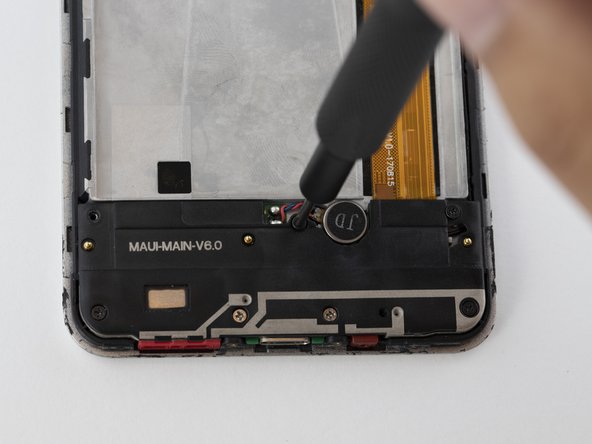
    • Use the Phillips #000 screwdriver to remove the five black 2 mm screws.

    • Use the Phillips #000 screwdriver to remove the two grey 2 mm screws.

  7. Orbic Wonder Speaker Replacement: 手順 7、 2の画像 1 Orbic Wonder Speaker Replacement: 手順 7、 2の画像 2
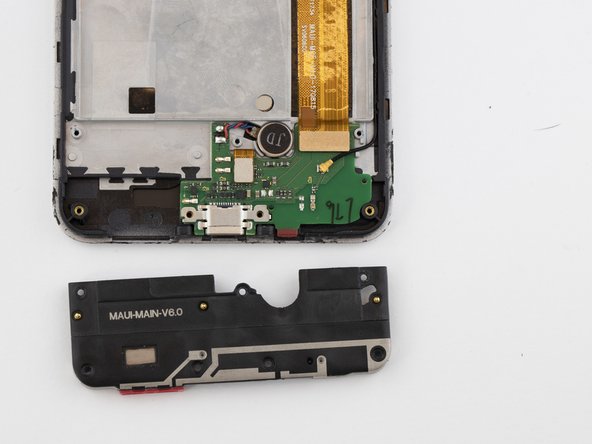
    • Use a pair of angled tweezers to remove the speaker housing.

終わりに

To reassemble your device, follow these instructions in reverse order.

作成者

3人の作成者と共同で作成されました。

Grant Adler

メンバー登録日: 09/17/19

859 ポイント

5のガイドは作成済み

チーム

0 件のコメント

コメントを追加

統計データ:

過去 24時間: 1

過去 7 日: 2

過去 30 日: 9

今までの合計 436