メインコンテンツにスキップ

Oral-B Vitality Battery Replacement

必要な工具と部品

  1. Oral-B Vitality Battery Replacement, Battery: 手順 1、 3の画像 1 Oral-B Vitality Battery Replacement, Battery: 手順 1、 3の画像 2 Oral-B Vitality Battery Replacement, Battery: 手順 1、 3の画像 3
    • Pull off head, and use pliers to remove the white cap. Pull out the circuit core.

  2. Oral-B Vitality Battery Replacement: 手順 2、 2の画像 1 Oral-B Vitality Battery Replacement: 手順 2、 2の画像 2
    • De-solder in these four (4) locations.

    • The two (2) motor connections

    • The Positive (+) side of the battery

    • The Negative (-) side of the battery

  3. Oral-B Vitality Battery Replacement: 手順 3、 2の画像 1 Oral-B Vitality Battery Replacement: 手順 3、 2の画像 2
    • De-Solder lower battery connection terminal. Bend back battery terminal to clear circuit board.

  4. Oral-B Vitality Battery Replacement: 手順 4、 1の画像 1
    • De-Solder the three (3) upper terminals from the circuit board.

  5. Oral-B Vitality Battery Replacement: 手順 5、 1の画像 1
    • Use plastic prying tools to carefully pry off the circuit board. (Utilize metal spedger as a last resort)

    • There is a white tab that goes through the board, be careful when removing the circuit board.

  6. Oral-B Vitality Battery Replacement: 手順 6、 2の画像 1 Oral-B Vitality Battery Replacement: 手順 6、 2の画像 2
    • Pull the circuit board and battery assembly out. Then proceed to remove the battery from the circuit board

  7. Oral-B Vitality Battery Replacement: 手順 7、 1の画像 1
    • When re-installing battery, remember to bend down lower terminal. And the negative (-) terminal is closest to the copper wires

    • Ensure you recharge the toothbrush after the repair. Even if the replacement battery is already fully charged, the toothbrush will fail to power on if you don’t recharge the toothbrush.

終わりに

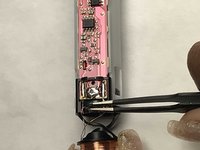
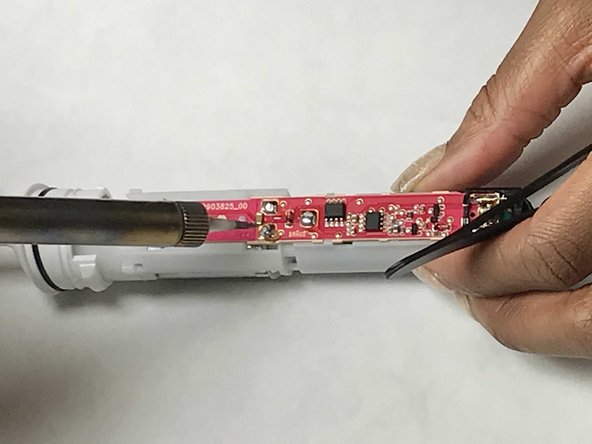
To reassemble your device, follow these instructions in reverse order. Remember to apply just enough solder to re-attach the terminals.

15 の人々がこのガイドを完成させました。

作成者

6人の作成者と共同で作成されました。

Miles Gunty

メンバー登録日: 11/07/17

492 ポイント

1ガイドが承認済み

チーム

IUPUI, Team S2-G1, Harley Fall 2017 IUPUI, Team S2-G1, Harley Fall 2017人のメンバー

IUPUI-HARLEY-F17S2G1

3 メンバー

8のガイドは作成済み

8 件のコメント

This is very easy to do. I had no problems following your instructions.

Ian Bowker - 返信

Thanks.

Is this a regular rechargeable AA?

Thanks again.

Stephen Shaw - 返信

The original battery is a NiCd with tabs. I just spot welded tabs onto a standard AA NiMH battery and it worked fine.

T C -

Thanks.

I did fix an Oral B Braun PRO timer (2022) and the only part that is different is the head. It has two nail presses inside, one at the switch side and the other at the opposite side, that are very difficult to lose.

Peter M. - 返信

コメントを追加

統計データ:

過去 24時間: 15

過去 7 日: 164

過去 30 日: 791

今までの合計 43,493