メインコンテンツにスキップ

Optical drive Replacement

必要な工具と部品

  1. Optical drive Replacement, Optical drive: 手順 1、 1の画像 1
    • First make sure the laptop is off and closed.

  2. Optical drive Replacement: 手順 2、 1の画像 1
    • Unlock the battery and push the release lever to remove the battery from the laptop.

  3. Optical drive Replacement: 手順 3、 2の画像 1 Optical drive Replacement: 手順 3、 2の画像 2
    • Unscrew the four screws to remove the hard drive cover.

    • Remove these two screws to loosen the hard drive.

    • Gently slide the hard drive out.

    • The hard drive is missing from this device. (Only cover is shown)

  4. Optical drive Replacement: 手順 4、 1の画像 1
    • Remove all the screws that hold the plastic bottom on. There are some more screws that can't be seen in the photo.

  5. Optical drive Replacement: 手順 5、 1の画像 1
    • Gently pry up the plastic bottom and if it feels like it is resisting check the surrounding areas for more screws.

  6. Optical drive Replacement: 手順 6、 1の画像 1
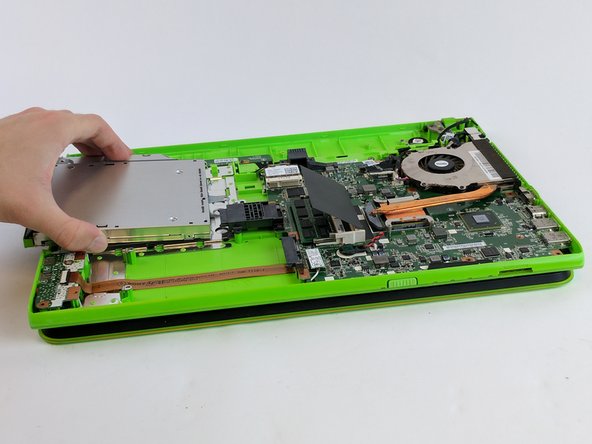
    • Now that the backing plate is off make sure to be careful of the Motherboard and its components from being damaged. From here on out it is recommended that you wear an anti static bracelet or at the very least touching something metal to remove any static electricity that you may have built up.

  7. Optical drive Replacement: 手順 7、 2の画像 1 Optical drive Replacement: 手順 7、 2の画像 2
    • There will be a couple more screw holding in the CD tray and once you remove them the CD tray will simply slide out.

終わりに

To reassemble your device, follow these instructions in reverse order.

2 の人々がこのガイドを完成させました。

作成者

4人の作成者と共同で作成されました。

Eric Martinez

メンバー登録日: 02/14/17

637 ポイント

6のガイドは作成済み

チーム

USF Tampa, Team 20-5, Remmell Spring 2017 USF Tampa, Team 20-5, Remmell Spring 2017人のメンバー

USFT-REMMELL-S17S20G5

3 メンバー

12のガイドは作成済み

0 件のコメント

コメントを追加

統計データ:

過去 24時間: 1

過去 7 日: 4

過去 30 日: 10

今までの合計 762