メインコンテンツにスキップ

Opening a bObi Robotic Vacuum

必要な工具と部品

  1. Opening a bObi Robotic Vacuum, Top Cover: 手順 1、 2の画像 1 Opening a bObi Robotic Vacuum, Top Cover: 手順 1、 2の画像 2
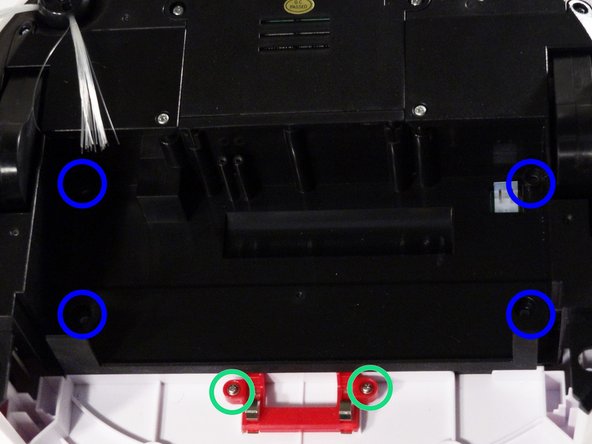
    • Remove bObi’s front wheel to access one of the screws holding bObi together.

    • Make sure the wheel is turned closer to bObi's front touch sensors. Use your screwdriver for leverage, and the wheel will pop up and out.

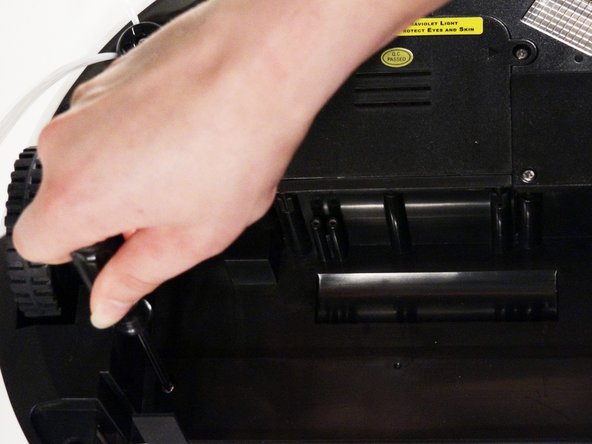
    • Uninstall the larger screw that sits deeper in the wheel compartment.

  2. Opening a bObi Robotic Vacuum: 手順 2、 3の画像 1 Opening a bObi Robotic Vacuum: 手順 2、 3の画像 2 Opening a bObi Robotic Vacuum: 手順 2、 3の画像 3
    • Remove bObi's dustbin.

    • Uninstall the 2 screws close to the bin and 2 smaller screws above her main brushes.

  3. Opening a bObi Robotic Vacuum: 手順 3、 3の画像 1 Opening a bObi Robotic Vacuum: 手順 3、 3の画像 2 Opening a bObi Robotic Vacuum: 手順 3、 3の画像 3
    • Lift the brush holder. To detach completely, unplug it from bObi.

    • Remove the two screws on the dustbin contact point holder inside bObi.

    • There are 4 screws beneath the main brushes. Uninstall these, and open bObi up to expose her main circuit board.

  4. Opening a bObi Robotic Vacuum: 手順 4、 3の画像 1 Opening a bObi Robotic Vacuum: 手順 4、 3の画像 2 Opening a bObi Robotic Vacuum: 手順 4、 3の画像 3
    • Detach the two circuit plugs connecting bObi's cover to the main board and the cover will be completely removed.

終わりに

To reassemble bObi, refer to the closing guide. Closing bObi's Cover Post-Repair

作成者

1人の作成者と共同作成されました。

Chelsea

メンバー登録日: 09/24/14

2,278 ポイント

31のガイドは作成済み

0 件のコメント

コメントを追加

統計データ:

過去 24時間: 0

過去 7 日: 0

過去 30 日: 0

今までの合計 298