メインコンテンツにスキップ

OnePlus 2 Motherboard Replacement

必要な工具と部品

  1. OnePlus 2 Motherboard Replacement, SIM Card: 手順 1、 3の画像 1 OnePlus 2 Motherboard Replacement, SIM Card: 手順 1、 3の画像 2 OnePlus 2 Motherboard Replacement, SIM Card: 手順 1、 3の画像 3
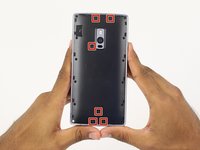
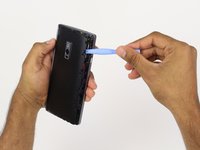
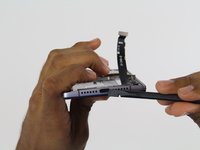
    • Make sure that your phone is turned off before proceeding

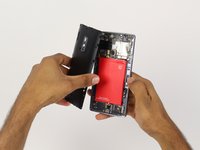
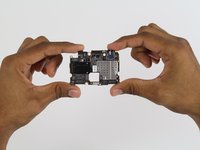
    • Use an opening pick, your thumbnail, or a spudger to gently pry off the external casing

  2. OnePlus 2 Motherboard Replacement: 手順 2、 3の画像 1 OnePlus 2 Motherboard Replacement: 手順 2、 3の画像 2 OnePlus 2 Motherboard Replacement: 手順 2、 3の画像 3
    • Locate the SIM card tray on the back of the phone

    • Use your thumb to gently slide out the tray

  3. OnePlus 2 Motherboard Replacement: 手順 3、 1の画像 1
    • Remove the SIM card tray

  4. OnePlus 2 Motherboard Replacement, Battery: 手順 4、 3の画像 1 OnePlus 2 Motherboard Replacement, Battery: 手順 4、 3の画像 2 OnePlus 2 Motherboard Replacement, Battery: 手順 4、 3の画像 3
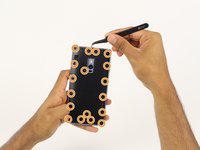
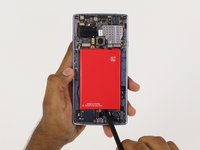
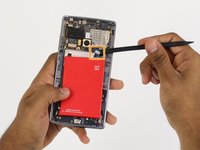
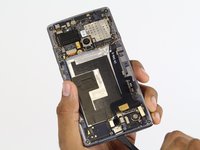
    • Find and carefully remove all 6 rubber screw covers with the tweezers.

    • Unscrew all 18 screws from the mid frame.

  5. OnePlus 2 Motherboard Replacement: 手順 5、 3の画像 1 OnePlus 2 Motherboard Replacement: 手順 5、 3の画像 2 OnePlus 2 Motherboard Replacement: 手順 5、 3の画像 3
    • Carefully pry up the mid frame from the back of the phone with the plastic opening tools.

    • Slowly work your way around the phone releasing all the clips that hold the frame in place.

  6. OnePlus 2 Motherboard Replacement: 手順 6、 3の画像 1 OnePlus 2 Motherboard Replacement: 手順 6、 3の画像 2 OnePlus 2 Motherboard Replacement: 手順 6、 3の画像 3
    • Using the spudger tool, pry the battery up from the adhesive.

    • Once the battery is loose from the adhesive holding it down, use the spudger tool to pry up the connection from the battery to the phone on the top right hand side.

  7. OnePlus 2 Motherboard Replacement, Front and Rear Camera: 手順 7、 3の画像 1 OnePlus 2 Motherboard Replacement, Front and Rear Camera: 手順 7、 3の画像 2 OnePlus 2 Motherboard Replacement, Front and Rear Camera: 手順 7、 3の画像 3
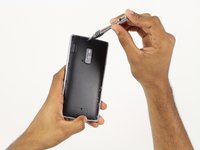
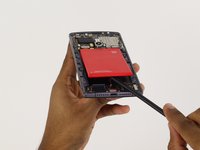
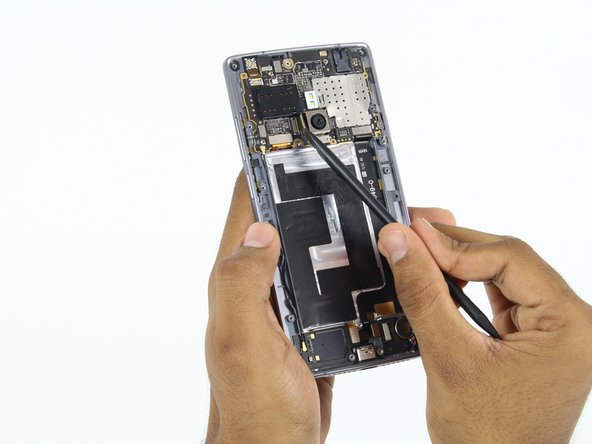
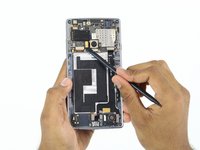
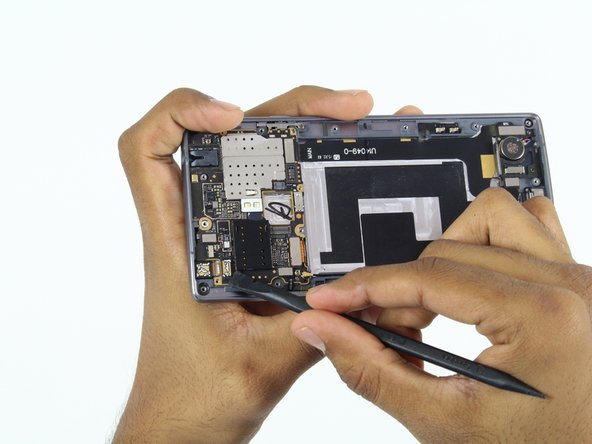
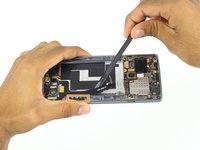
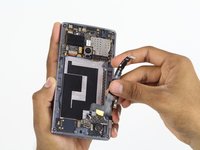
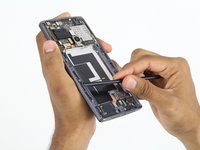
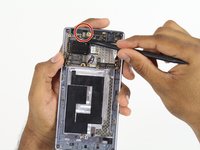
    • Use the spudger tool to pry off the connections at the bottom-right of the front-facing camera.

    • Be sure to disconnect both connections before attempting to lift off the wiring.

  8. OnePlus 2 Motherboard Replacement: 手順 8、 2の画像 1 OnePlus 2 Motherboard Replacement: 手順 8、 2の画像 2
    • Use the spudger tool to pry off the connection on the left of the front facing camera.

  9. OnePlus 2 Motherboard Replacement: 手順 9、 2の画像 1 OnePlus 2 Motherboard Replacement: 手順 9、 2の画像 2
    • Use the tweezers to lift up the camera from its groove.

    • The camera has a long, flat portion at the bottom, so be sure to slide the camera up while lifting it up.

  10. OnePlus 2 Motherboard Replacement: 手順 10、 3の画像 1 OnePlus 2 Motherboard Replacement: 手順 10、 3の画像 2 OnePlus 2 Motherboard Replacement: 手順 10、 3の画像 3
    • Use a spudger to pry off the connection below the front-facing camera.

    • Using the tweezers, carefully remove the camera from its groove.

  11. OnePlus 2 Motherboard Replacement, Charging Port: 手順 11、 2の画像 1 OnePlus 2 Motherboard Replacement, Charging Port: 手順 11、 2の画像 2
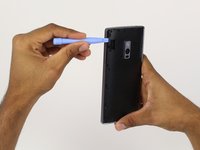
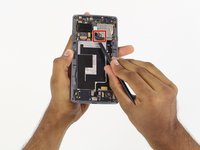
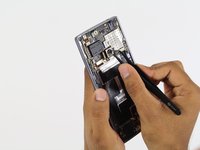
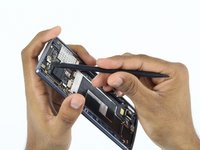
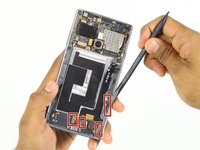
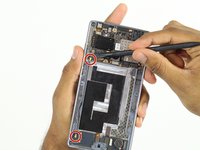
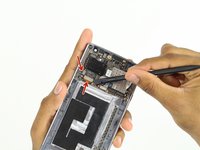
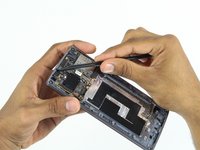
    • Use the spudger tool to pry up the top connection of the charging port.

    • Follow the cable with the spudger and slowly pry it up from the adhesive holding it down.

    • Stop at the next connection.

  12. OnePlus 2 Motherboard Replacement: 手順 12、 3の画像 1 OnePlus 2 Motherboard Replacement: 手順 12、 3の画像 2 OnePlus 2 Motherboard Replacement: 手順 12、 3の画像 3
    • Again, using the spudger tool, pry up the final 4 connections on the charging port

    • Again, just like before, slowly follow the cable with the spudger tool lifting it up from the adhesive backing.

  13. OnePlus 2 Motherboard Replacement: 手順 13、 3の画像 1 OnePlus 2 Motherboard Replacement: 手順 13、 3の画像 2 OnePlus 2 Motherboard Replacement: 手順 13、 3の画像 3
    • Using the spudger tool on the bottom of the phone, push the charging part inward.

    • Once the charging port is free from the frame, use your fingers to remove the charging port the rest of the way.

  14. OnePlus 2 Motherboard Replacement, Motherboard: 手順 14、 2の画像 1 OnePlus 2 Motherboard Replacement, Motherboard: 手順 14、 2の画像 2
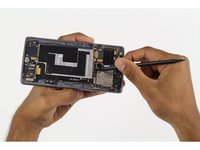
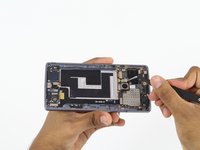
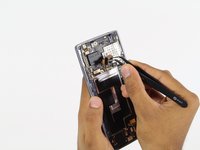
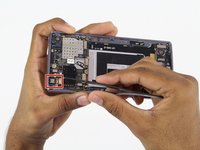
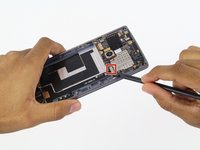
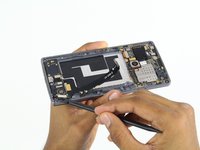
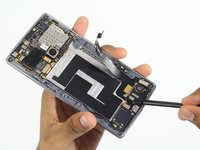
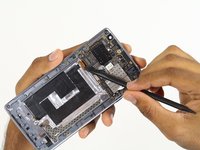
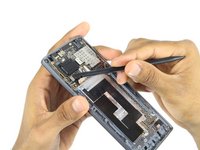
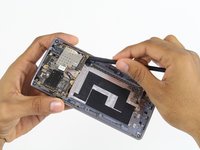
    • Use the spudger tool to pry off the long wire connecting the motherboard (top) and the daughter-board (bottom).

    • Try to use the spudger to pry off as much of the wire as possible before attempting to remove it.

  15. OnePlus 2 Motherboard Replacement: 手順 15、 3の画像 1 OnePlus 2 Motherboard Replacement: 手順 15、 3の画像 2 OnePlus 2 Motherboard Replacement: 手順 15、 3の画像 3
    • Use the spudger tool to pry off the 2 connections at the bottom-left of the motherboard.

  16. OnePlus 2 Motherboard Replacement: 手順 16、 1の画像 1
    • Use the screwdriver to unscrew the screw fastened at the bottom right of the motherboard.

  17. OnePlus 2 Motherboard Replacement: 手順 17、 2の画像 1 OnePlus 2 Motherboard Replacement: 手順 17、 2の画像 2
    • Use the spudger tool to pry up the connection at the top of the motherboard.

  18. OnePlus 2 Motherboard Replacement: 手順 18、 3の画像 1 OnePlus 2 Motherboard Replacement: 手順 18、 3の画像 2 OnePlus 2 Motherboard Replacement: 手順 18、 3の画像 3
    • Insert the spudger tool underneath the bottom right corner of the motherboard.

    • Gently work your way around the underside of the board, making sure that it is completely detached before attempting to remove it.

終わりに

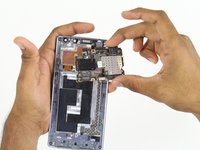
To reassemble your device, follow these instructions in reverse order.

13 の人々がこのガイドを完成させました。

作成者

2人の作成者と共同で作成されました。

Kayla Williams

メンバー登録日: 10/01/15

1,541 ポイント

6のガイドは作成済み

チーム

Cal Poly, Team 4-5, Maness Fall 2015 Cal Poly, Team 4-5, Maness Fall 2015人のメンバー

CPSU-MANESS-F15S4G5

4 メンバー

19のガイドは作成済み

3 件のコメント

Perfect. How can change de microphone and audio plug?

something?

Adolfo Mendoza Gutierrez - 返信

where can i find the replace of the motherboard?

Georgina Patron - 返信

hi,

where the wifi antena location?

Nimrod Cohen - 返信

コメントを追加

統計データ:

過去 24時間: 0

過去 7 日: 7

過去 30 日: 14

今までの合計 12,509