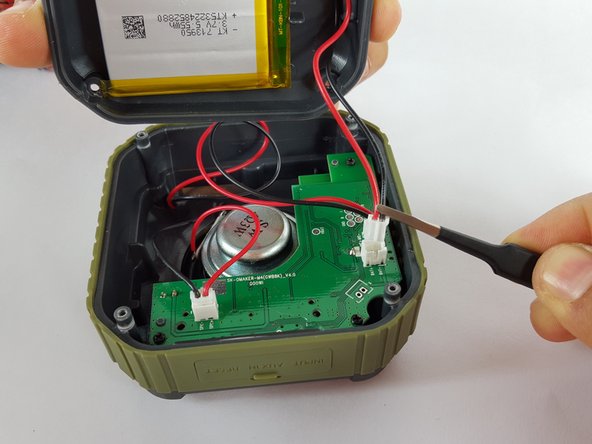
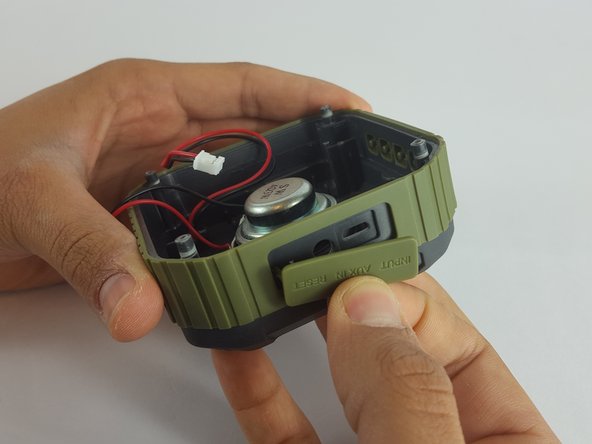
メインコンテンツにスキップ

Omaker M4 Port Cover Replacement

必要な工具と部品

  1. Omaker M4 Port Cover Replacement, Back Case: 手順 1、 1の画像 1
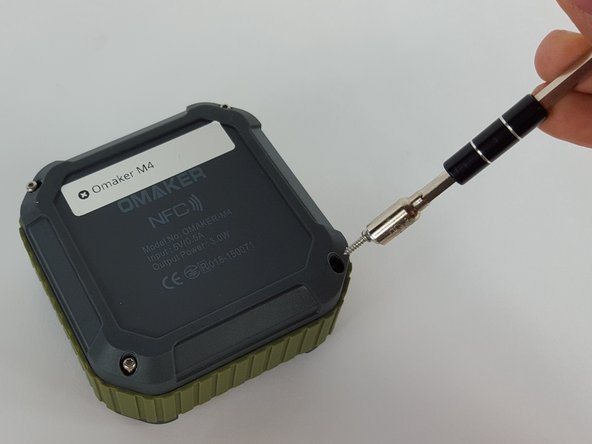
    • Flip the device over so the front of the speaker is facing down. Make sure to place the speaker on a flat surface

  2. Omaker M4 Port Cover Replacement: 手順 2、 2の画像 1 Omaker M4 Port Cover Replacement: 手順 2、 2の画像 2
    • Use a T6 Torx screwdriver to remove the four 9mm screws from the back of the device.

  3. Omaker M4 Port Cover Replacement: 手順 3、 2の画像 1 Omaker M4 Port Cover Replacement: 手順 3、 2の画像 2
    • Use a magnet to remove the screws after unscrewing them and place them aside.

  4. Omaker M4 Port Cover Replacement: 手順 4、 1の画像 1
    • Carefully remove the back cover without breaking the battery wire.

  5. Omaker M4 Port Cover Replacement: 手順 5、 2の画像 1 Omaker M4 Port Cover Replacement: 手順 5、 2の画像 2
    • Remove the end of the battery connection from the motherboard by holding the end of the wire and carefully pulling it out of the socket using tweezers.

    • The battery is still attached to the back cover.

  6. Omaker M4 Port Cover Replacement, Motherboard: 手順 6、 2の画像 1 Omaker M4 Port Cover Replacement, Motherboard: 手順 6、 2の画像 2
    • Remove the mic wire by carefully pulling the plug out of the socket.

  7. Omaker M4 Port Cover Replacement: 手順 7、 1の画像 1
    • Remove the speaker wire by carefully pulling the plug out of the socket on the motherboard.

  8. Omaker M4 Port Cover Replacement: 手順 8、 2の画像 1 Omaker M4 Port Cover Replacement: 手順 8、 2の画像 2
    • Use Phillips PH00 screwdriver to remove the three screws holding the motherboard in place.

  9. Omaker M4 Port Cover Replacement: 手順 9、 2の画像 1 Omaker M4 Port Cover Replacement: 手順 9、 2の画像 2
    • Remove the screws using the screwdriver.

    • Since the screws that hold the motherboard in place are smaller, the screwdriver is able to pick them up.

  10. Omaker M4 Port Cover Replacement: 手順 10、 2の画像 1 Omaker M4 Port Cover Replacement: 手順 10、 2の画像 2
    • Carefully remove the motherboard with your hand by lifting it from the device.

  11. Omaker M4 Port Cover Replacement, Port Cover: 手順 11、 2の画像 1 Omaker M4 Port Cover Replacement, Port Cover: 手順 11、 2の画像 2
    • Separate the port cover from the device using your hands.

  12. Omaker M4 Port Cover Replacement: 手順 12、 1の画像 1
    • Orient the device so the port cover is on your left.

  13. Omaker M4 Port Cover Replacement: 手順 13、 2の画像 1 Omaker M4 Port Cover Replacement: 手順 13、 2の画像 2
    • Using Tweezers, pinch the larger part of the stem

  14. Omaker M4 Port Cover Replacement: 手順 14、 1の画像 1
    • Use your left hand to pull while at the same time use the tweezers to compress the stem, carefully remove the port cover from the device.

終わりに

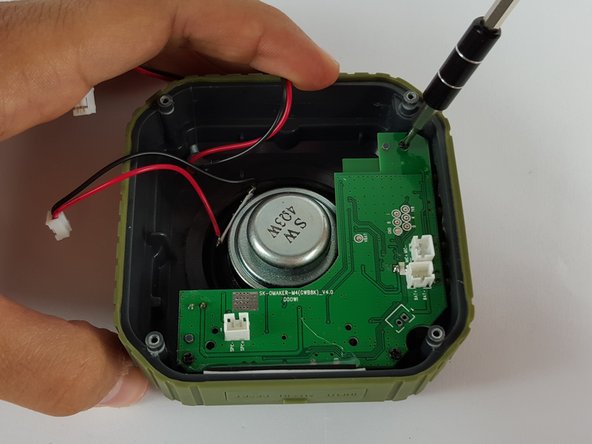
To reassemble your device, follow these instructions in reverse order.

2 の人々がこのガイドを完成させました。

作成者

4人の作成者と共同で作成されました。

Obaida Matar

メンバー登録日: 02/17/16

119 ポイント

1ガイドが承認済み

チーム

USF Tampa, Team 2-2, Sullivan Spring 2016 USF Tampa, Team 2-2, Sullivan Spring 2016人のメンバー

USFT-SULLIVAN-S16S2G2

3 メンバー

2のガイドは作成済み

0 件のコメント

コメントを追加

統計データ:

過去 24時間: 0

過去 7 日: 0

過去 30 日: 0

今までの合計 365