メインコンテンツにスキップ

Olympus Stylus 410 Speaker Replacement

必要な工具と部品

  1. Olympus Stylus 410 Speaker Replacement, Outer Case: 手順 1、 3の画像 1 Olympus Stylus 410 Speaker Replacement, Outer Case: 手順 1、 3の画像 2 Olympus Stylus 410 Speaker Replacement, Outer Case: 手順 1、 3の画像 3
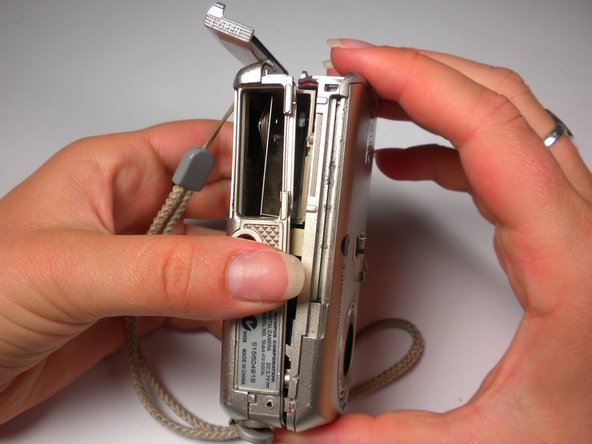
    • Locate the 3 screws on the outer metal band and remove them with a #00 Phillips screwdriver.

  2. Olympus Stylus 410 Speaker Replacement: 手順 2、 2の画像 1 Olympus Stylus 410 Speaker Replacement: 手順 2、 2の画像 2
    • Use the spudger to peel off the outer metal band, starting from the bottom of the camera.

    • The metal band it attached to the camera with glue in addition to screws. Be careful not to bend the band when removing it from the camera.

  3. Olympus Stylus 410 Speaker Replacement: 手順 3、 2の画像 1 Olympus Stylus 410 Speaker Replacement: 手順 3、 2の画像 2
    • The shutter button can now be removed. It is not connected to the camera and can be lifted off.

  4. Olympus Stylus 410 Speaker Replacement: 手順 4、 2の画像 1 Olympus Stylus 410 Speaker Replacement: 手順 4、 2の画像 2
    • Remove the memory card.

    • Locate and remove the 2 screws using a #00 Phillips screwdriver.

  5. Olympus Stylus 410 Speaker Replacement: 手順 5、 3の画像 1 Olympus Stylus 410 Speaker Replacement: 手順 5、 3の画像 2 Olympus Stylus 410 Speaker Replacement: 手順 5、 3の画像 3
    • Use a spudger around the edge of the case to loosen it.

    • Carefully wiggle the back case off. This may require a fair amount of force.

  6. Olympus Stylus 410 Speaker Replacement: 手順 6、 1の画像 1
    • Locate the 3 internal screws holding on the front of the case. Remove them with a #00 Phillips screwdriver.

  7. Olympus Stylus 410 Speaker Replacement: 手順 7、 2の画像 1 Olympus Stylus 410 Speaker Replacement: 手順 7、 2の画像 2
    • While grasping the interior and the front case, gently pull until they start to come apart. Some light wiggling may be required.

    • Be careful not to completely pull the front case off because it will still be connected with wires.

  8. Olympus Stylus 410 Speaker Replacement, Speaker: 手順 8、 3の画像 1 Olympus Stylus 410 Speaker Replacement, Speaker: 手順 8、 3の画像 2 Olympus Stylus 410 Speaker Replacement, Speaker: 手順 8、 3の画像 3
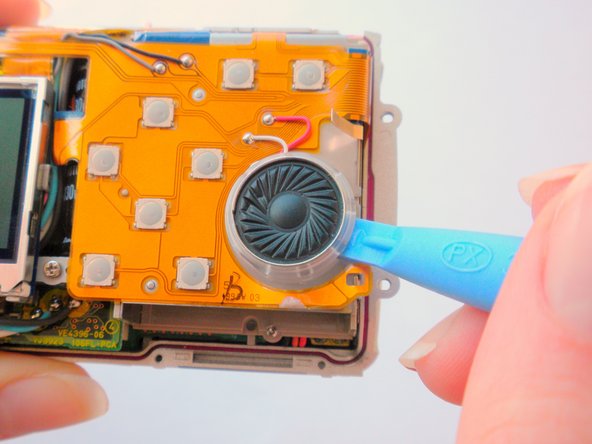
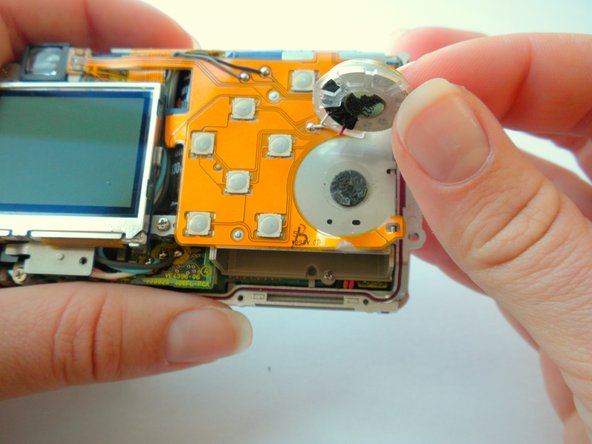
    • Use a spudger to remove the speaker. It is attached by a double sided adhesive so it should just peel off.

  9. Olympus Stylus 410 Speaker Replacement: 手順 9、 1の画像 1
    • Un-solder the wires to remove the speaker.

終わりに

To reassemble your device, follow these instructions in reverse order.

作成者

3人の作成者と共同で作成されました。

Gabriela Igel

メンバー登録日: 04/15/10

27 ポイント

1ガイドが承認済み

チーム

Cal Poly, Team 6-13, Maness Spring 2010 Cal Poly, Team 6-13, Maness Spring 2010人のメンバー

CPSU-MANESS-S10S6G13

5 メンバー

17のガイドは作成済み

0 件のコメント

コメントを追加

統計データ:

過去 24時間: 0

過去 7 日: 0

過去 30 日: 0

今までの合計 1,392