メインコンテンツにスキップ

この修理ガイドは変更されています。最新の未承認バージョンに切り替えます。

Olympus Stylus 1030 SW Camera Lens Replacement

必要な工具と部品

  1. Olympus Stylus 1030 SW Camera Lens Replacement, Olympus Stylus 1030 SW Camera Disassembly: 手順 1、 3の画像 1 Olympus Stylus 1030 SW Camera Lens Replacement, Olympus Stylus 1030 SW Camera Disassembly: 手順 1、 3の画像 2 Olympus Stylus 1030 SW Camera Lens Replacement, Olympus Stylus 1030 SW Camera Disassembly: 手順 1、 3の画像 3
    • Using the iFixit Opening Tool, pry off the plastic part of the lens.

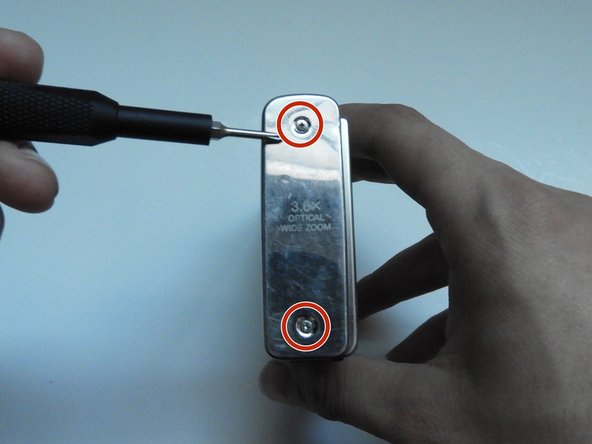
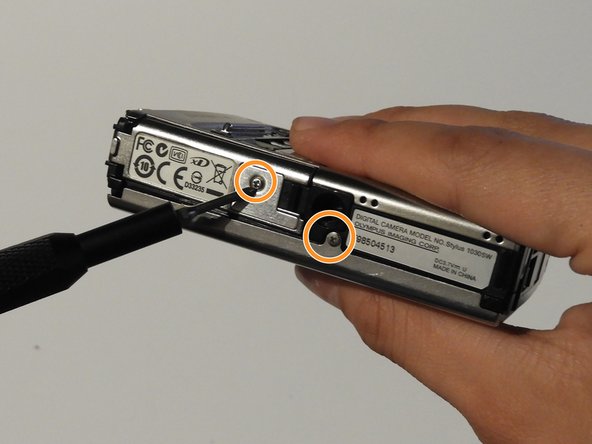
    • Using the T6 Torx screwdriver, unscrew the three screws.

  2. Olympus Stylus 1030 SW Camera Lens Replacement: 手順 2、 3の画像 1 Olympus Stylus 1030 SW Camera Lens Replacement: 手順 2、 3の画像 2 Olympus Stylus 1030 SW Camera Lens Replacement: 手順 2、 3の画像 3
    • Using the Phillips #00 screwdriver, unscrew the three screws.

    • Carefully swivel the metal cover out towards you.

    • Using tweezers, remove the metal washer.

  3. Olympus Stylus 1030 SW Camera Lens Replacement: 手順 3、 2の画像 1 Olympus Stylus 1030 SW Camera Lens Replacement: 手順 3、 2の画像 2
    • Using the tweezers, slowly peel off the plate.

  4. Olympus Stylus 1030 SW Camera Lens Replacement: 手順 4、 3の画像 1 Olympus Stylus 1030 SW Camera Lens Replacement: 手順 4、 3の画像 2 Olympus Stylus 1030 SW Camera Lens Replacement: 手順 4、 3の画像 3
    • Using the Phillips #00 screwdriver, unscrew the two screws on the side of the camera.

  5. Olympus Stylus 1030 SW Camera Lens Replacement: 手順 5、 3の画像 1 Olympus Stylus 1030 SW Camera Lens Replacement: 手順 5、 3の画像 2 Olympus Stylus 1030 SW Camera Lens Replacement: 手順 5、 3の画像 3
    • On the opposite side, use the Phillips #00 screwdriver to unscrew both screws.

    • Take out the speaker plate.

    • Open the multi-connector cover and slide off the side panel.

  6. Olympus Stylus 1030 SW Camera Lens Replacement: 手順 6、 3の画像 1 Olympus Stylus 1030 SW Camera Lens Replacement: 手順 6、 3の画像 2 Olympus Stylus 1030 SW Camera Lens Replacement: 手順 6、 3の画像 3
    • Using the Phillips #00 screwdriver, unscrew the screw above the speaker.

    • On the bottom side of the camera, unscrew the two screws.

  7. Olympus Stylus 1030 SW Camera Lens Replacement: 手順 7、 3の画像 1 Olympus Stylus 1030 SW Camera Lens Replacement: 手順 7、 3の画像 2 Olympus Stylus 1030 SW Camera Lens Replacement: 手順 7、 3の画像 3
    • Open the battery compartment cover.

    • Use the Phillips #00 screwdriver to unscrew the screw in the battery compartment.

  8. Olympus Stylus 1030 SW Camera Lens Replacement: 手順 8、 3の画像 1 Olympus Stylus 1030 SW Camera Lens Replacement: 手順 8、 3の画像 2 Olympus Stylus 1030 SW Camera Lens Replacement: 手順 8、 3の画像 3
    • On the front of the camera, unscrew the two screws shown.

    • Gently pull on the side until the camera is separated from the back panel.

    • Remove the shutter and power button.

  9. Olympus Stylus 1030 SW Camera Lens Replacement: 手順 9、 3の画像 1 Olympus Stylus 1030 SW Camera Lens Replacement: 手順 9、 3の画像 2 Olympus Stylus 1030 SW Camera Lens Replacement: 手順 9、 3の画像 3
    • Use the Phillips #00 screwdriver to unscrew the four screws on the front of the camera.

    • Unscrew the shutter using the Phillips #00 screwdriver.

  10. Olympus Stylus 1030 SW Camera Lens Replacement: 手順 10、 2の画像 1 Olympus Stylus 1030 SW Camera Lens Replacement: 手順 10、 2の画像 2
    • Release the top holding using a spudger.

    • Slowly and carefully separate the front and back of the camera, exposing the electrical ribbons.

  11. Olympus Stylus 1030 SW Camera Lens Replacement: 手順 11、 3の画像 1 Olympus Stylus 1030 SW Camera Lens Replacement: 手順 11、 3の画像 2 Olympus Stylus 1030 SW Camera Lens Replacement: 手順 11、 3の画像 3
    • Using the spudger and tweezers if needed, remove the ribbons from the computer chips.

  12. Olympus Stylus 1030 SW Camera Lens Replacement, Camera Lens: 手順 12、 3の画像 1 Olympus Stylus 1030 SW Camera Lens Replacement, Camera Lens: 手順 12、 3の画像 2 Olympus Stylus 1030 SW Camera Lens Replacement, Camera Lens: 手順 12、 3の画像 3
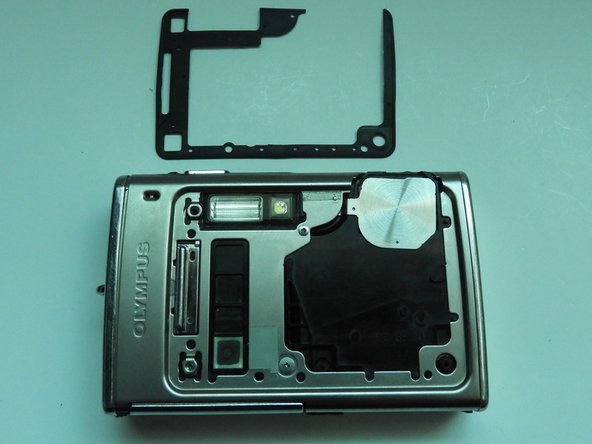
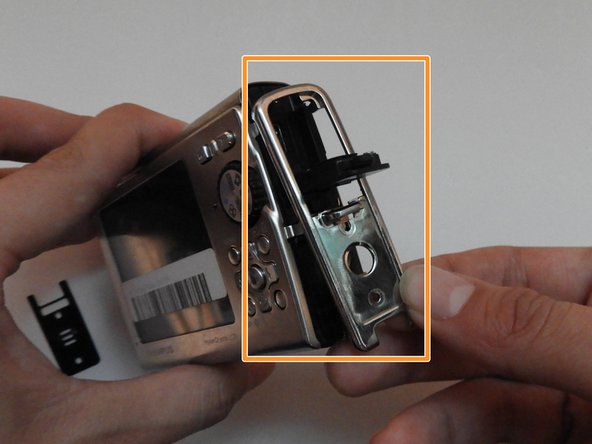
    • Open A/V door, remove 3 screws in large metal plate

    • Using tweezers peel back tape

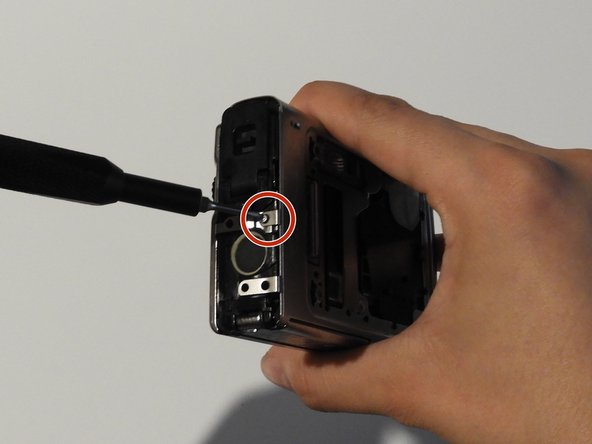
    • Remove PH00 screw (originally hidden beneath tape)

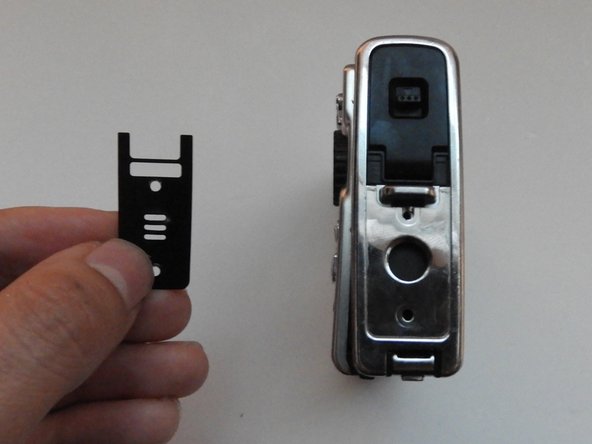
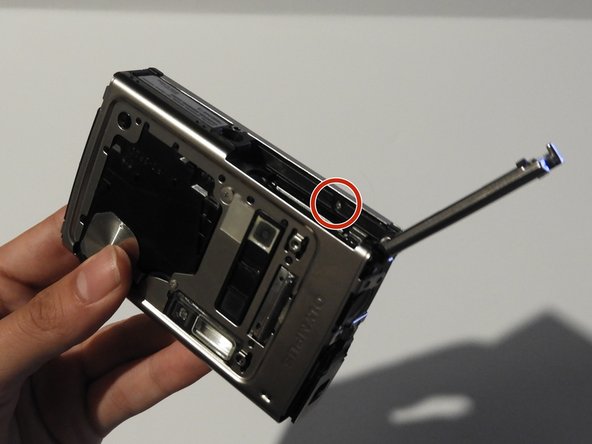
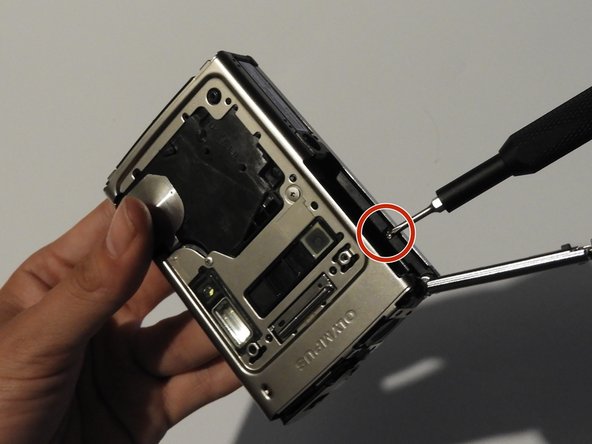
    • Remove PH00 screw from top left corner of camera lens component

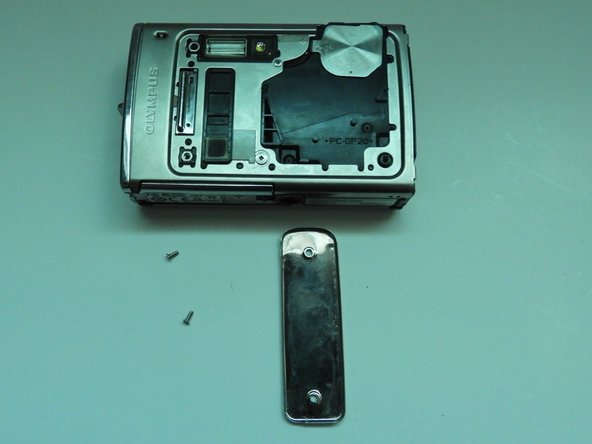
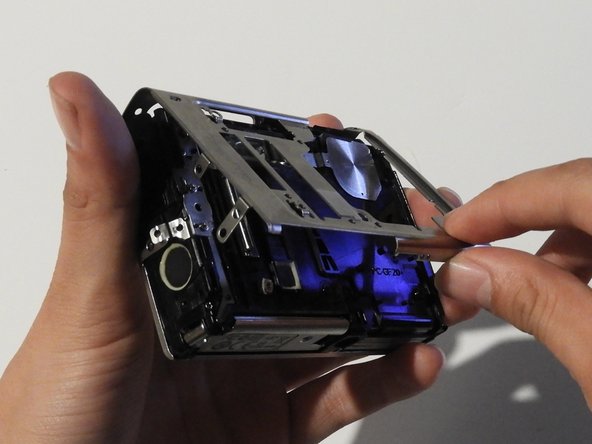
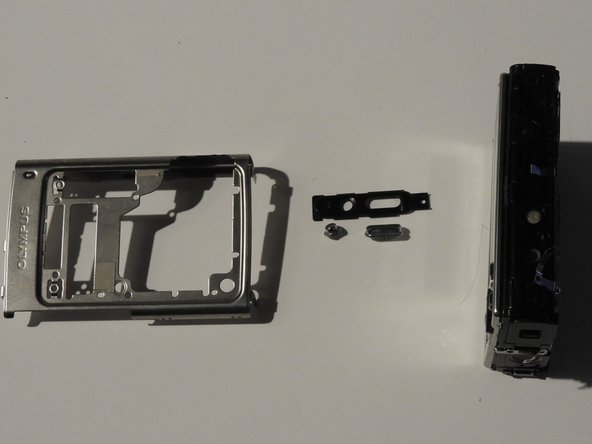
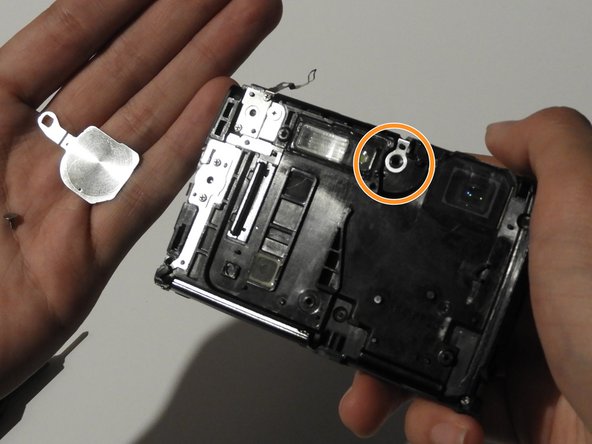
    • Using tweezers remove large plate

  13. Olympus Stylus 1030 SW Camera Lens Replacement: 手順 13、 3の画像 1 Olympus Stylus 1030 SW Camera Lens Replacement: 手順 13、 3の画像 2 Olympus Stylus 1030 SW Camera Lens Replacement: 手順 13、 3の画像 3
    • Remove the plastic plate (should now be loose).

    • Pivot plastic strips over the ribbon wires upwards.

    • Using tweezers carefully remove ribbons from their ports.

    • Peel back any tape that may be hiding them.

  14. Olympus Stylus 1030 SW Camera Lens Replacement: 手順 14、 3の画像 1 Olympus Stylus 1030 SW Camera Lens Replacement: 手順 14、 3の画像 2 Olympus Stylus 1030 SW Camera Lens Replacement: 手順 14、 3の画像 3
    • Peel off black tape from lens component.

    • Remove PH00 screw and the metal washer plate beneath it

    • Use plastic spudger or opening tools to carefully pry it out from its left side.

    • Collect the plastic pivot pieces (now loose) that attach to the top of the lens component.

終わりに

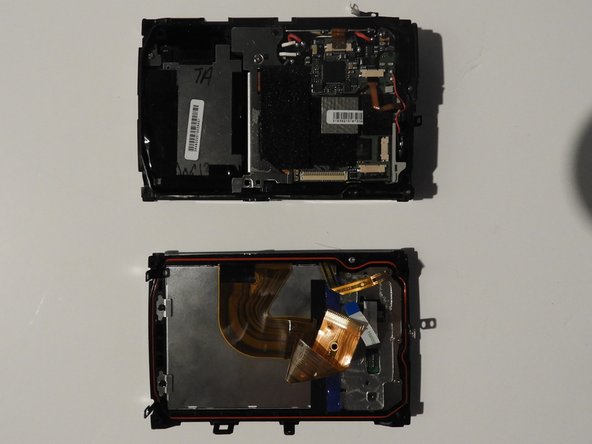
To reassemble your device, follow these instructions in reverse order.

作成者

6人の作成者と共同で作成されました。

Shanmei Zheng

メンバー登録日: 02/17/14

304 ポイント

3のガイドは作成済み

0 件のコメント

コメントを追加

統計データ:

過去 24時間: 0

過去 7 日: 0

過去 30 日: 2

今までの合計 1,142