メインコンテンツにスキップ

Olympus Stylus 1030 SW Camera Lens Replacement

必要な工具と部品

  1. Olympus Stylus 1030 SW Camera Lens Replacement, Olympus Stylus 1030 SW Camera Disassembly: 手順 1、 3の画像 1 Olympus Stylus 1030 SW Camera Lens Replacement, Olympus Stylus 1030 SW Camera Disassembly: 手順 1、 3の画像 2 Olympus Stylus 1030 SW Camera Lens Replacement, Olympus Stylus 1030 SW Camera Disassembly: 手順 1、 3の画像 3
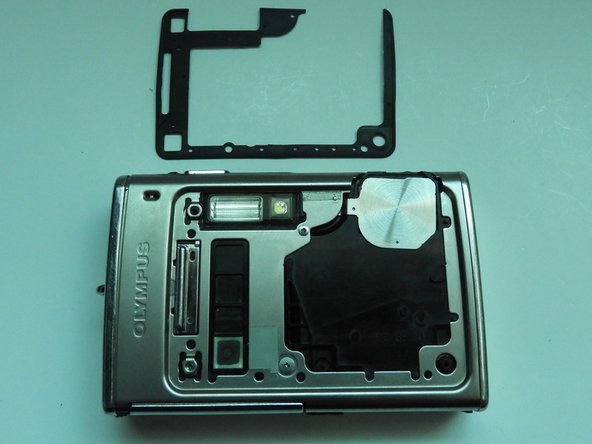
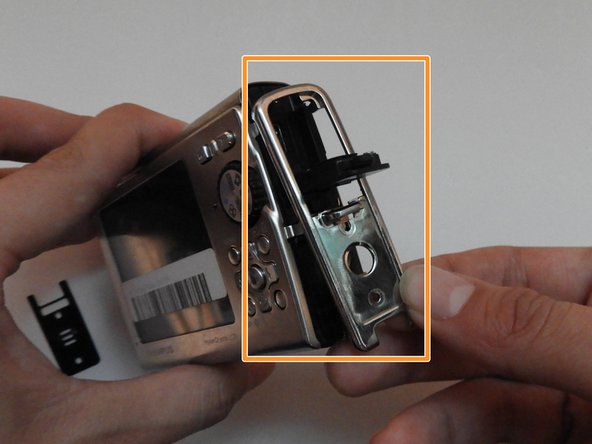
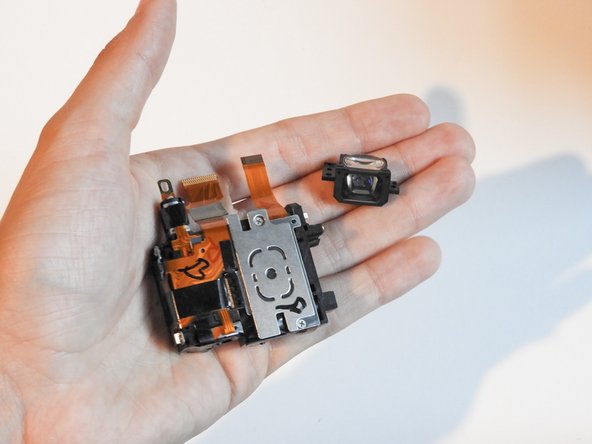
    • Using the iFixit Opening Tool, pry off the plastic part of the lens.

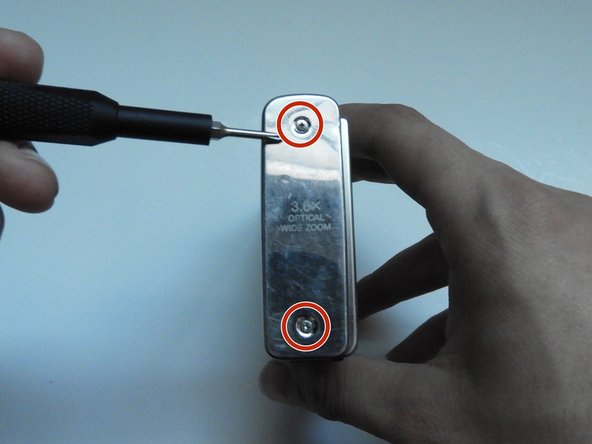
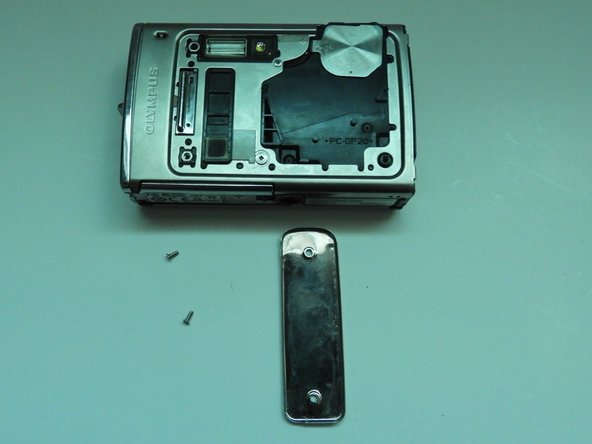
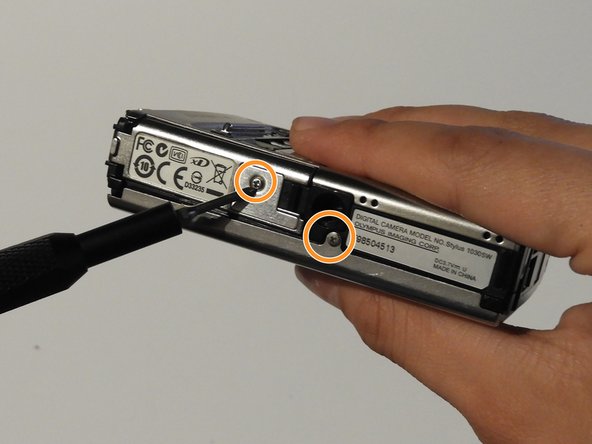
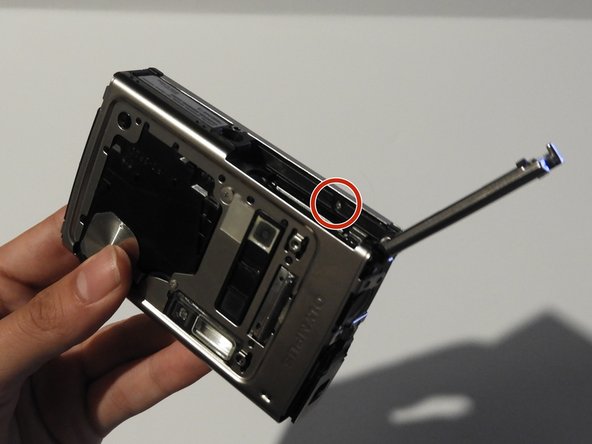
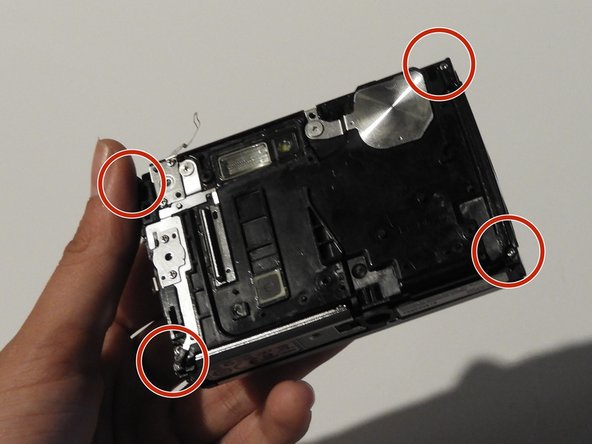
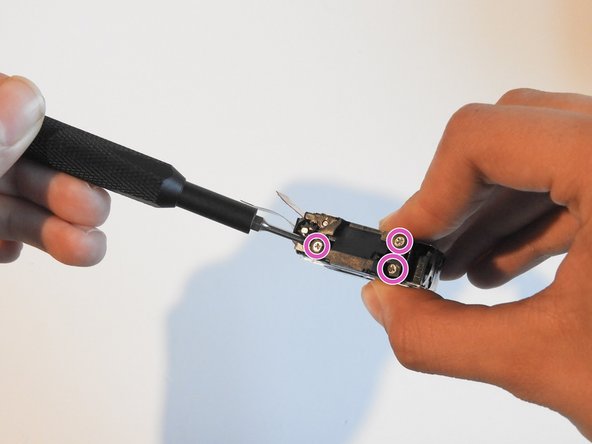
    • Using the T6 Torx screwdriver, unscrew the three screws.

  2. Olympus Stylus 1030 SW Camera Lens Replacement: 手順 2、 3の画像 1 Olympus Stylus 1030 SW Camera Lens Replacement: 手順 2、 3の画像 2 Olympus Stylus 1030 SW Camera Lens Replacement: 手順 2、 3の画像 3
    • Using the Phillips #00 screwdriver, unscrew the three screws.

    • Carefully swivel the metal cover out towards you.

    • Using tweezers, remove the metal washer.

  3. Olympus Stylus 1030 SW Camera Lens Replacement: 手順 3、 2の画像 1 Olympus Stylus 1030 SW Camera Lens Replacement: 手順 3、 2の画像 2
    • Using the tweezers, slowly peel off the plate.

  4. Olympus Stylus 1030 SW Camera Lens Replacement: 手順 4、 3の画像 1 Olympus Stylus 1030 SW Camera Lens Replacement: 手順 4、 3の画像 2 Olympus Stylus 1030 SW Camera Lens Replacement: 手順 4、 3の画像 3
    • Using the Phillips #00 screwdriver, unscrew the two screws on the side of the camera.

  5. Olympus Stylus 1030 SW Camera Lens Replacement: 手順 5、 3の画像 1 Olympus Stylus 1030 SW Camera Lens Replacement: 手順 5、 3の画像 2 Olympus Stylus 1030 SW Camera Lens Replacement: 手順 5、 3の画像 3
    • On the opposite side, use the Phillips #00 screwdriver to unscrew both screws.

    • Take out the speaker plate.

    • Open the multi-connector cover and slide off the side panel.

  6. Olympus Stylus 1030 SW Camera Lens Replacement: 手順 6、 3の画像 1 Olympus Stylus 1030 SW Camera Lens Replacement: 手順 6、 3の画像 2 Olympus Stylus 1030 SW Camera Lens Replacement: 手順 6、 3の画像 3
    • Using the Phillips #00 screwdriver, unscrew the screw above the speaker.

    • On the bottom side of the camera, unscrew the two screws.

  7. Olympus Stylus 1030 SW Camera Lens Replacement: 手順 7、 3の画像 1 Olympus Stylus 1030 SW Camera Lens Replacement: 手順 7、 3の画像 2 Olympus Stylus 1030 SW Camera Lens Replacement: 手順 7、 3の画像 3
    • Open the battery compartment cover.

    • Use the Phillips #00 screwdriver to unscrew the screw in the battery compartment.

  8. Olympus Stylus 1030 SW Camera Lens Replacement: 手順 8、 3の画像 1 Olympus Stylus 1030 SW Camera Lens Replacement: 手順 8、 3の画像 2 Olympus Stylus 1030 SW Camera Lens Replacement: 手順 8、 3の画像 3
    • On the front of the camera, unscrew the two screws shown.

    • Gently pull on the side until the camera is separated from the back panel.

    • Remove the shutter and power button.

  9. Olympus Stylus 1030 SW Camera Lens Replacement: 手順 9、 3の画像 1 Olympus Stylus 1030 SW Camera Lens Replacement: 手順 9、 3の画像 2 Olympus Stylus 1030 SW Camera Lens Replacement: 手順 9、 3の画像 3
    • Use the Phillips #00 screwdriver to unscrew the four screws on the front of the camera.

    • Unscrew the shutter using the Phillips #00 screwdriver.

  10. Olympus Stylus 1030 SW Camera Lens Replacement: 手順 10、 2の画像 1 Olympus Stylus 1030 SW Camera Lens Replacement: 手順 10、 2の画像 2
    • Release the top holding using a spudger.

    • Slowly and carefully separate the front and back of the camera, exposing the electrical ribbons.

  11. Olympus Stylus 1030 SW Camera Lens Replacement: 手順 11、 3の画像 1 Olympus Stylus 1030 SW Camera Lens Replacement: 手順 11、 3の画像 2 Olympus Stylus 1030 SW Camera Lens Replacement: 手順 11、 3の画像 3
    • Using the spudger and tweezers if needed, remove the ribbons from the computer chips.

  12. Olympus Stylus 1030 SW Camera Lens Replacement, Camera Lens: 手順 12、 3の画像 1 Olympus Stylus 1030 SW Camera Lens Replacement, Camera Lens: 手順 12、 3の画像 2 Olympus Stylus 1030 SW Camera Lens Replacement, Camera Lens: 手順 12、 3の画像 3
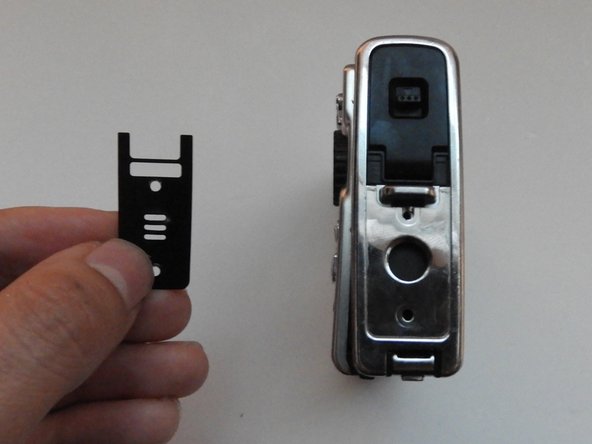
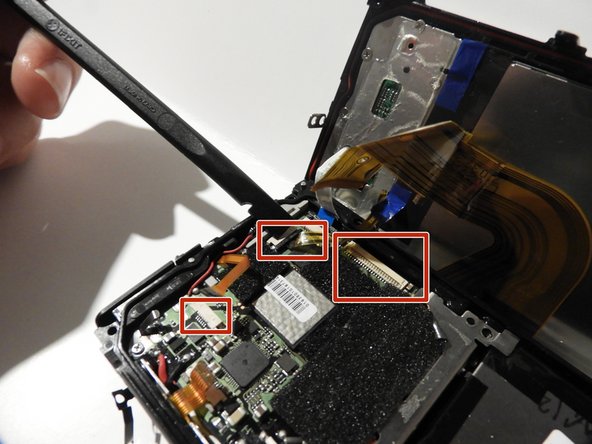
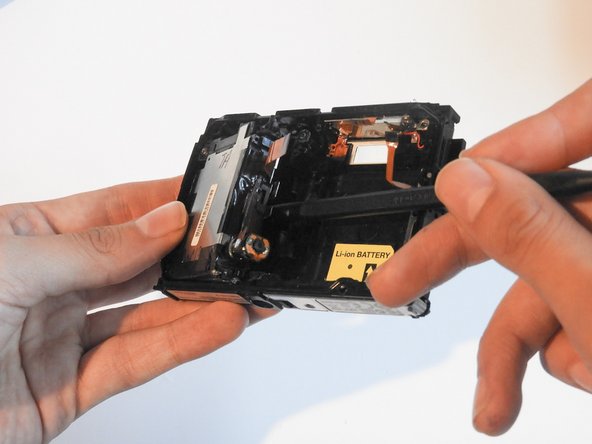
    • Peel off the black tape using tweezers.

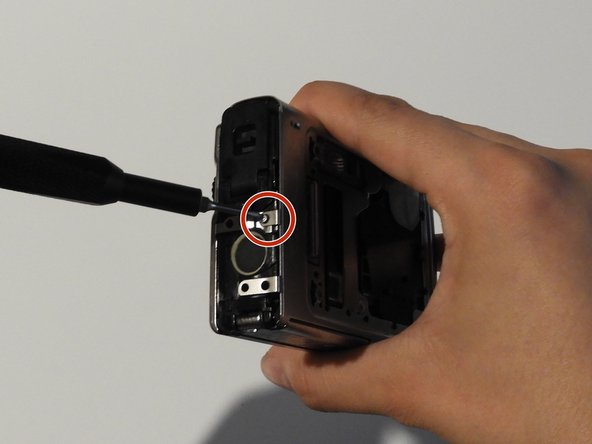
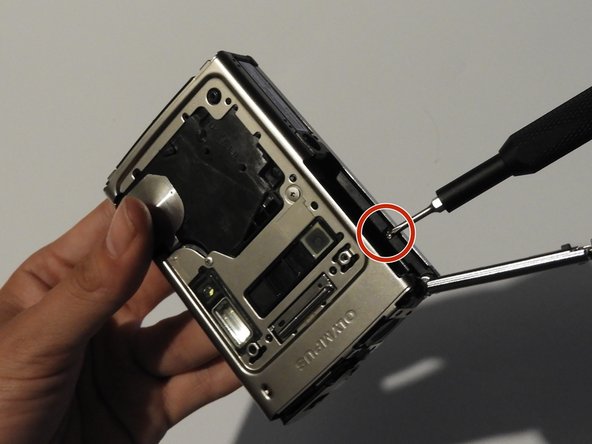
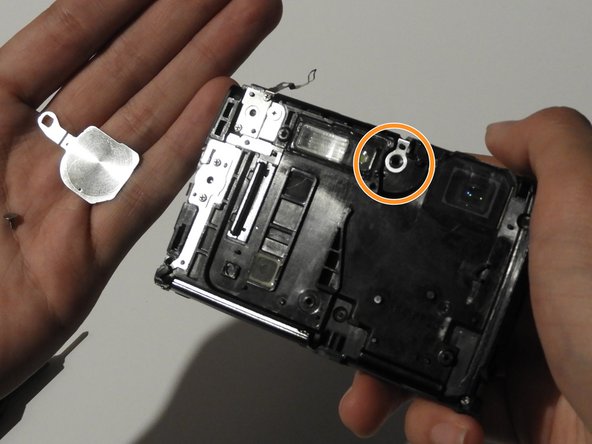
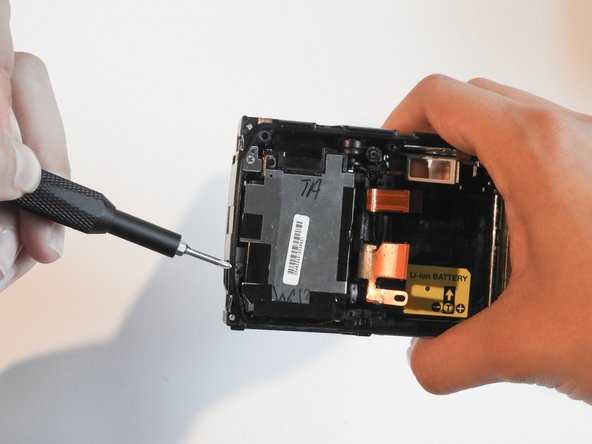
    • Unscrew the 1.0 cm screw.

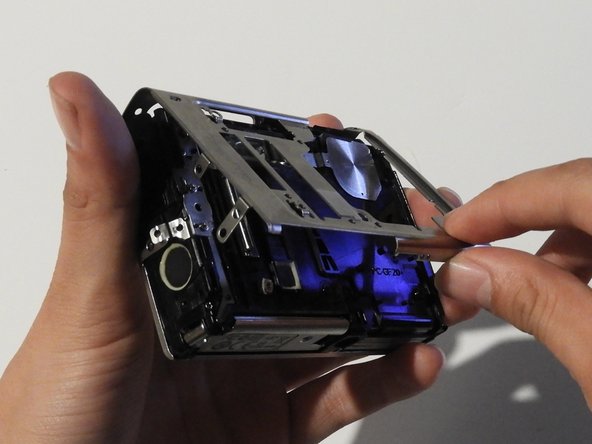
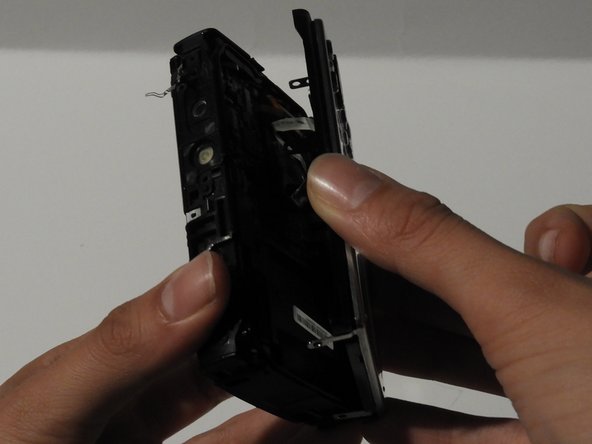
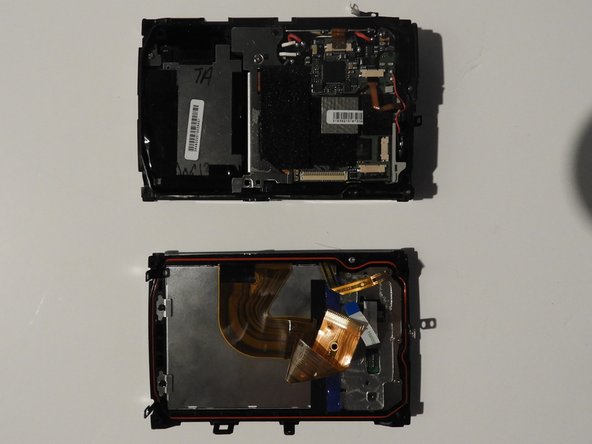
    • Use the spudger to carefully take out the lens compartment.

  13. Olympus Stylus 1030 SW Camera Lens Replacement: 手順 13、 2の画像 1 Olympus Stylus 1030 SW Camera Lens Replacement: 手順 13、 2の画像 2
    • Carefully take out the lens and the black plastic pieces along with it.

  14. Olympus Stylus 1030 SW Camera Lens Replacement: 手順 14、 3の画像 1 Olympus Stylus 1030 SW Camera Lens Replacement: 手順 14、 3の画像 2 Olympus Stylus 1030 SW Camera Lens Replacement: 手順 14、 3の画像 3
    • Unscrew the three screws found on top of the mirror lens.

    • The mirror lens can now be removed.

終わりに

To reassemble your device, follow these instructions in reverse order.

作成者

6人の作成者と共同で作成されました。

Shanmei Zheng

メンバー登録日: 02/17/14

301 ポイント

3のガイドは作成済み

0 件のコメント

コメントを追加

統計データ:

過去 24時間: 0

過去 7 日: 2

過去 30 日: 6

今までの合計 1,140