メインコンテンツにスキップ

Olympus Pen E-PL7 Lens Assembly Replacement

必要な工具と部品

  1. Olympus Pen E-PL7 Lens Assembly Replacement, Battery: 手順 1、 2の画像 1 Olympus Pen E-PL7 Lens Assembly Replacement, Battery: 手順 1、 2の画像 2
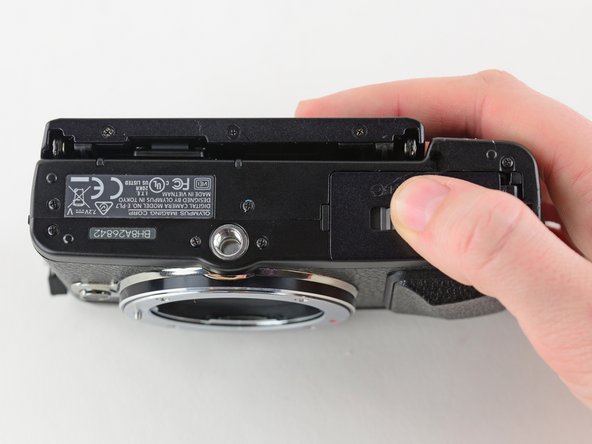
    • Turn the camera upside down.

    • Push the grey tab to the right to open the battery compartment.

    • Pull out the battery.

    • The battery is not shown in these photos.

  2. Olympus Pen E-PL7 Lens Assembly Replacement, Lens Assembly: 手順 2、 2の画像 1 Olympus Pen E-PL7 Lens Assembly Replacement, Lens Assembly: 手順 2、 2の画像 2
    • Use a Phillips #00 screwdriver to remove the four 6.3 mm screws from the lens mount.

    • Remove the lens mount with tweezers.

  3. Olympus Pen E-PL7 Lens Assembly Replacement: 手順 3、 1の画像 1
    • Use tweezers to remove the inner metal ring.

  4. Olympus Pen E-PL7 Lens Assembly Replacement: 手順 4、 2の画像 1 Olympus Pen E-PL7 Lens Assembly Replacement: 手順 4、 2の画像 2
    • Use tweezers to remove the two springs lying beneath the inner metal ring.

  5. Olympus Pen E-PL7 Lens Assembly Replacement: 手順 5、 2の画像 1 Olympus Pen E-PL7 Lens Assembly Replacement: 手順 5、 2の画像 2
    • Use a Phillips #00 screwdriver to remove the three 5 mm screws.

    • Remove the two 4 mm Phillips screws.

  6. Olympus Pen E-PL7 Lens Assembly Replacement: 手順 6、 3の画像 1 Olympus Pen E-PL7 Lens Assembly Replacement: 手順 6、 3の画像 2 Olympus Pen E-PL7 Lens Assembly Replacement: 手順 6、 3の画像 3
    • Press and hold the lens release button while using tweezers to remove the lens hook.

    • Use tweezers to remove the spring underneath the lens hook.

終わりに

To reassemble your camera, follow these instructions in reverse order.

2 の人々がこのガイドを完成させました。

作成者

1人の作成者と共同作成されました。

Kelsea Weber

メンバー登録日: 11/12/15

19,873 ポイント

32のガイドは作成済み

チーム

iFixit iFixit人のメンバー

Staff

135 メンバー

16,817のガイドは作成済み

0 件のコメント

コメントを追加

統計データ:

過去 24時間: 1

過去 7 日: 10

過去 30 日: 36

今までの合計 2,032