メインコンテンツにスキップ

このバージョンは誤った内容を含んでいる可能性があります。最新の承認済みスナップショットに切り替えてください。

必要な工具と部品

  1. この手順は未翻訳です。 翻訳を手伝う。

    : 手順 1、 1の画像 1
    • Remove five baseplate screws using a Phillips #00 screwdriver.

  2. この手順は未翻訳です。 翻訳を手伝う。

    : 手順 2、 1の画像 1
    • Press and slide the battery cover retainer clip to the left. Use tweezers to lift the battery cover away.

  3. この手順は未翻訳です。 翻訳を手伝う。

    : 手順 3、 1の画像 1
    • Remove the single screw from the battery housing using a Phillips #00 screwdriver.

  4. この手順は未翻訳です。 翻訳を手伝う。

    : 手順 4、 1の画像 1
    • Using tweezers, lift the rubber plate to expose the ports.

  5. この手順は未翻訳です。 翻訳を手伝う。

    : 手順 5、 1の画像 1
    • Remove two screws from the ports using a Phillips #00 screwdriver.

  6. この手順は未翻訳です。 翻訳を手伝う。

    : 手順 6、 1の画像 1
    • Use a spudger to pry the faceplate away from the rest of the camera.

  7. この手順は未翻訳です。 翻訳を手伝う。

    : 手順 7、 1の画像 1
    • To avoid disconnection of the connector line to the motherboard, use caution when pulling faceplate away from camera case.

    • Damage to the connector line will prevent the on/off power switch's operational function.

  8. この手順は未翻訳です。 翻訳を手伝う。

    : 手順 8、 1の画像 1
    • Using a Phillips #00 screwdriver, remove three screws fastened to the camera backplate edge.

  9. この手順は未翻訳です。 翻訳を手伝う。

    : 手順 9、 1の画像 1
    • Using a Phillips #00 screwdriver, remove the two camera flash screws secured to either side of bulb housing component.

  10. この手順は未翻訳です。 翻訳を手伝う。

    : 手順 10、 1の画像 1
    • Using an iFixit opening tool, pry the backplate from the camera internal housing component.

  11. この手順は未翻訳です。 翻訳を手伝う。

    : 手順 11、 1の画像 1
    • Pull the backplate away from the camera internal housing component.

  12. この手順は未翻訳です。 翻訳を手伝う。

    : 手順 12、 1の画像 1
    • Remove one screw Phillips #00 from the right side of the LCD screen camera internal housing component.

  13. この手順は未翻訳です。 翻訳を手伝う。

    : 手順 13、 2の画像 1 : 手順 13、 2の画像 2
    • To check that all screws are removed from the exterior side panel, gradually slide and lift no more than 3cm away from the camera internal component body.

  14. この手順は未翻訳です。 翻訳を手伝う。

    : 手順 14、 2の画像 1 : 手順 14、 2の画像 2
    • View the front of the camera internal housing component.

    • Using tweezers, detach the gray connector and blue wiring tape.

    • Be cautious to gently wiggle and pull blue wiring tape and gray wire connector during detachment.

  15. この手順は未翻訳です。 翻訳を手伝う。

    : 手順 15、 2の画像 1 : 手順 15、 2の画像 2
    • View the top of the camera internal housing component.

    • Using tweezers, gently lift the black tape exposing all connector wires.

  16. この手順は未翻訳です。 翻訳を手伝う。

    : 手順 16、 1の画像 1
    • View the bottom of the camera internal housing component.

    • Caution: Keep yellow taped wire attached to the LCD screen.

    • Use tweezers to gently wiggle, pull, and detach tape from the surface of the camera internal housing component.

  17. この手順は未翻訳です。 翻訳を手伝う。

    : 手順 17、 3の画像 1 : 手順 17、 3の画像 2 : 手順 17、 3の画像 3
    • View the front of the camera internal housing component.

    • Using tweezers, gently lift the speaker, cautiously maneuvering the wire away from the side of the internal housing component toward the front of the camera internal housing component.

  18. この手順は未翻訳です。 翻訳を手伝う。

    : 手順 18、 2の画像 1 : 手順 18、 2の画像 2
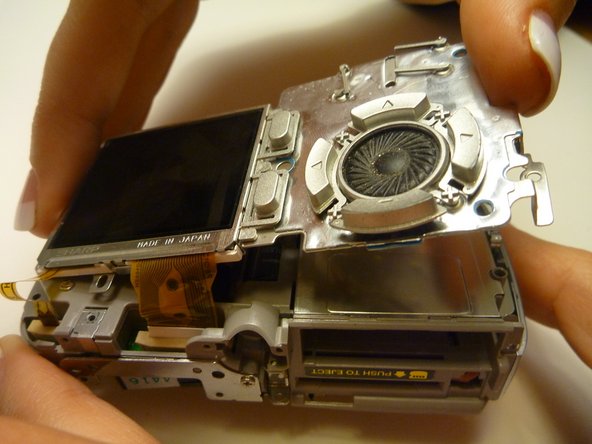
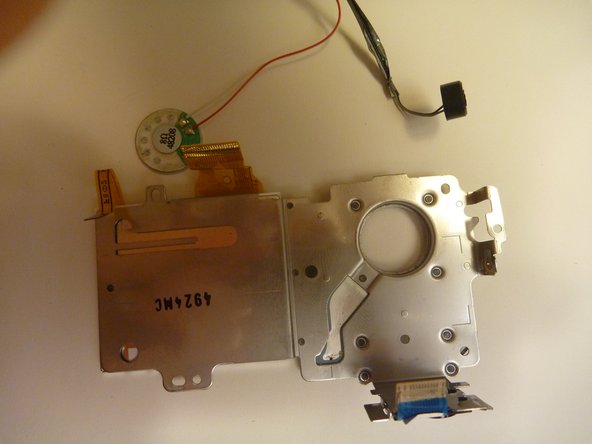
    • Gently lift the LCD screen away from the camera internal housing component hinging the thick yellow wiring tape attached to the camera internal housing component.

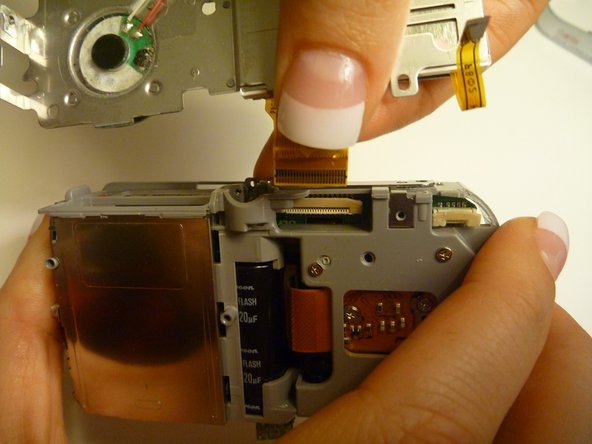
    • Use a forefinger and thumb to gently pull the thick yellow wiring tape out of the camera internal housing component.

  19. この手順は未翻訳です。 翻訳を手伝う。

    : 手順 19、 1の画像 1
    • Using tweezers, gently lift and remove the clear tape covering the speaker.

  20. この手順は未翻訳です。 翻訳を手伝う。

    : 手順 20、 2の画像 1 : 手順 20、 2の画像 2
    • Gently lift the speaker from the LCD screen fitting.

ゴール

作成者

7人の作成者と共同で作成されました。

Joshua

メンバー登録日: 04/15/10

7 ポイント

2のガイドは作成済み

チーム

Cal Poly, Team 28-23, Regan Spring 2010 Cal Poly, Team 28-23, Regan Spring 2010人のメンバー

CPSU-REGAN-S10S28G23

4 メンバー

14のガイドは作成済み

0 件のコメント

コメントを追加

統計データ:

過去 24時間: 0

過去 7 日: 8

過去 30 日: 11

今までの合計 1,430